What's new

Tutorial: Repair cracked handles/shafts in Gillette Old Types etc.

"Useless shaver, post: 8986044, member: 46737"]Great thread, thank you OP!

I might have to use your wisdom...
I would go to a hobby store and look for the thinnest brass, aluminum, etc tubing possible, that will fit into the handle, AND allow the inner tube to slide in. It would be doable.

Soldering is an option, but not what this thread is about. I can't help you there.
 
I would go to a hobby store and look for the thinnest brass, aluminum, etc tubing possible, that will fit into the handle, AND allow the inner tube to slide in. It would be doable.

Soldering is an option, but not what this thread is about. I can't help you there.

Many thanks, sir!
 

nikonNUT

The "Peter Hathaway Capstick" of small game
I busted out the calipers and the fit is WAAAAAYYY tighter than I would have expected... The inside diameter of my Canadian SR barrel is .325" (8.255mm) and the outside diameter of the knob is .315" (8.001mm). This only leaves .005" (0.127mm) clearance per side so tubing is out.. You MIGHT (if you are feeling brave) wax the knob and threads with Kiwi neutral shoe polish followed but a light coating of cooking spray and this will act like a mold release agent. Then you can butter the epoxy all over the inside of the barrel, screw everything together (make sure you pack the hole in the end of the knob to keep epoxy from creeping into the threads), and clamp. If it works... YAY! If it doesn't a soak in nail polish remover aka acetone with soften the epoxy and let you get everything back apart with little harm I would think. Just my $.02 and, no, I have never tried this process but I have pulled a few mold patterns in my day so...
 
Here's the Ty-Rap method.

proxy.php
 
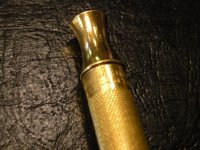
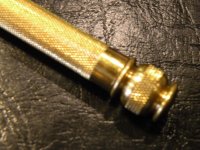
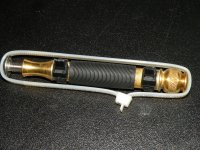
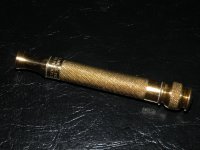
Howdy! I picked up a very nice 1931 Goodwill #160 with very small cracks at both ends of the ball end hollow handle. After 2 hours of gentle scrubbing with lime based oven cleaner, I removed all of the brown lacquer to reveal the hidden golden treasure! I promise to get some pics up as well! So what I found, there is only one crack at the top where the threaded attachment for the head is...that part actually loosened during cleaning and I can easily remove. The ball end is another issue. It has two cracks, one more prominent and other almost not visible....yet that end will not budge.

What next? I want to do the tutorial here.....have small vise, spring clamps, precision file kit, dremel tool, epoxy, platic ties..etc still need a filler sleeve or rod to get the weight up...but that bottom did not come out....any suggestions how to help get it removed? I have some training in town today until mid-afternoon....thinking to pop the top and fill the tube with some solvent (PB blaster) from the car stuff.....
The end is just pressed on. If you work on loosening it by twisting it it should work loose. Cover your tools with tape to keep from marking up anything. You could also put a bolt or something through the other end and tap the ball end out.
 
Howdy! I picked up a very nice 1931 Goodwill #160 with very small cracks at both ends of the ball end hollow handle. After 2 hours of gentle scrubbing with lime based oven cleaner, I removed all of the brown lacquer to reveal the hidden golden treasure! I promise to get some pics up as well! So what I found, there is only one crack at the top where the threaded attachment for the head is...that part actually loosened during cleaning and I can easily remove. The ball end is another issue. It has two cracks, one more prominent and other almost not visible....yet that end will not budge.

What next? I want to do the tutorial here.....have small vise, spring clamps, precision file kit, dremel tool, epoxy, platic ties..etc still need a filler sleeve or rod to get the weight up...but that bottom did not come out....any suggestions how to help get it removed? I have some training in town today until mid-afternoon....thinking to pop the top and fill the tube with some solvent (PB blaster) from the car stuff.....
If it's still solid I would leave it in fear of making the crack worse. I have one that I added weight to I used a toilet tank bolt cut to size with a hacksaw.
 
The ball end is another issue. It has two cracks, one more prominent and other almost not visible....yet that end will not budge.
As imatabor stated, it's pressed on, so can be removed. If it's too tight though just leave it. Trying too hard to get it out could distort/scratch the tube. Post a picture before you work on it.
 
Great idea to tap it out! Just want to do the whole thing at once....why repair one end and then later have to get the other? Also not interested that the crack will continue to grow at the bottom....still at training...they have wifi!
 
OK, so had spray on silicon soaking all morning. During my volunteer class noticed my pen has a slip over rubber grip! Well it fit nice and snug on the handle tube. Flipped it over and rammed gently against a T-handle 4.5 mm allen, presto the ball end is now separated....off to the hardware store for an appropriate insert + a bolt to thread in during the application of the epoxy to keep the threads from clogging with any glue.....pics are forthcoming by this evening when I put this all together...promise. This razor is such a nice find and first shave on it was awesome...
 
OK here are the pics, top with crack (can see it), bottom with crack (too small to show up on photo), zip tied with epoxy setting, and finished product:
TopCracked.JPG BottomCrack.JPG ZipTied.JPG FinishedRepair.JPG

Couple of notes on the repair:
- The machine screw to insert and protect threaded top was English size 10-32 at 1/2 length
- Used a 2 1/2 full threaded 5/16 stainless steel bolt, with caliper determined the depth of either end piece was just over 4 mm; so I subtracted 9 mm from the length of the tube and marked the bolt for cutting to length, the cut was done with my dremmel like tool and cutoff disk....sparky!
- Note how the patent engraving is on the top position? On the Mr Razor reference image for this Goodwill it is at the bottom. Searching around Etsy, ebay, etc. seems to be random which end of the handle has the patent marking.....I did try to reverse the fit and it was a no-go...left as original
- In the zip-tied image you can see the ball point pen rubber grip I slid over during the tapping out of the bottom end....left it on there for remainder of the repair..it was handy!

Lastly - big thanks to @Pinan! When I scored this razor from Etsy seller, the small hairline cracks are not visible on the listing images....but the seller honestly disclosed their presence.....so without this tutorial handy I was not going to acquire this razor...with it, made the purchase and by tomorrow with the epoxy full set will get my second Goodwill shave!

Ciao
 
If Gillette had of tried the handle cracks could have been avoided. Proper tubing annealing and ends diameter tolerance control would have done the job I expect. I have about a dozen Henckels Rapide and Wotan razors with tubular pressed together handles, and a couple of German clones of them, and not one has a visible handle crack.
 
@Pinan thanks for this classic tutorial. After all this time I finally got around to trying it.

The subject was a 1918 Old Type. I wish I took a before pic. It had a substantial 1cm long crack at the top of the handle. "Had." The results were pretty good. As for the crack, the results were EXCELLENT. I couldn't even get the crack to show up in the photos. Amazing repair.

IMG_7992.JPG


However, I did make a few mistakes along the way.

I used the brass bolt method because I could not source 5/16 tubing here locally. I really like the weight it adds to the razor.

My first issue was that I used a grinding wheel with the Dremel tool and got a little reckless with it. I ended up rubbing it on the flange a little too much and made it uneven. I also nicked the spindle. The uneven edge I created made the spindle rest a hair crooked which is barely noticeable. But since I did it, I notice it.

FullSizeRender.jpg


My next issue was with the marine epoxy. I found it difficult to work with. And it ended up oozing out the ends and leaving a slight ring on the ends. I trimmed most of it away but could not get all of it. The good thing was that the epoxy line took on a grey color after I polished the razor. It was really noticeable when it was white.

IMG_7994.JPG


Luckily I have a few of these so I have another chance. I'm really pleased with how well it deals with the crack. I just need to be more careful with the grinding.

I used the smaller Irwin clamp. I love this thing.

IMG_7993.JPG


Thanks again everyone for the info on this thread.

Has anyone had good results with clear epoxy? Any reason not to use say 5-minute epoxy?

Has anyone ground down the end caps and epoxy set them into a good handle just to prevent future cracking?
 
R

romsitsa

Hello,

I'm not sure what you mean with ground down end caps? As for spares a handful of top and bottom pieces are waiting for an uncracked nadle, but these are quite rare.
And when I find one I'm nervous that it will crack when I try to press in the neck or ball end...

Adam
 
@Pinan thanks for this classic tutorial. After all this time I finally got around to trying it.

The subject was a 1918 Old Type. I wish I took a before pic. It had a substantial 1cm long crack at the top of the handle. "Had." The results were pretty good. As for the crack, the results were EXCELLENT. I couldn't even get the crack to show up in the photos. Amazing repair.

View attachment 860377

However, I did make a few mistakes along the way.

I used the brass bolt method because I could not source 5/16 tubing here locally. I really like the weight it adds to the razor.

My first issue was that I used a grinding wheel with the Dremel tool and got a little reckless with it. I ended up rubbing it on the flange a little too much and made it uneven. I also nicked the spindle. The uneven edge I created made the spindle rest a hair crooked which is barely noticeable. But since I did it, I notice it.

View attachment 860376

My next issue was with the marine epoxy. I found it difficult to work with. And it ended up oozing out the ends and leaving a slight ring on the ends. I trimmed most of it away but could not get all of it. The good thing was that the epoxy line took on a grey color after I polished the razor. It was really noticeable when it was white.

View attachment 860379

Luckily I have a few of these so I have another chance. I'm really pleased with how well it deals with the crack. I just need to be more careful with the grinding.

I used the smaller Irwin clamp. I love this thing.

View attachment 860378

Thanks again everyone for the info on this thread.

Has anyone had good results with clear epoxy? Any reason not to use say 5-minute epoxy?

Has anyone ground down the end caps and epoxy set them into a good handle just to prevent future cracking?
You did a terrific job! I have one with noticeable cracks that I need to address, and this has motivated me!

I understand your question - you're asking if anyone has done this to a not-yet-cracked handle, and by end caps, you mean the ball-end and the neck, correct? I'm thinking that if one of these ~100 year old handles hasn't cracked yet, it's probably not going to.
 
Last edited:
Yes. The best one I have has the beginnings of a crack but hasn't gone through yet. I'm sure it's a matter of time.

So I was thinking about grinding the end plugs and then reattaching with epoxy. Thus prolonging the life of the razor(?)

I was wondering if anyone has done that? I'd like to leave it in original condition but it's going to crack one day. I'd like to save it from happening.

IMG_8002.JPG
 
R

romsitsa

Thanks, now I get it. I think cracks were caused by oversized end pieces and/or lesser quality brass tubing and if the stress wasn't enough to crack the tube in 90-100 years, it won't crack at all.
I file down the neck/ball end just a little bit if there is too much resistance when I ty to press them into the handle.

Adam
 
I have repaired several handles with small cracks by sanding down the ends, as described at the beginning of this thread, clamping the tube with whatever is handy (tape, tip tie) enough to close the crack then put a small amount of super glue on ball end and/or thread end then push them together quickly. If you don't push them in quickly you will be left with an end that is not all the way in and not removable. Since the end has been sanded down to a loose fit, it will not push the tube apart. Leave it set 24 hours (may not be necessary) then polish it up. I have several that I have been using for +3 years repaired this way. I have one with a full length split that I would like to try the method described at the beginning of this thread. Thanks for all the excellent info in this thread!
 
Top Bottom