- Thread starter
- #21
It's well past time for another update. I was expecting my parents, brother, and grandparents to be staying over at my house for Christmas, so I was working hard for days to get our only bathroom functional again, especially during the period when our only toilet was sitting in the driveway. By the end of each day, I didn't have any energy or motivation to come post the progress. One day I worked for 13 hours on it. I was able to get it working again, and looking pretty good in the main, though still incomplete. After the holidays, I had to be busy on other things, and I was also fatigued from the project. I have only recently gotten back into it.
The best news is that I've finished the shower, but for the paint above the tile and the door facing that had to come down.
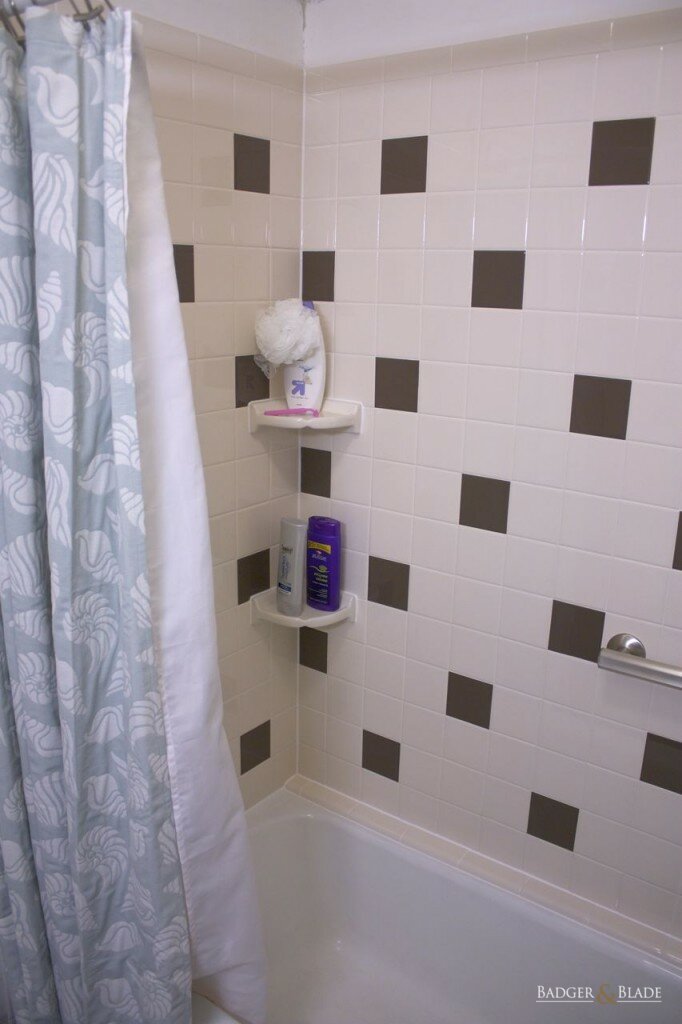
It looks even better in person. It is so refreshing to take a shower in a shower that doesn't feel dirty. See what I started with in the first post to know what I mean. The shower head is the old one I put up when we first moved in. The new kit came with a new head that looks better, but I like how this older one works better. I will change it before I move out and keep my old faithful. I love the new corner shelves, and I think that is my wife's favorite part of the whole project. Every time I heard her tell about our project to someone else, it was the bit about the shelves that came out most prominently.
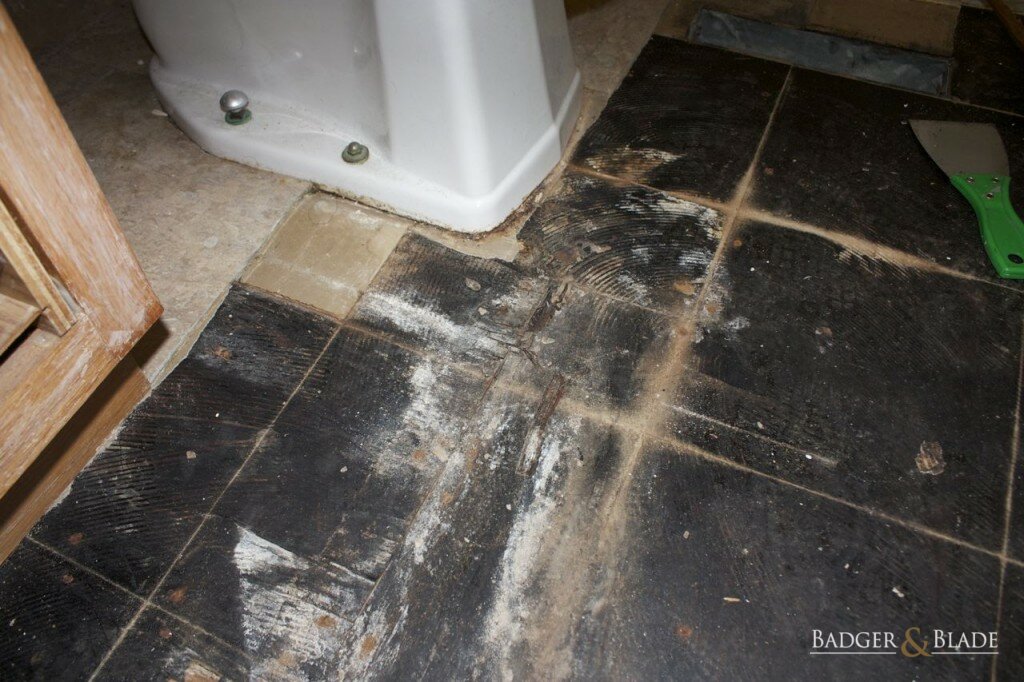
On the the floor. Here is a last shot of the old floor before I tore it out:
I expected that bit near the tub to be potentially damaged, but it wasn't. But then to my surprise:
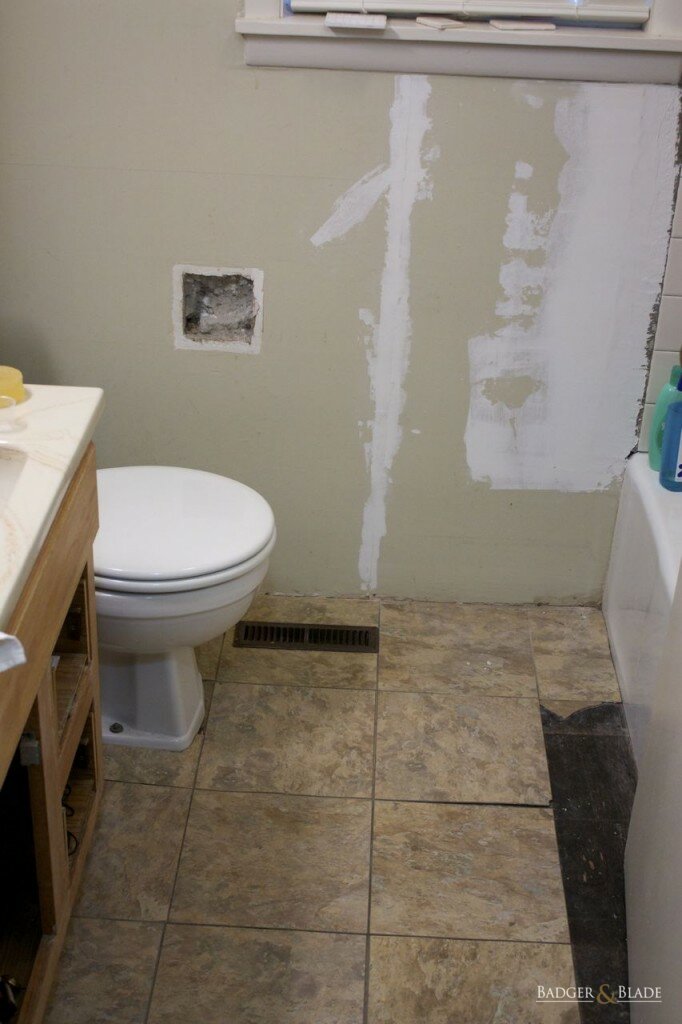
The place around the toilet was bad. The toilet was even sunk down a bit (or the floor swelled around it). I got under the house, and it didn't look too bad, but the more I worked, the worse it looked. So I took the underlayment off.
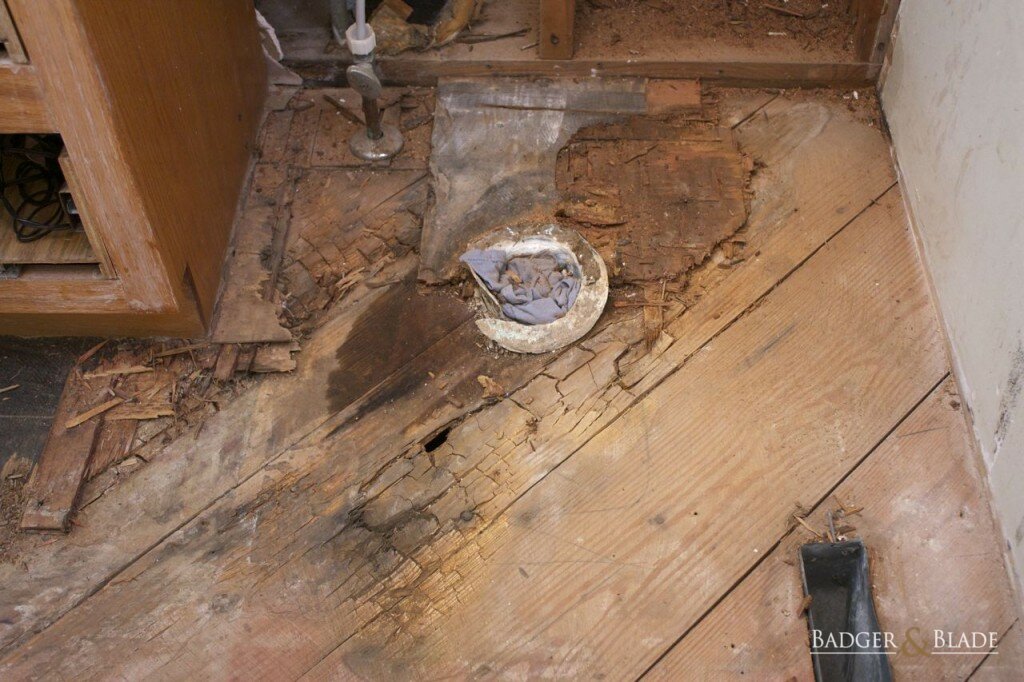
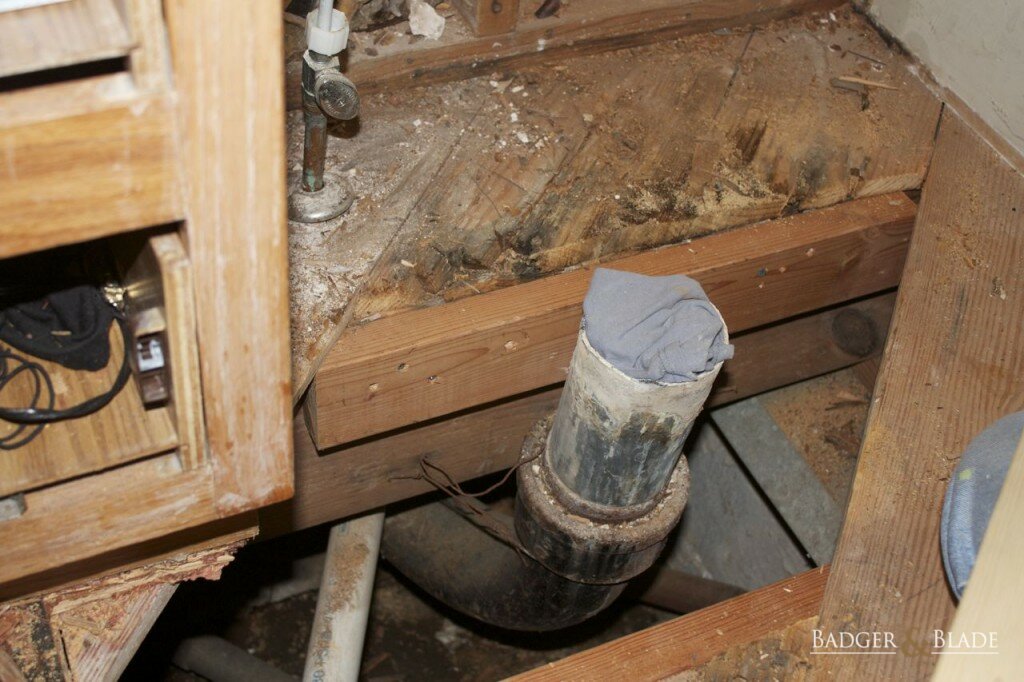
Oh no! Worse still! The subfloor was soft in some places, damp in others, as you can see, and that dark spot is a hole clear to the crawl space. It turns out that old lead toilet flange was completely torn and leaking. It's just as well I started this project so that I found the problem before it got worse. I wasn't expecting that part of the floor to be bad in the least. I only was expecting it to be bad around the tub.
It's at this point that I was really feeling like I was in over my head. I had no experience in this area. Fortunately, I have several fellow members of the church that work in this field, so I asked for their advice. One of them came to help me with this part. He has had a number of rental properties that he would have to work on himself, and he was no stranger to the problem.
We cut out the bad wood along the floor joists and replaced the wood, then I got back on track. Next I placed new 5/8" plywood underlayment.
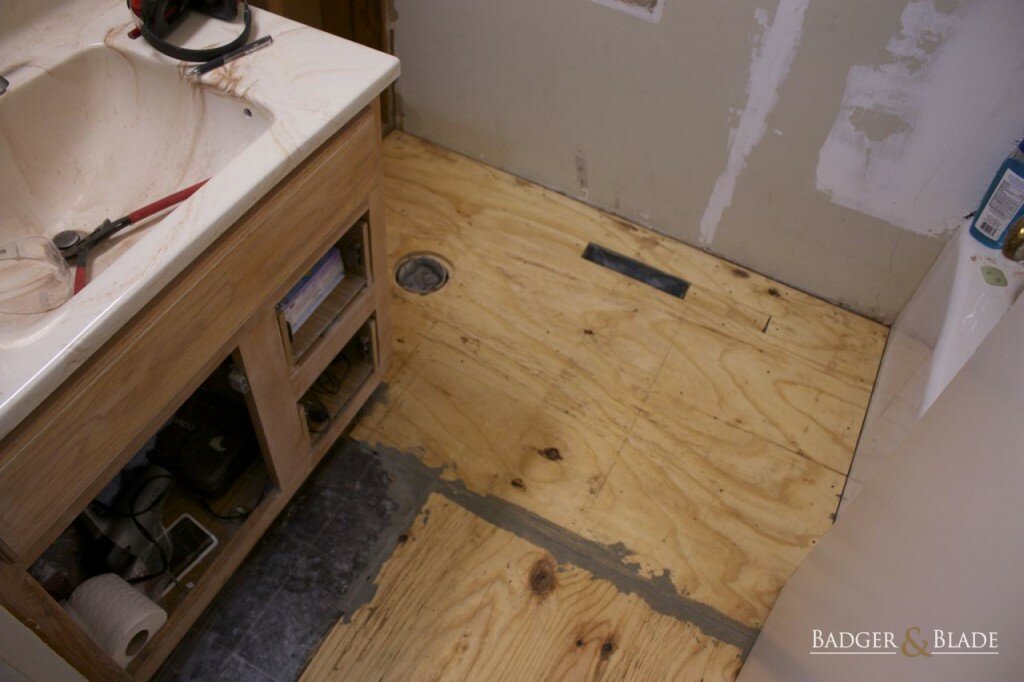
Then I put down the Durock cement board with thinset and screws per instructions, etc. No picture there. Then the tiling started. With such a small bathroom, it seemed it was all cuts!
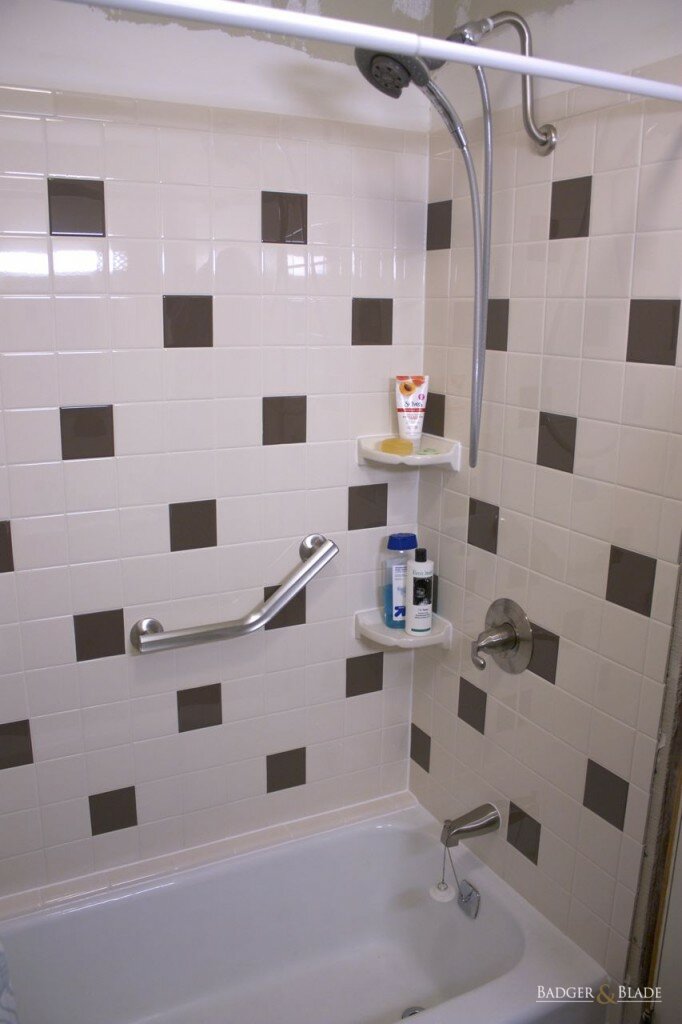
Anyway, to cut to the chase, here is the tile finished, but for grout to be sealed. This picture was only a couple days ago, though I got to this points just before Christmas.
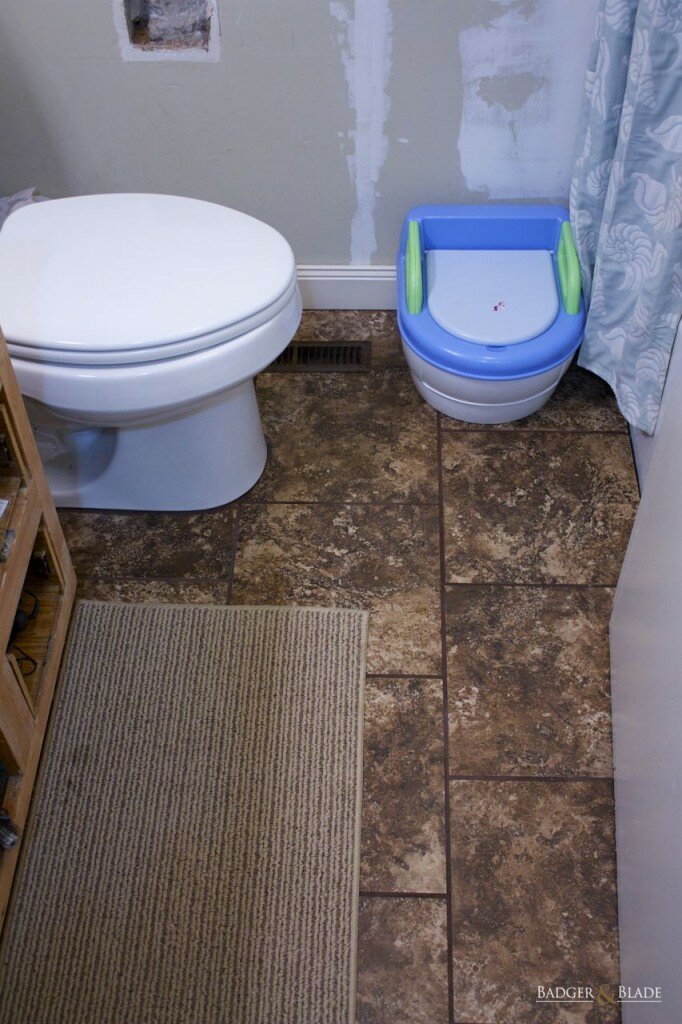
By the way, that's a new toilet. The bigger one, that is; we've had that little one for a few months. The old (big) toilet had bad wear on the inside, where it looked like it hadn't been cleaned in a long time, but it was actually damaged. Also, there was mold growing behind the tank because the tank was right against the wall, and in the winter, the cold water filling the tank caused a lot of condensation for mold to grow on. It was too close to clean. The landlord opted to replace the toilet, and they had their own plumber come and do it for me so I wouldn't have to worry about getting a proper seal with the wax ring.
I also had the wall behind the toilet and around the vanity to do, so out went the old tile and the drywall behind it.

I was actually doing this the same time as the floor. I was trying to get done all of the stuff that required the removal of the toilet as quickly as possible. Anyway, I proceeded here about the same as in the shower, and this is where I got to just before my family arrived for Christmas.
That's as far as I've gotten since. I still have to finish the transition from cement board to drywall so I can then finish the last row of tile. Then more grout. Then caulk, etc. I've not been in a hurry lately.
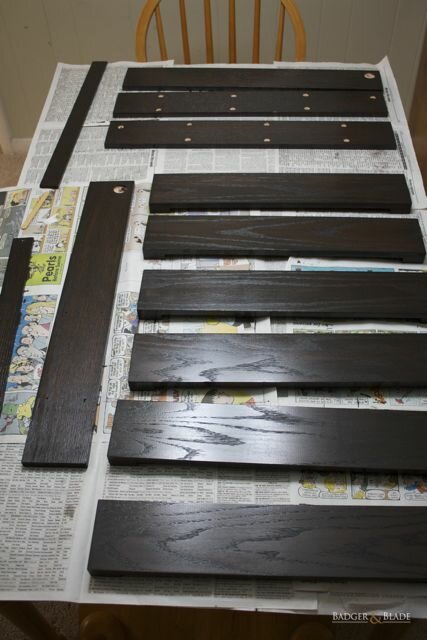
And lastly, what I've been working on lately is the cabinet. It took me a while to strip, strip again, and strip some more the wood as best I could. After using the chemicals, then I continued with lots of sanding. I'm sore even now from sanding. I finally have some of it stained. Here are the doors stained but not finished.

This is that dark color I was going for in my simulation picture of the finished product in the first post. I'm wondering now if it might have been too dark, but that's how it's going to have to be, and anyway, I can't fairly judge it until I put on the polyurethane.
While I'm doing that, I've also been working on something really exciting: shelves for my shave stuff! I bought some nice oak boards to make a pair of shelves with. I have them cut to their design, and I am working on sanding them to stain and finish to match the vanity. I'm really looking forward to having those. I'll catch you up on that another time.
Thanks for reading!
The best news is that I've finished the shower, but for the paint above the tile and the door facing that had to come down.
It looks even better in person. It is so refreshing to take a shower in a shower that doesn't feel dirty. See what I started with in the first post to know what I mean. The shower head is the old one I put up when we first moved in. The new kit came with a new head that looks better, but I like how this older one works better. I will change it before I move out and keep my old faithful. I love the new corner shelves, and I think that is my wife's favorite part of the whole project. Every time I heard her tell about our project to someone else, it was the bit about the shelves that came out most prominently.
On the the floor. Here is a last shot of the old floor before I tore it out:
I expected that bit near the tub to be potentially damaged, but it wasn't. But then to my surprise:
The place around the toilet was bad. The toilet was even sunk down a bit (or the floor swelled around it). I got under the house, and it didn't look too bad, but the more I worked, the worse it looked. So I took the underlayment off.
Oh no! Worse still! The subfloor was soft in some places, damp in others, as you can see, and that dark spot is a hole clear to the crawl space. It turns out that old lead toilet flange was completely torn and leaking. It's just as well I started this project so that I found the problem before it got worse. I wasn't expecting that part of the floor to be bad in the least. I only was expecting it to be bad around the tub.
It's at this point that I was really feeling like I was in over my head. I had no experience in this area. Fortunately, I have several fellow members of the church that work in this field, so I asked for their advice. One of them came to help me with this part. He has had a number of rental properties that he would have to work on himself, and he was no stranger to the problem.
We cut out the bad wood along the floor joists and replaced the wood, then I got back on track. Next I placed new 5/8" plywood underlayment.
Then I put down the Durock cement board with thinset and screws per instructions, etc. No picture there. Then the tiling started. With such a small bathroom, it seemed it was all cuts!
Anyway, to cut to the chase, here is the tile finished, but for grout to be sealed. This picture was only a couple days ago, though I got to this points just before Christmas.
By the way, that's a new toilet. The bigger one, that is; we've had that little one for a few months. The old (big) toilet had bad wear on the inside, where it looked like it hadn't been cleaned in a long time, but it was actually damaged. Also, there was mold growing behind the tank because the tank was right against the wall, and in the winter, the cold water filling the tank caused a lot of condensation for mold to grow on. It was too close to clean. The landlord opted to replace the toilet, and they had their own plumber come and do it for me so I wouldn't have to worry about getting a proper seal with the wax ring.
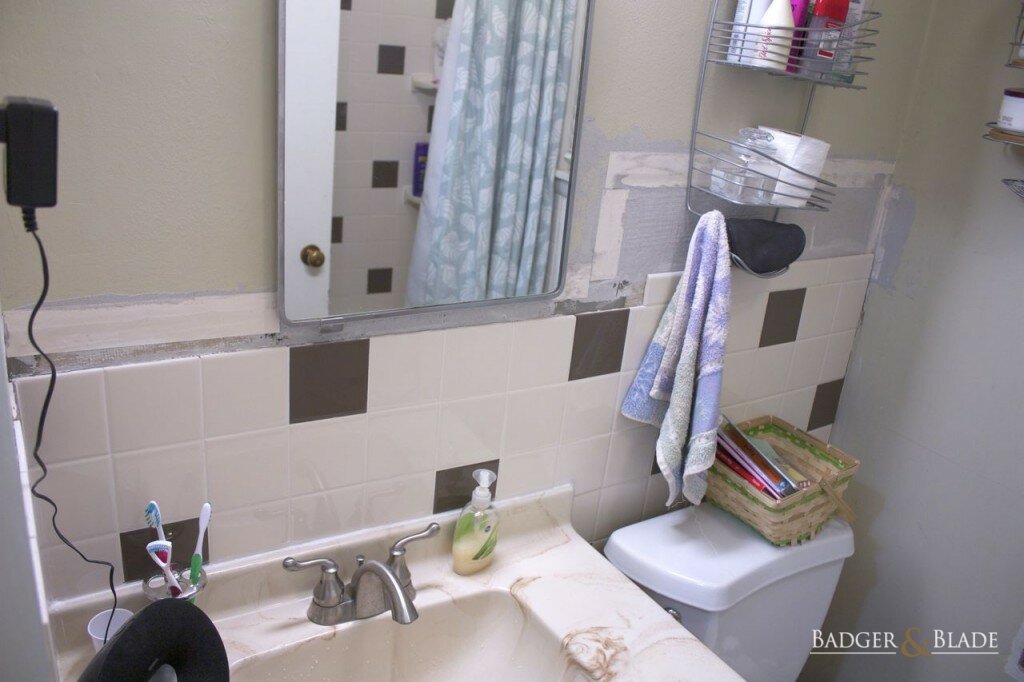
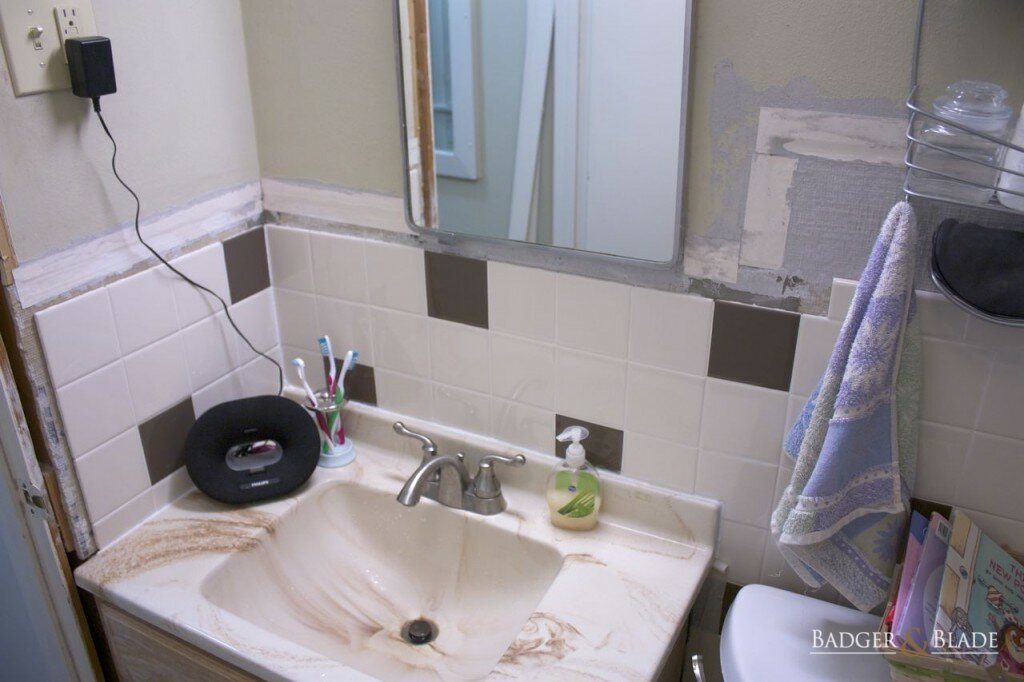
I also had the wall behind the toilet and around the vanity to do, so out went the old tile and the drywall behind it.
I was actually doing this the same time as the floor. I was trying to get done all of the stuff that required the removal of the toilet as quickly as possible. Anyway, I proceeded here about the same as in the shower, and this is where I got to just before my family arrived for Christmas.
That's as far as I've gotten since. I still have to finish the transition from cement board to drywall so I can then finish the last row of tile. Then more grout. Then caulk, etc. I've not been in a hurry lately.
And lastly, what I've been working on lately is the cabinet. It took me a while to strip, strip again, and strip some more the wood as best I could. After using the chemicals, then I continued with lots of sanding. I'm sore even now from sanding. I finally have some of it stained. Here are the doors stained but not finished.
This is that dark color I was going for in my simulation picture of the finished product in the first post. I'm wondering now if it might have been too dark, but that's how it's going to have to be, and anyway, I can't fairly judge it until I put on the polyurethane.
While I'm doing that, I've also been working on something really exciting: shelves for my shave stuff! I bought some nice oak boards to make a pair of shelves with. I have them cut to their design, and I am working on sanding them to stain and finish to match the vanity. I'm really looking forward to having those. I'll catch you up on that another time.
Thanks for reading!
Last edited by a moderator:


 And it is true that it's a lot of work. However it is worth it to me: 1) I have greatly enjoyed the results so far, 2) the work has kind of been fun to see what I can accomplish, 3) I get to practice on someone else's house, and especially, as I once said before, 4) whether my monthly check goes to a landlord or to a house loan, it is still my home.