What's new

Brush restoration - help me decide

Guys:

I have tried to use this brush but too thin and floppy. I've read the restoration threads and it seems pretty straight forward. TGN seems the place to go but what do I pick? I don't have a FAN shaped brush and am leaning toward that but what do you think?

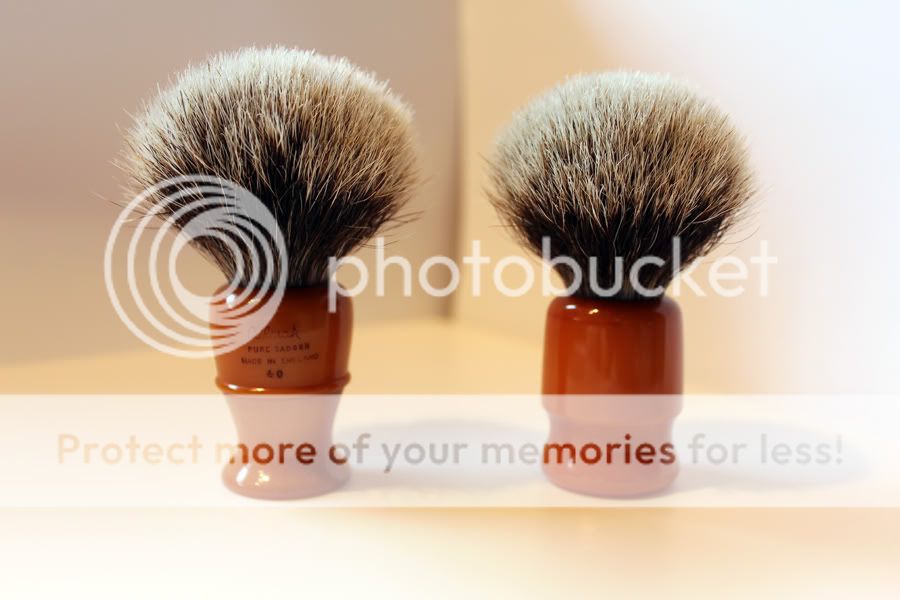
Here is how clueless I am: Is the reference to a 20mm knot the diameter of the base of the knot? Also, the reference to a 50mm loft - is that the spread of the width of the bristles? Thanks in advance for your input.

 
Last edited:
yes the 20 mm refers to the diameter at the base; 50 mm loft refers to the height of the bristles from the base to the top tips. in your photo the loft looks like 50 mm.
 
First thing you need to do is remove the old knot.

Then you need to measure the diameter of the hole and the depth.


From there you can find out what your knot size ( diameter of the base of the knot ) and what loft ( height of bristle above handle , though this will depend on the depth of the hole ).....

So from above the loft is from the top of the handle ( approx 45mm ) to the tip of the bristle ( approx 95mm ) so 50mm loft.

This is different from the height of the knots advertised on say thegoldennib, as some of the knot will be in the hole, leaving the loft.......

Easy huh :lol:

See my post here:

http://badgerandblade.com/vb/showthread.php/200713

And my wiki ( see my sig below ).

Hopefully that might clear things up a bit more ( or confuse you further ) :lol:

Don't be afraid to ask away if there's more questions, we love to enable addictions :001_smile
 
Last edited:
Ian:

Thanks so much for the link - VERY helpful and am most grateful.

I stopped by Ace Hardware and bought just the Dremel bit. Put it in my drill and routed it out. The pics tell the story but here is where I'm at: The hole is 20 mm. across. I have ordered a 20 mm Finest Fan from TGN and yes, since I am paying the shipping anyway just HAD to order some Omega soap.

Question: The old bristles were set in rubber and that is what I have routed out. As best I can measure the hole is 12 mm deep. So far I haven't hit bottom yet. How far do I go or am I there yet? The depth, of course, affects the shape of the brush. Weigh in here if you like.

proxy.php


proxy.php


proxy.php
 
Sorry to be the bearer of possibly bad news, but if the hole is 20mm across, a 20mm knot may not fit...it might, but it might not. Just be prepared.

The knot you chose is nice. I have had fan and bulb knots in finest from TGN and they are both nice quality knots. I think a loft of 44-46mm would be nice. Too low and the don't splay enough. The Rudy vey LE that was just released is a 22mm knot set at 46mm loft. So your 20mm would be equal at about 44mm (approx.).
 
I suspect you're going to need an 18 mm knot but try your 20. I bought a set of digital calipers for under 20 bucks on Amazon that measures in metric and English. It has been very useful when playing with brushes.

I need one of those cutter balls for my Dremel.

PS - You're going to have a sweet brush when you're done.
 
EEEK! I just double checked the diameter of the hole all around the edge. It is precisely 20 mm on the nose.

It's not too late - should I order both the 18mm and 20 mm? Then return one of them?

Still wondering from someone out there - do I keep drilling deeper? Or wait until I get the knot and see how it looks then?
 
Don't worry too much , things ain't all that bad :)

Haven't done one of these, but I'd assume it's a solid handle and you'll know you've hit the bottom when you hit gold ...( yellow ) .

There is a bit of variation with the knots.

The Finest Fan XH is 60mm in height, you'll get around 7-9mm ( the height of the holder from where it starts to bloom ) most likely into the knot hole. That'll give you a 53mm loft. That's not overly high and the Finest is a pretty stiff bristle so it won't splay too much.

If you go the 18mm that's 62mm in height, you should be able to get the whole 12mm + into the knot hole giving you a sub 50mm loft..........

Your call really if you want a higher loft brush or a lower loft brush.

I'd keep with the 20mm knot since you've ordered it. Make a 3-5mm cork shelf to go into the knot hole. Use a dob of silicon to secure the knot and give it a try. You might find that you're happy with that.

If you're not then just twist out the knot and pull out the cork and order your 18mm knot.

As someone else mentioned the 20mm knot wouldn't go astray as hopefully this is the first of many :)

Good luck, keep us posted.
 
Last edited:
What bit is that???

If you order the 20mm knot and it is too tight, couldn't you just sand away at the edge a bit? Maybe get some sand paper or another bit and widen the hole just a bit?
 
One thing nobody has covered for you yet is how splay is affected by the dia of the hole, above the plug the knot slightly widens & depending how much you restrict this it can make a big difference to its splay post bloom.

Here's some quick & dirty photo's to show what I mean.
proxy.php


proxy.php


Both of these knots are TGN finest 20mm extra stuffed set at 48-49mm

The one on the Culmak is set in a 21.5mm hole while the right is a 20.5mm, there's always going to be some variance from knot to knot but if your looking for more of a fan shape you might need to use the 18mm to let it bloom.

There is a bit of meat on your handle so you could open out the hole to take the 20mm, I use the sanding drum on a dremel just rolling it around the inside of the hole to slowly enlarge it but do take it slow, you can easily oval the hole. I do have a trick using a black marker to draw round a washer placed central over the hole to give me a line to work to but that might be a bit OCD for some :001_smile
 
What bit is that???

The local hardware store had a whole display of Dremel bits. I read in a different post how one restorer had a large selection of bits that he tried. The one he kept going back to and ended up using for his restores was, "the size of a BB." When I saw this bit in the Dremel display I knew right away that was the one. It worked terrific and I just used it in my own drill. It was unwieldy to use it in my regular drill but it worked fine. If I were to turn this restore business into a regular thing I'd get a Dremel tool to go with the bit.

Thanks so much guys for the info. I'm going to wait until the knot gets here and then hope it fits. If it does then I'll tinker with how deeply to seat it. GREAT idea to simply seat it temporarily with a dab of silicon and see how it blooms. Will post more in probably a week when I get the knot.
 
Well, it didn't take long to get the knot - TGN ships fast!

Unfortunately this doesn't have a happy ending, yet. To whit:

I dropped the knot into the top of the handle. It fell right in without a tight fit even though my opening was 20 mm and the knot was likewise. I looked at it and it seemed to sit a bit high:

proxy.php


So I pulled out the knot and got out the Dremel and bored down deeper, at one point drilling right through the supporting "plate." Once that happened I evened out the surface It doesn't look much deeper than the original pic from above but it is somewhat:

proxy.php


Then I dropped the knot back in to see if I liked it better sitting a bit deeper:

proxy.php


I did, so next up was epoxy or in my case JB Weld:

proxy.php


I mixed it all up and seated it home after thoroughly reading the directions. (I realize that a guy actually reading directions on any label may get him kicked out of being a guy altogether but I wanted to see how long it took to cure.) It took over night. So off we went to dinner but I kept thinking I still wasn't sure I liked the look. Somehow with the shorter handle it looked top heavy. Maybe I needed to seat it even deeper into the handle. When I got home it was out to the garage and my first reaction was that it looked top heavy. Uh oh. Time to remove if I still can - six hours had passed. Before I did I ran upstairs and lathered the face for the first time. Seemed WAY too top heavy and not firm enough - I wanted a shorter loft big time and hoped it might not be so floppy. Race back to the garage and p-u-l-l-e-d it out:

proxy.php


So I am left with a used knot coated with epoxy on the base and a handle to drill deeper. Here is the question for the brush restorers out there: Is it a simple matter of drilling until I find the depth I want and then reglue? I realize I am going to now have to remove the entire inside of the handle and reestablish a new "shelf".

Any feedback would be appreciated. Am I being too anal here or does the knot look out of scale for how tall the handle is to you?
 
Last edited:
So, here's what I think. The epoxy on the knot shouldn't make much of a difference, as it'll be hidden/epoxied again, right?

Removing the inside of the handle is no biggie. Personally, I'd rather remove the shelf and rebuild it than try to reuse what's there. I use 2 part epoxy to rebuild the shelf on two handles. Worked a treat! It doesn't add much to the weight of the handle, either. A single package of 2 part epoxy took care of both brushes. My opinion is this: The knot height is what looks good to you. If you like it, use it! I wouldn't say you're being anal.

I have an Ever-Ready 150 that I had a knot for, but I'm going to need to get a larger one, because it looks silly with the one I have for it now.
 
I usually drill them out completely. No Shelf at all remaining after I'm done making my hole. That way, I can sit and play with the depth of the knot until it suits my eye and my feel. The handles are almost all hollow. I recommend just drilling straight through there. Use a small bit just to be safe, and from there step it up. I have a dremel to finish off, but many use a forstner bit. Whatever works. If you feel you want it heavier or feel you need a shelf to sit the knot on then use some wood filler. It's airy and has give, so you are less likely to crack your handle if you drop it. Get some two part Epoxy at Lowes or Home Depot to set it. It's the easiest to work with and super strong as well as water proof. You can open that handle up as wide as you want too, there's room for error in this. Drill baby drill !!

I have that same handle, or something very close to it sitting on the shelf in my garage. So if you screw it up too bad I got you covered. Just let me know and it's yours. Go to town and have fun without worry.
 
All a learning experience :lol:

The other thing to remember is that the knot will bloom after you use it. That makes a big difference. They may look aesthetically displeasing at first but once they bloom they look fine. That goes for both a short loft on a long brush and a long loft on a short brush.

You don't mention what the loft is on the brush at the moment.

Here's my travel brush I just did. The handle is 34mm and the loft is 45mm. Looks a bit weird/top heavy before it blooms, but post-bloom it's fine
proxy.php
proxy.php


All comes down to personal taste visually.

Since you've lathered with it and don't think it's firm enough then that's another matter all together though.

You'll need to drill/dremel/sand deeper. If it's hollow just grind out the entire shelf and reestablish another one with a cork or similar. If ti's solid just drill/dremel/sand the hole out till you get to the level you want.

Maybe this time use silicon just to hold the knot in until you have the loft you want before committing yourself to two part epoxy :wink2:
 
Last edited:
Bob, as always you are most helpful and encouraging - thanks!

The JB Weld should be set up hard by tomorrow so can drill it out. Gooey for now and would make a mess of the bit. I think epoxy would trickle in there better so will likely pick some up. I'm just going to remove the insides altogether and start over. With the knot dropped in there farther it will be firmer and have less give plus look more in scale with the handle. Will have an update in a few days.
 
+1 on drilling out the shelf and filling the hollow to the desired depth with some silicone, epoxy, wood filler, a slice of cork, a stack of coins, whatever works for you. The fun thing with restoring these old brushes, is you never know what you're going to find once you start removing the old knot. Improvisation comes in handy. The end results are usually outstanding.
 
Top Bottom