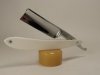
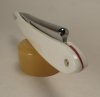
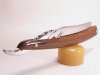
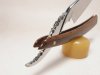
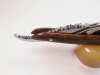
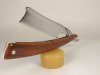
I always wanted a Kami so I built this one. It's my first go 'round making a blade so it is what it is at this point. Got some tool steel, a bench grinder, some files and went at it. It measures out at 9/8,, 6 1/2 " long. It has Giraffe bone scales with file worked brass liners. I'm very happy with it as it shaves like a demon,, the balance is right on ( I also tapered the tang) and I think looks interesting.
You are using an out of date browser. It may not display this or other websites correctly.
You should upgrade or use an alternative browser.
You should upgrade or use an alternative browser.
The Goods! Straight Razor Hobbyist Gallery
- Thread starter Seraphim
- Start date

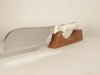
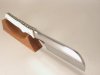
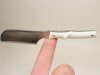


I always wanted a Kami so I built this one.

That's beautiful, you have serious talent, sir.
That is fantabulous, seriously a nice Kami!! That's pretty stellar if your first try grinding a razor and you pulled off an asymmetrical grind.
My goodness, what a talented group of people!!
I always wanted a Kami so I built this one.
That's a beauty Mark!
very very nice.... i would totally rock that!


I know I've said this before Brian but I think this latest razor is my favorite.
Here is a razor that was planned to be around 7/8-8/8.
At which point I "tin foiled" the edge http://badgerandblade.com/vb/showthread.php/308301-Tin-Foil.
So I took it back to the grinder to get back to solid steel.
Also took it from the original french point to a round point
So here it is, 13/16 round point with a long monkey tail.
Scales are black G10 with a tru-stone wedge.
And now this is headed my way.

Congrats Rick. Nice razor. I think that needs a trip to RI.

Love that monkey tail. Must be fun to use.
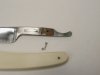
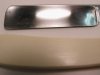
I got this CVH in from a fellow board member. It was in decent shape with some pitting along the edge and some rust under the pin. As luck would have it the pitting at the paper thin edge was just enough to say " tear on the dotted line" . Didn't the little bugger do just that. I was sick.
Graciously he said to make it a shorty,, don't fuss over the scales ( I did manage to save the originals for possibly a later resto for him) and call it done. I cut it down , polished it up and added Giraffe Bone scales with a blood red wedge. It's going out today.
First two pics are the original blade.
Attachments
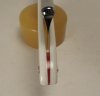
Other shots. Due to the unwillingness of the bone to want to flex I slightly relieved the insides of the scales to let the razor settle in. There is though just enough flex to give a nice tension when opening the razor.
Attachments

Beautiful, mycarver. I really like the blood red wedge. Nice touch.
Wow. Gorgeous.
Very nice indeed, love it.
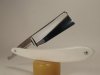
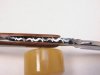
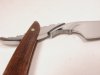
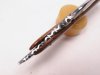
While building the Kami I also worked on this piece. I figured I needed one of each. Granted, these are my first attempts at building razors but I'm quite happy with how they are coming out.
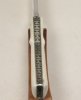
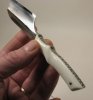
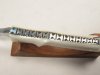
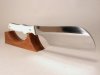
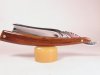
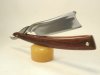
This one measures out at 8/8. The scales are CocoBolo. I also did stacked washers at the wedge end just for fun. I wanted to keep the scales clean looking and relatively thin so as not to distract from the blade work itself and try to show it to its best advantage. As you can see the grain ( I wasted a bit of stock here) pattern follows the shape of the scales adding to the linear look of the piece. Since lines and how they flow are integral to this design I thought it was necessary.
With this piece as well as the Kami my primary tool was a simple bench grinder. The spine work was done with ordinary files.
What I find so much fun in doing these is the flood of ideas about other designs,, features,, file work,, a variety of scales etc. that want to take me in other directions. I can't wait to chase these designs and see just how they too can come out. This is too much like fun.
Attachments
Oh my. Mark I will send you my address for that one.
Similar threads
- Replies
- 12
- Views
- 754
- Replies
- 6
- Views
- 933
- Replies
- 3
- Views
- 619