Hey Everyone,
I am the new proud owner of a Gillette Super Speed Flare Tip thanks to the amazing generosity and kindness of Scott (HDStreetGlide). As part of the deal, Scott told me to "Pay it Forward" and share my experiences with my new-found DE.
Before I received the razor, Scott told me that it needed a bit of a cleaning, as well as a good sanitizing. So, I thought, "What better way to start sharing my experiences with this new razor than a photo-guide to my 1st cleaning experience?"
I received the razor tonight and got right to it.
CLEANING/POLISHING
This is the front shot of the razor head with the doors closed. Note the patina that is covering a good part of the head of the razor. Patina is great for antiques, but this is a razor that's going to be used all the time. It has to go.
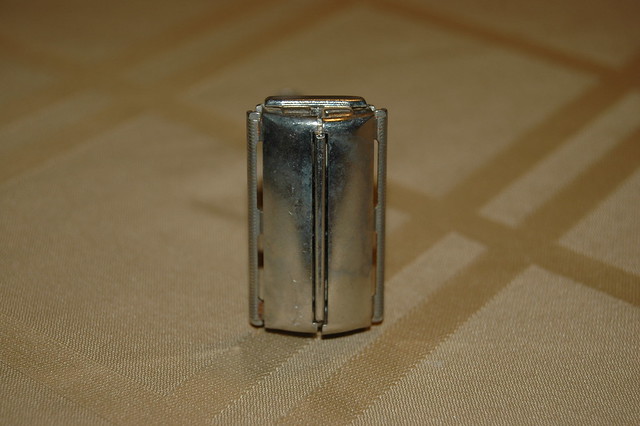
The underside of the razor's head shows some mild rust/corrosion/soap scum.
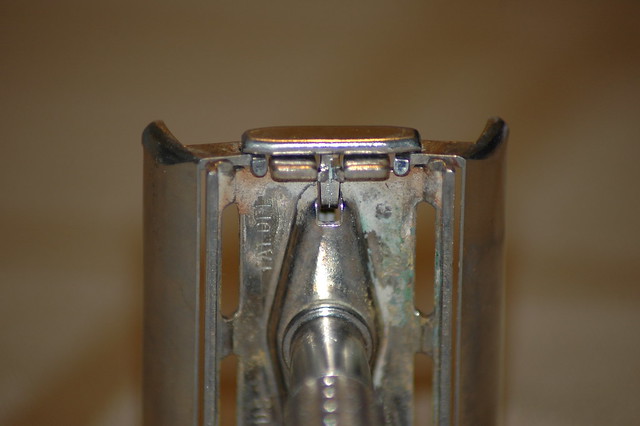
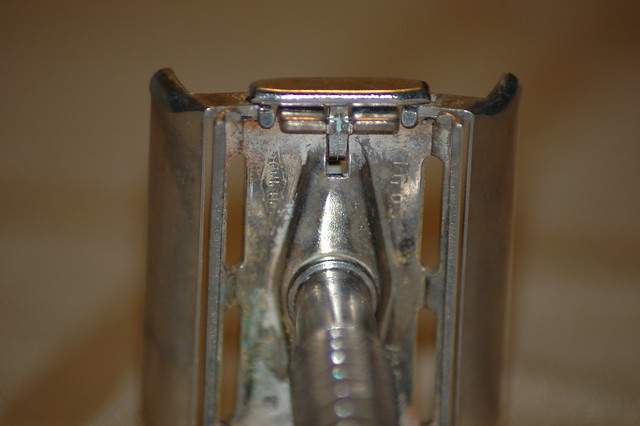
The inside of the razor head with some shots of rust/corrosion.
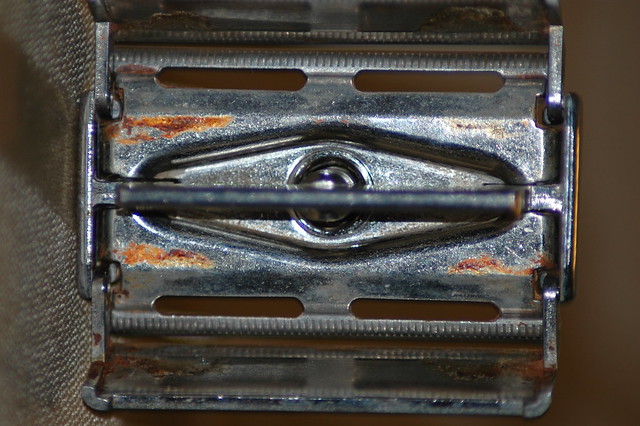
The insides of the head doors show some more rust/corrosion.
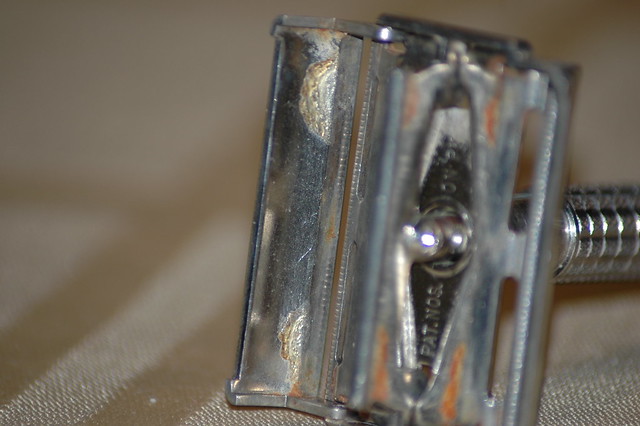
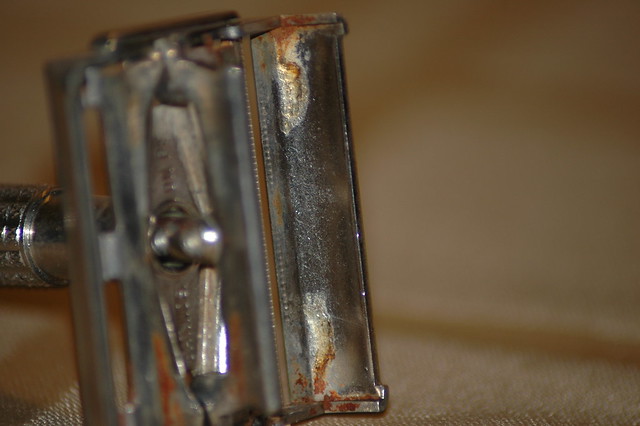
Time to break out the cleaning supplies.
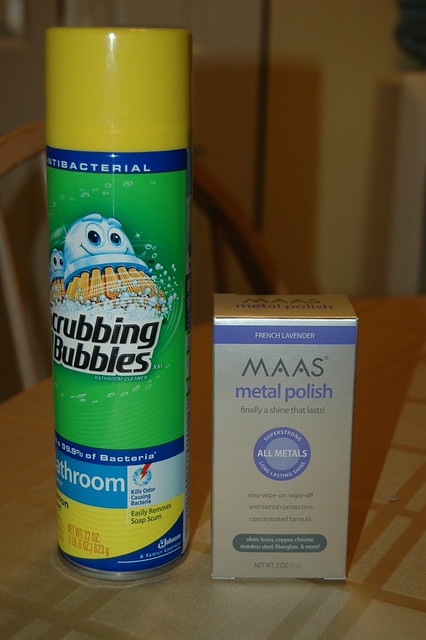
I sprayed down the razor with some Scrubbing Bubbles. I let the Scrubbing Bubbles sit on the razor for about 3 minutes in an old butter container.
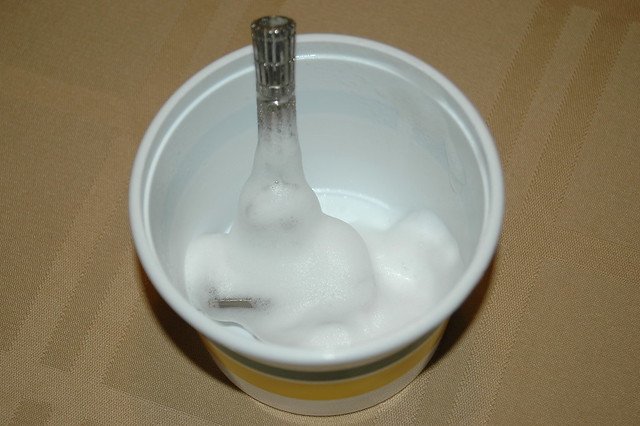
I then started with the active cleaning. To start I used Q-Tips and lots of elbow grease.
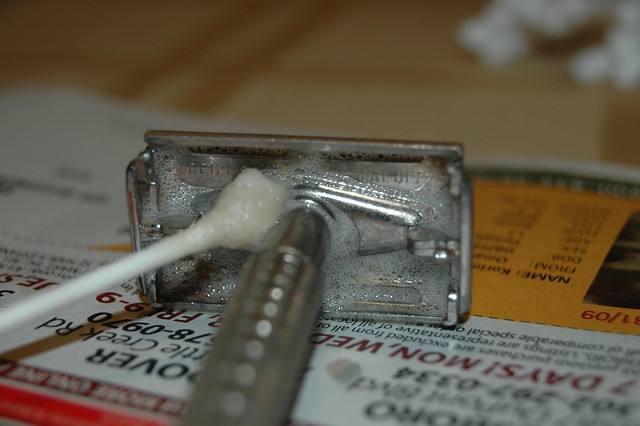
Inside after some scrubbing.
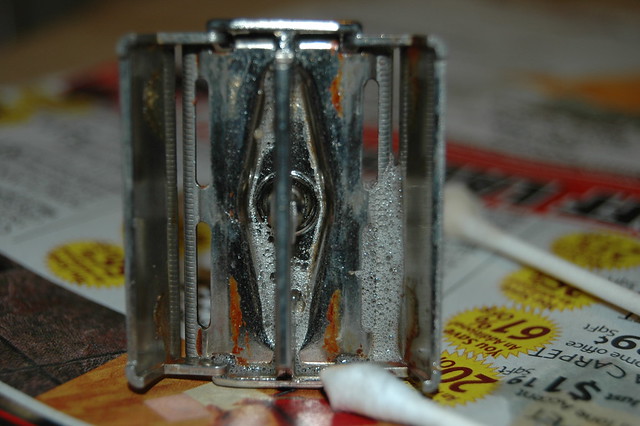
I then rinsed the razor off with some warm water. I dried the razor with an old tee-shirt.
Then I started with the MAAS.
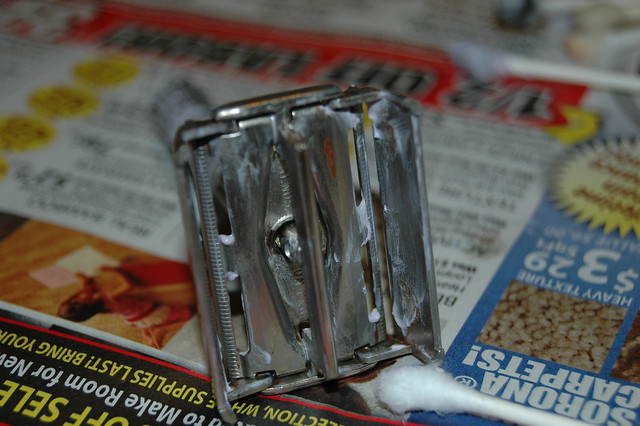
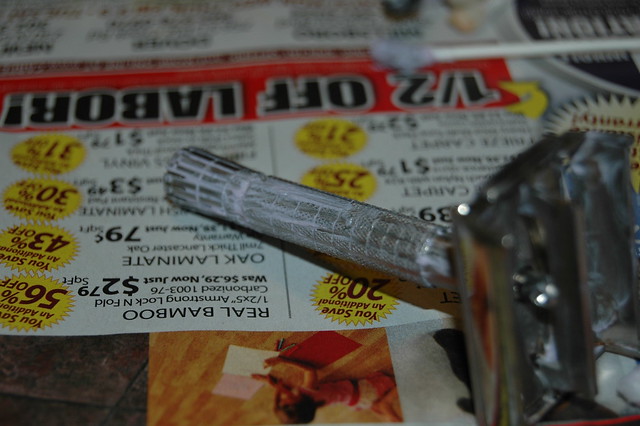
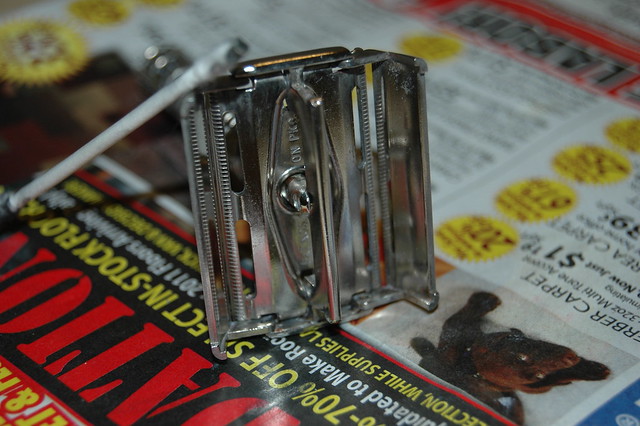
The MAAS did a fantastic job of taking care of the tarnish/rust/corrosion/patina. In this photo I tried to show how I ripped off the cotton and used the bare Q-Tip stick to do a majority of the scrubbing in the crevices.
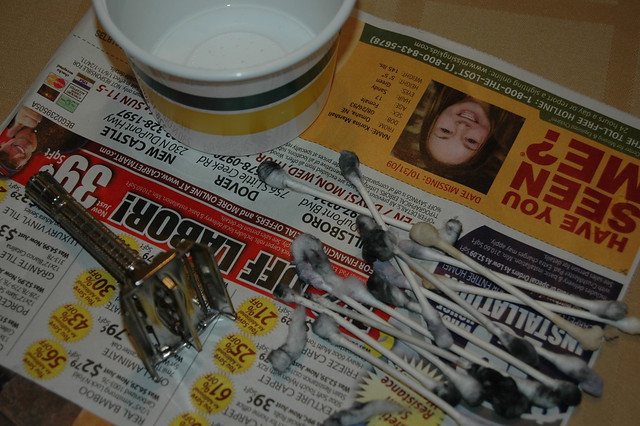
Even though it does a GREAT job, don't underestimate the amount of work (in scrubbing) and time (about 45 minutes) that is necessary to get a razor shiny. Here's an idea of the amount of Q-Tips used and what they should look like at the end of the job. Black with tarnish.
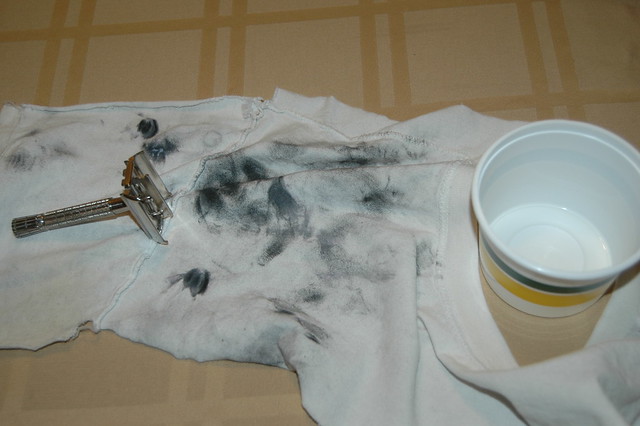
A shot of the tarnish on the tee-shirt.
Final of TTO open.
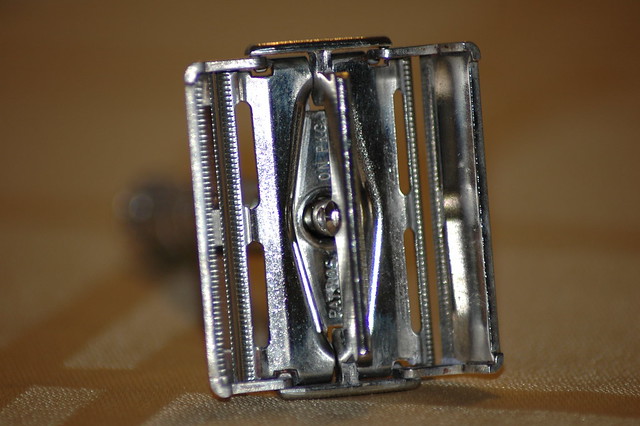
Final of TTO closed to the side.
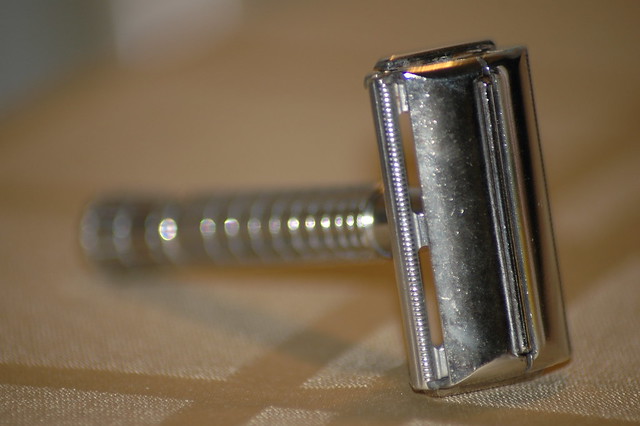
Final underneath.
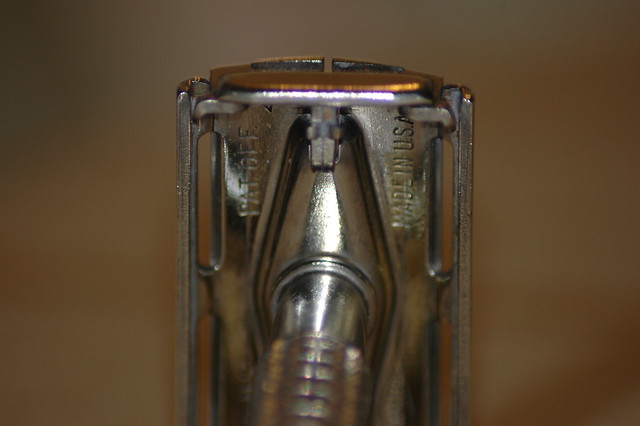
Final underneath <Gillette>.
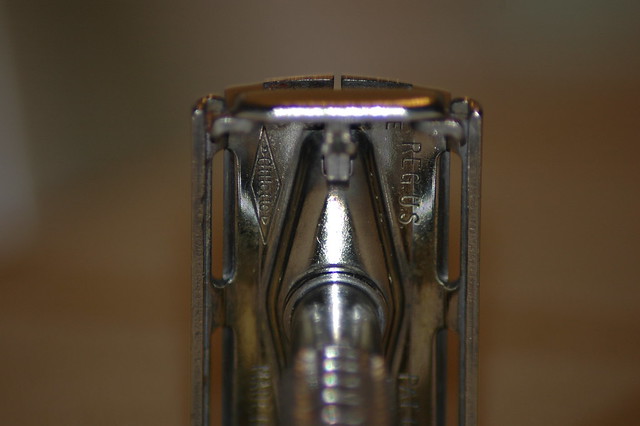
Final profile shot.
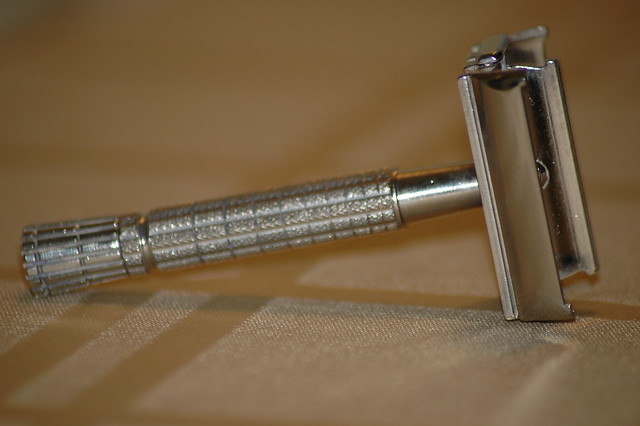
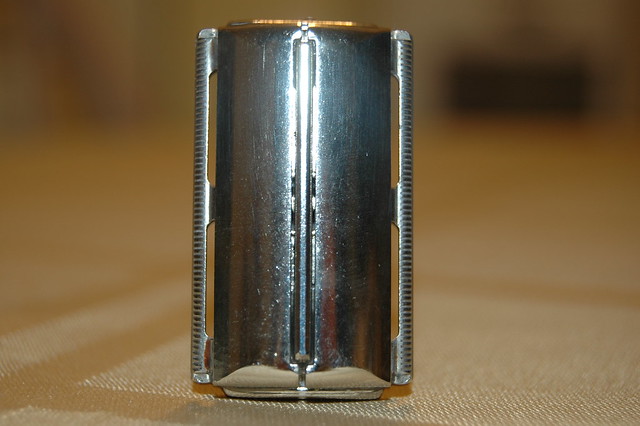
Final head-on shot of TTO closed.
I don't have shots of cleaning the middle/inner tube of the handle, but i sprayed Scrubbing Bubbles in there and used Q-Tips to clean it out. They were a bit short, next time I'll opt for pipe cleaners or a wound paper towel.
SANITIZING
In order to sanitize this razor I let it sit in 3% hydrogen peroxide solution for 12 hours.
LUBRICATING
I followed the suggestion on the wiki to use mineral oil to lube the TTO action.
FINAL THOUGHTS
As happy I am with the cleaning, there are still a few spots that will need to be cleaned again.
The crevice spots are very difficult to get to. I tried to get to them with a de-fuzzed Q-Tip (out of focus in above photo). I did OK with that, but those tight spots do hold on to some dirt/grime, etc. I am open to any suggestions as to how to clean those tight corners and such.
I didn't use a toothbrush as suggested in the Wiki due to a couple facts:
1. Didn't have a clean old one.
2. MAAS needs to be buffed off while still wet and a toothbrush will not allow that, unless you put something over the brush like a napkin/coffee filter/microfibre towel etc.
I hope that this photo guide helps at least one other newbie out there. If it does I feel that I have partly completed "paying it forward" for Scott.
When I first received this razor I must say that I didn't think it would get as clean as it did. I'm here to tell all the other newbie razor cleaners out there, "With a little work, a sparkling razor is possible."
Please leave comments/suggestions for future improvement.
Thanks,
Dave
I am the new proud owner of a Gillette Super Speed Flare Tip thanks to the amazing generosity and kindness of Scott (HDStreetGlide). As part of the deal, Scott told me to "Pay it Forward" and share my experiences with my new-found DE.
Before I received the razor, Scott told me that it needed a bit of a cleaning, as well as a good sanitizing. So, I thought, "What better way to start sharing my experiences with this new razor than a photo-guide to my 1st cleaning experience?"
I received the razor tonight and got right to it.
CLEANING/POLISHING
This is the front shot of the razor head with the doors closed. Note the patina that is covering a good part of the head of the razor. Patina is great for antiques, but this is a razor that's going to be used all the time. It has to go.

The underside of the razor's head shows some mild rust/corrosion/soap scum.


The inside of the razor head with some shots of rust/corrosion.

The insides of the head doors show some more rust/corrosion.


Time to break out the cleaning supplies.

I sprayed down the razor with some Scrubbing Bubbles. I let the Scrubbing Bubbles sit on the razor for about 3 minutes in an old butter container.

I then started with the active cleaning. To start I used Q-Tips and lots of elbow grease.

Inside after some scrubbing.

I then rinsed the razor off with some warm water. I dried the razor with an old tee-shirt.
Then I started with the MAAS.


The MAAS did a fantastic job of taking care of the tarnish/rust/corrosion/patina. In this photo I tried to show how I ripped off the cotton and used the bare Q-Tip stick to do a majority of the scrubbing in the crevices.

Even though it does a GREAT job, don't underestimate the amount of work (in scrubbing) and time (about 45 minutes) that is necessary to get a razor shiny. Here's an idea of the amount of Q-Tips used and what they should look like at the end of the job. Black with tarnish.

A shot of the tarnish on the tee-shirt.

Final of TTO open.

Final of TTO closed to the side.

Final underneath.

Final underneath <Gillette>.

Final profile shot.

Final head-on shot of TTO closed.

I don't have shots of cleaning the middle/inner tube of the handle, but i sprayed Scrubbing Bubbles in there and used Q-Tips to clean it out. They were a bit short, next time I'll opt for pipe cleaners or a wound paper towel.
SANITIZING
In order to sanitize this razor I let it sit in 3% hydrogen peroxide solution for 12 hours.
LUBRICATING
I followed the suggestion on the wiki to use mineral oil to lube the TTO action.
FINAL THOUGHTS
As happy I am with the cleaning, there are still a few spots that will need to be cleaned again.
The crevice spots are very difficult to get to. I tried to get to them with a de-fuzzed Q-Tip (out of focus in above photo). I did OK with that, but those tight spots do hold on to some dirt/grime, etc. I am open to any suggestions as to how to clean those tight corners and such.
I didn't use a toothbrush as suggested in the Wiki due to a couple facts:
1. Didn't have a clean old one.
2. MAAS needs to be buffed off while still wet and a toothbrush will not allow that, unless you put something over the brush like a napkin/coffee filter/microfibre towel etc.
I hope that this photo guide helps at least one other newbie out there. If it does I feel that I have partly completed "paying it forward" for Scott.
When I first received this razor I must say that I didn't think it would get as clean as it did. I'm here to tell all the other newbie razor cleaners out there, "With a little work, a sparkling razor is possible."
Please leave comments/suggestions for future improvement.
Thanks,
Dave


 Thanks for the effort. Enjoy your shaves.


