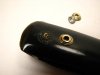
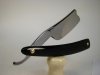
Alright I picked this razor up a while back and was just going to have Mark clean it up without removing the pins because I wanted to keep the original washers. It had some pretty good rust on the tang and a few spots on the blade. Well Mark talked me into removing the scales and that he could duplicate the washers, so I agreed. He ended up removing the pins and being able to reuse the original washers except one set. So it's all original and the scales are polished to a mirror shine. I was in awe the first time I saw it. Enough talk...here's the pictures. Sorry my phone camera isn't the greatest.
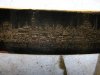
BEFORE(I buffed this a little but wasn't getting anywhere):


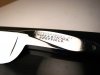
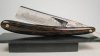
AFTER:


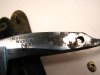
BEFORE(I buffed this a little but wasn't getting anywhere):
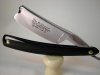
AFTER:


")