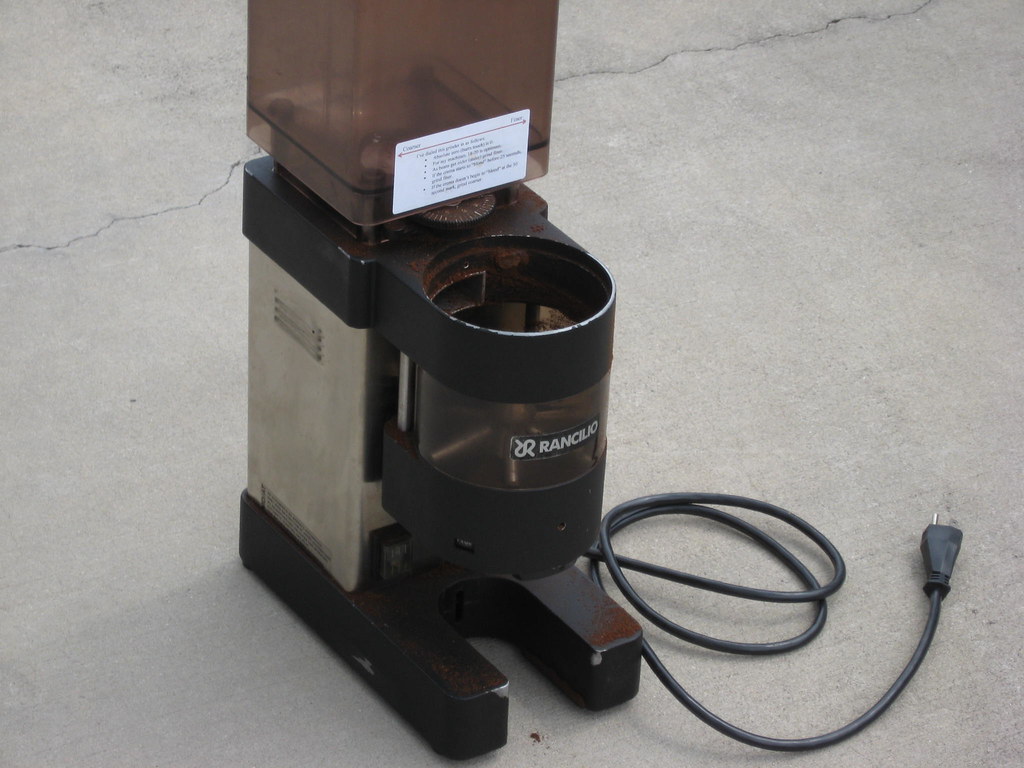
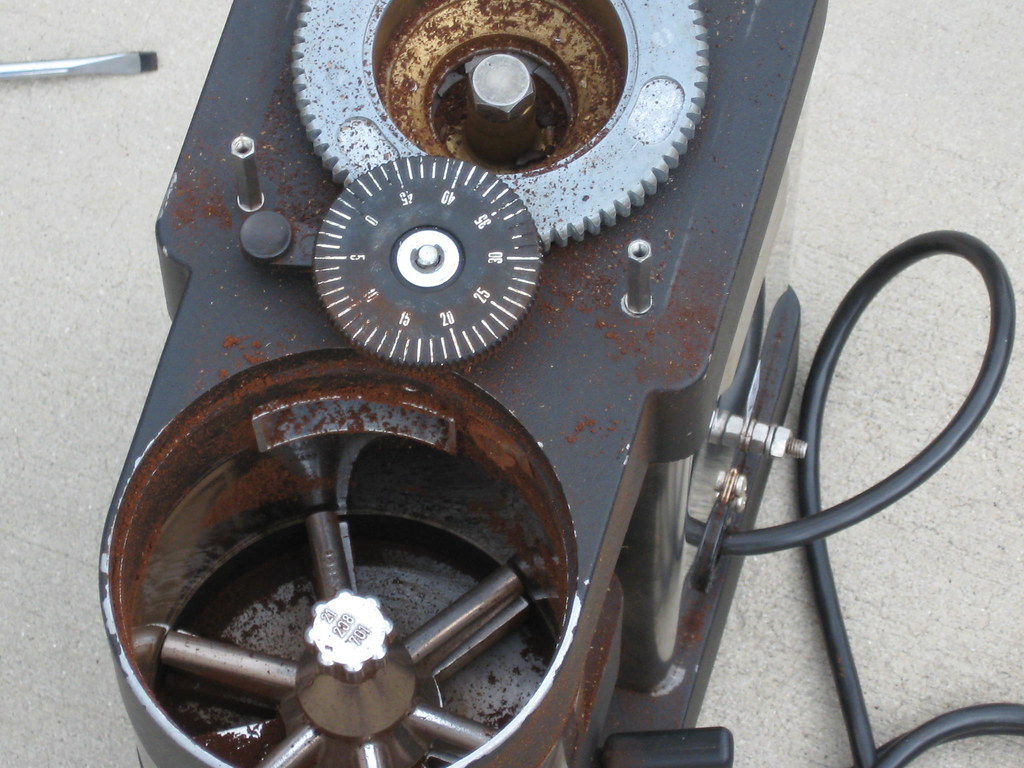
What's new

Why U want to Disassemble and Clean your burr grinder

Ranchillio MD-50


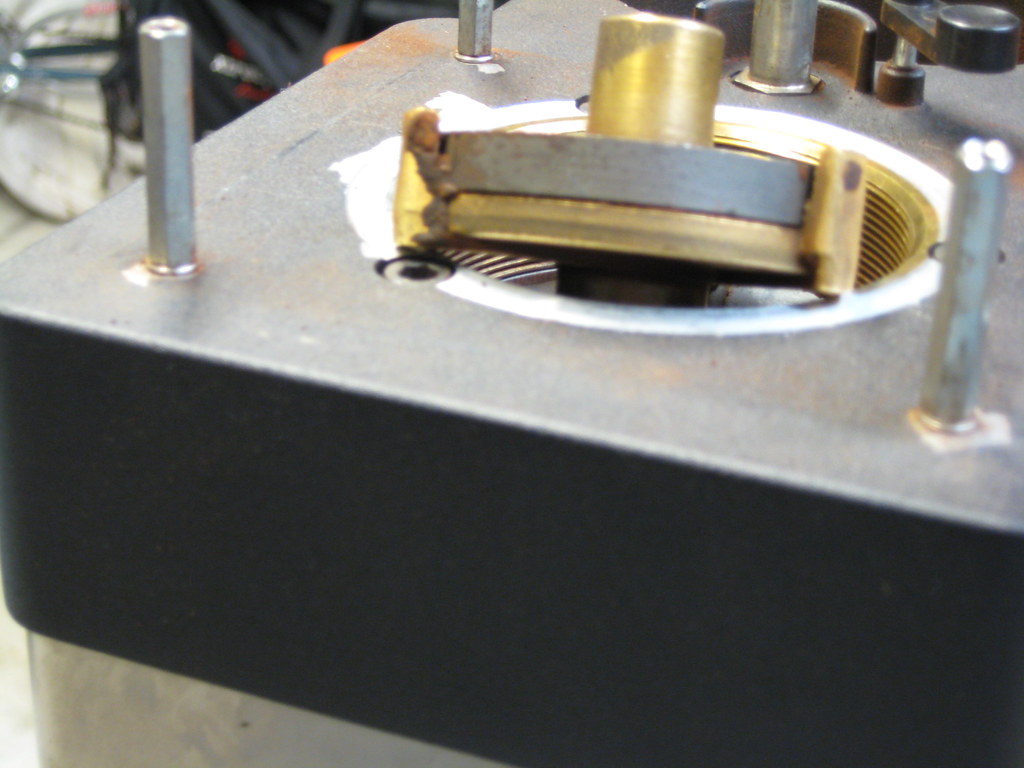
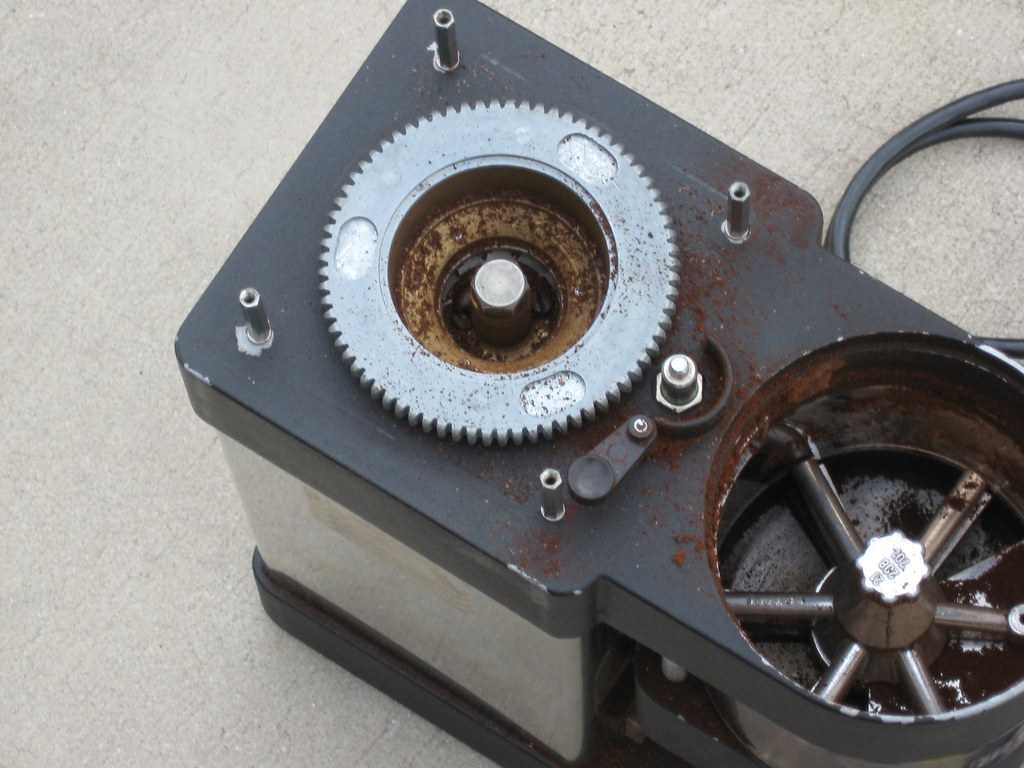
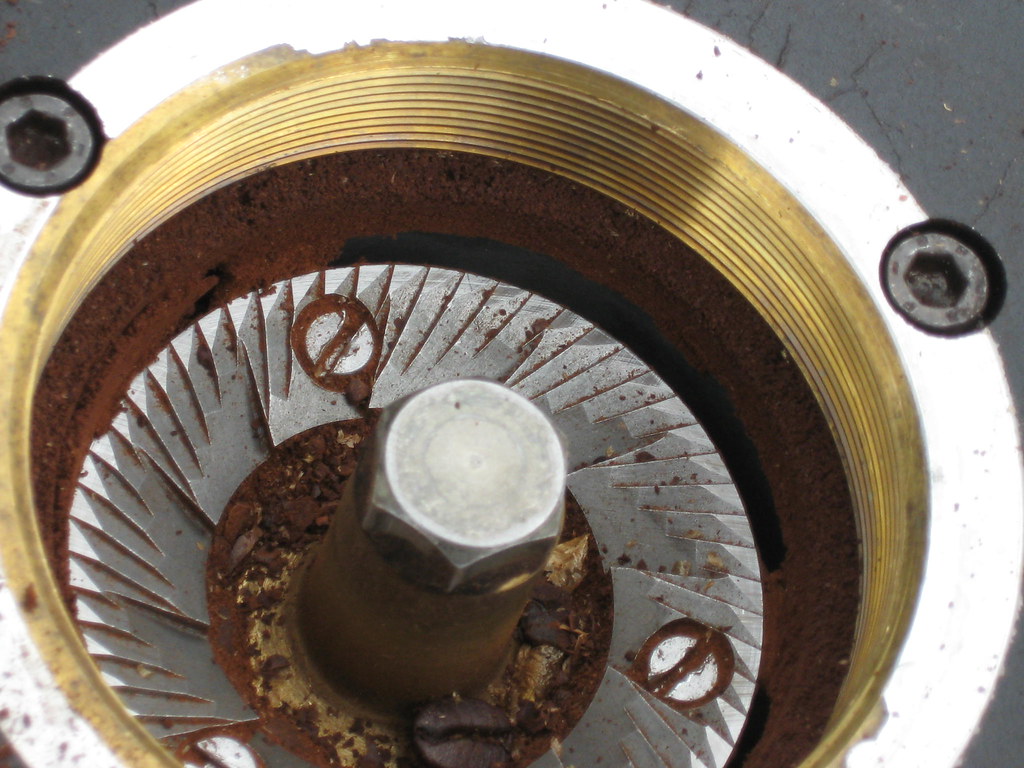
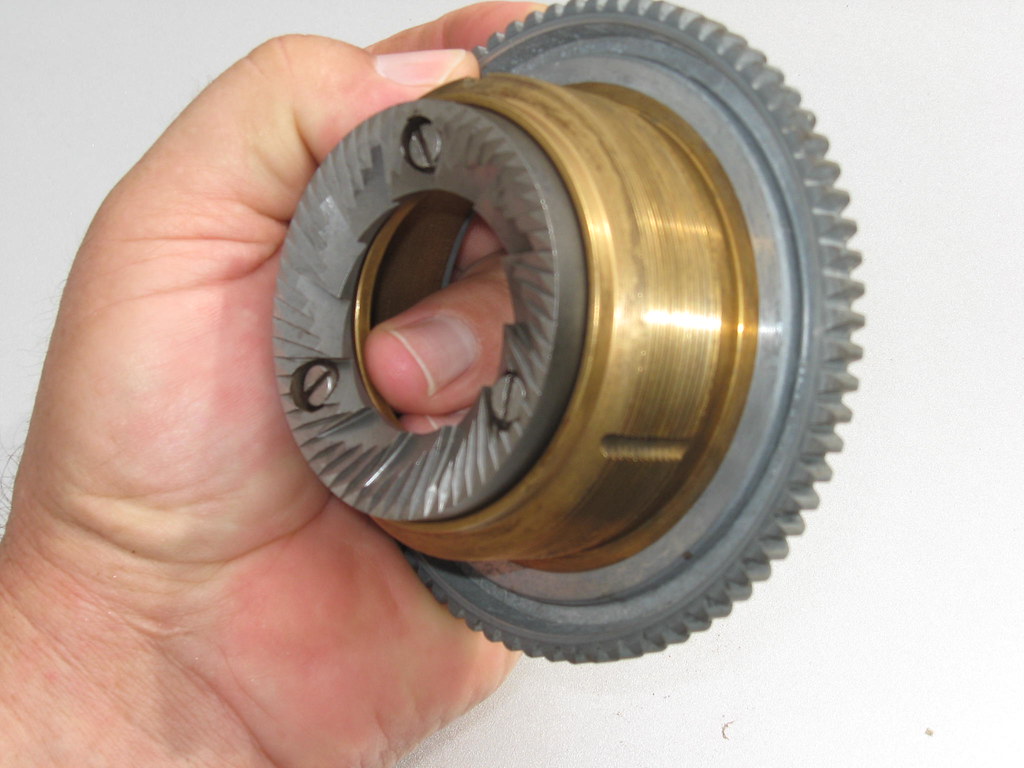
This is the lower burr carrier- Note built up oil on the burr carrier finger
proxy.php

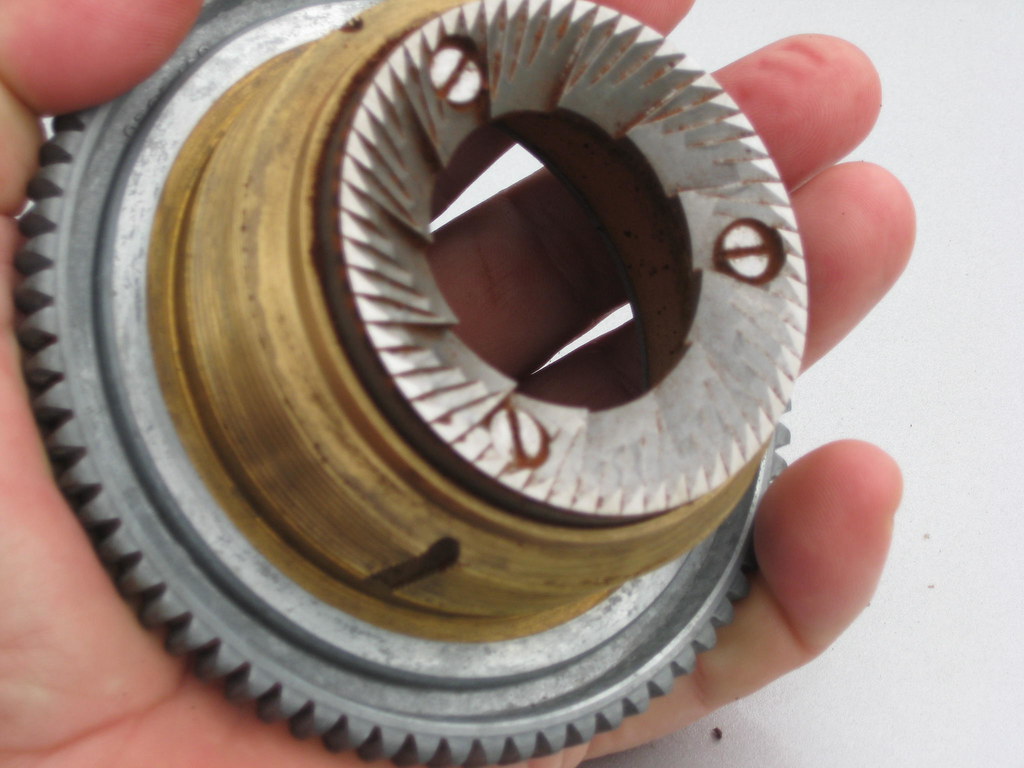
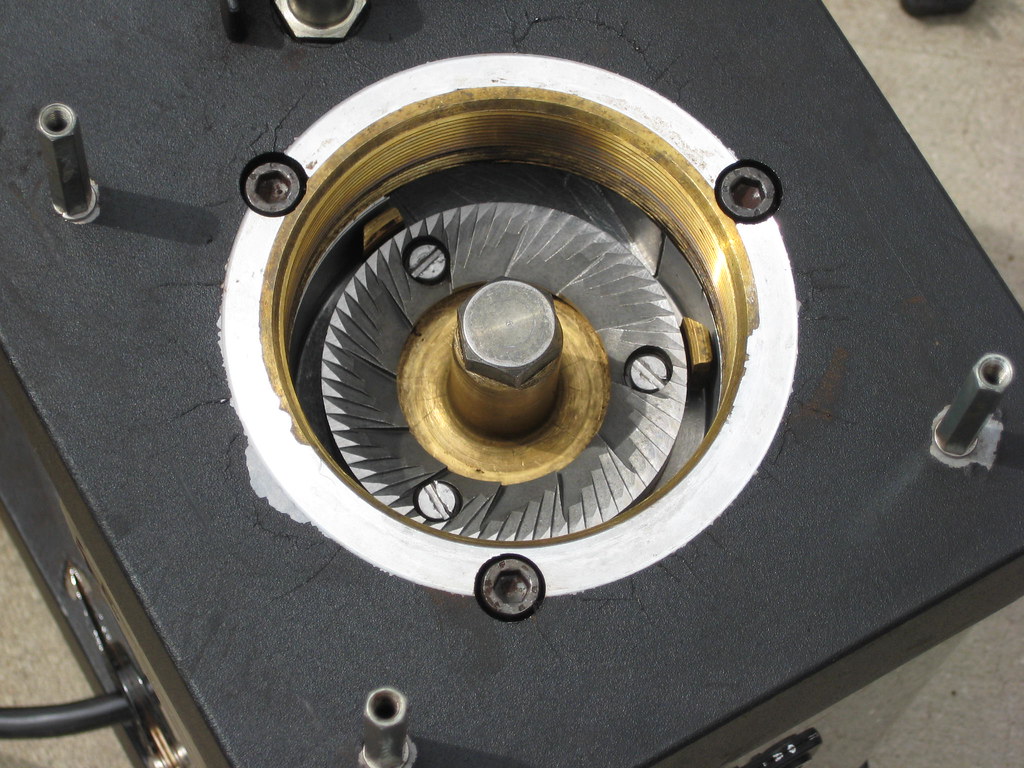
Below, lower burr carrier with lower burr flipped upside down resting on it...upper burr right side up off to the side
proxy.php


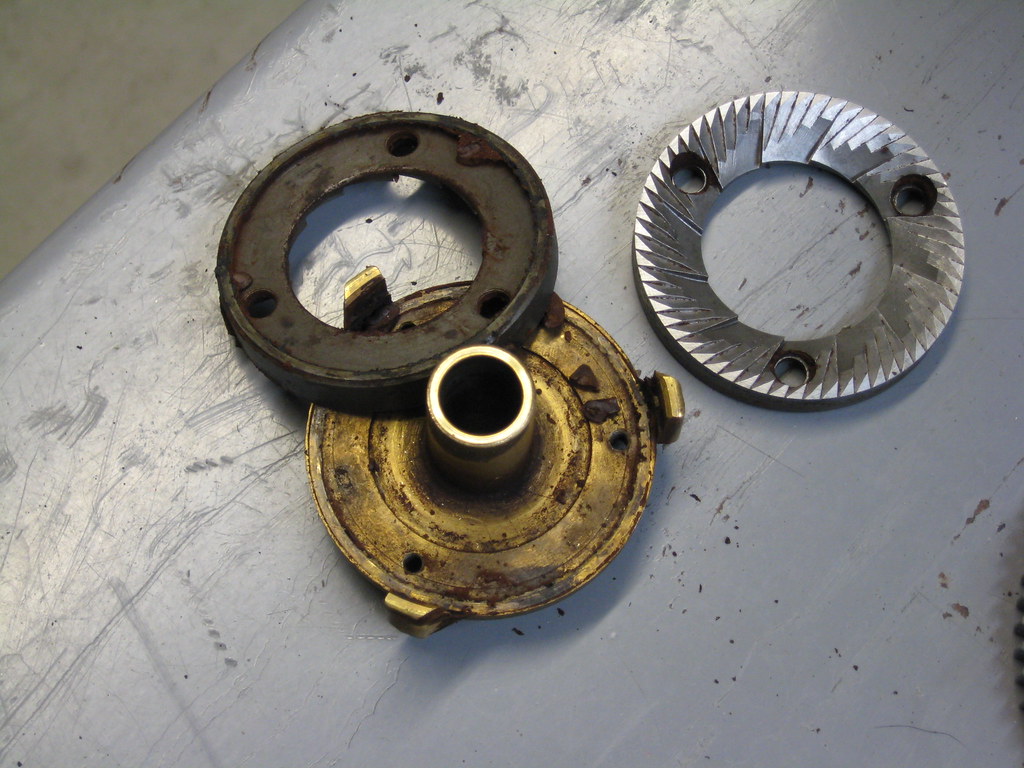
FWIW, these are 54 mm burrs. I use this grinder exclusively to grind coffee I roast for espresso, and I typically bring my roasts up to FC+. My maint. schedule for this grinder consists of...every two weeks, blow out with compressed air, removing the upper burr carrier so I can blow out the grinding chamber

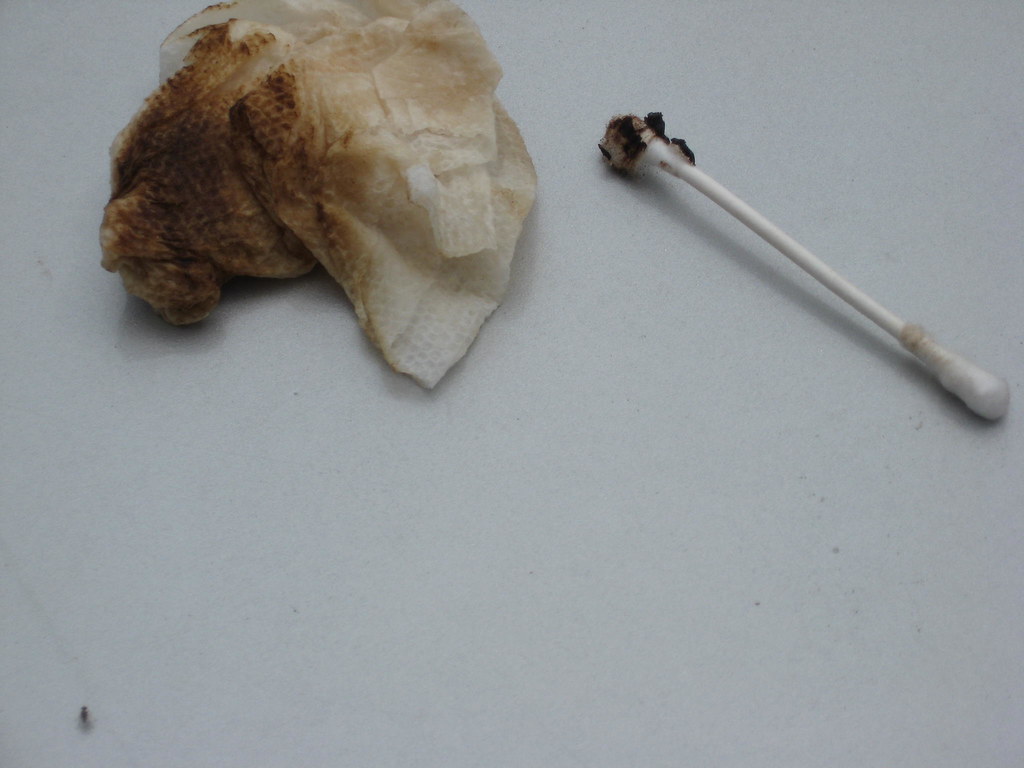
...when i think it's time (every few months or so) I remove the lower burr carrier for a more thorough douching, and at this time, burrs are removed from both carriers and soaked in a solution of hot water and espresso machine cleaner...I like and use Joe Glo brand espresso machine cleaner for my soak water solution. FWIW2 I use a brass brush to scrub the carriers and burrs when cleaning these parts, and I'll use the Joe Glo solution with paper towel to wipe down the rest of the chamber including the doser chamber and follow with hot rinse water. Fun!, Fun!, Fun! yet this is what it takes to keep your cups tasting good, and yes, in case you were wondering, I was over due to clean the burr carriers this time around

I'm having company over later today and I'm pulling shots for them, on clean equipment thank you:001_tt2:


Best,


Jake
Reddick Fla.
 
Yikes! After seeing your pictures I know I need to take my burr grinder apart and clean it, it's a couple of years old. I clean it with the brush that came with it but that's about it.
 
Yikes! After seeing your pictures I know I need to take my burr grinder apart and clean it, it's a couple of years old. I clean it with the brush that came with it but that's about it.


~~~I took a bunch of pics back in 2008 and parked them on one of my flickr sets when disassembling to clean my MDF-50 coffee grinder...I'll put some of them up here for you to peruse, perhaps they'll help you in getting your grinder apart. A lot of burr grinders are assembled similarly...here goes-
proxy.php

...this is a Ranchilio MD-50 coffee grinder...it's considered commercial grade. One aspect that signifys such is the volumous bean hopper. I'll point out other features that distinguishes this grinder as commercial in following pics. FWIW, I wanted to use a commercial coffee grinder in order to make grinds for my home made espresso as my research way back when suggested commercial burr grinders provide a superior grind for espresso...an even consistent grind many consumer level coffee grinders can't match. I bought this grinder used to keep the costs down and that said, I paid (IIRC) $250 for this grinder which included a new set of burrs, less shipping. I've owned and used four different espresso machines and have always felt the espresso machine itself is the least important piece of equipment in preparing espresso at home, that the grinder is far more important and the one piece of equipment you do not want to cheap out obtaining
proxy.php

the bean hopper needs to come off to get at the burr carriers for cleaning...the PO did away with all but one screw, to make quick work of R&Ring the hopper
proxy.php

hjopper removed, this is what the top of this grinder looks like. Also, the doser portion has the lid removed. Next step is to remove grind setting wheel so the top burr carrier can be unscrewed and removed for cleaning
proxy.php

After you remove the C clip the wheel lifts up and out of the way
proxy.php

the upper burr carrier simply unscrews out, and here it is-
proxy.php

the carrier threading is brass and the grinding burr is steel attached with three slot head screws. for most cleanings I do not remove the grinding burr...I'll simply blow it clean using compressed air but for more thorough cleaning the burr is removed and both pieces are set into a bath of hot water combined with espresso machine cleaner. 10 minutes in that bath is long enough (using Joe Glo)...it handily removes all of the bean oil residue. I've also found using a brass brush to scrub the grinding burrs to help in removing specs of bean matter
proxy.php

This is what is underneath the upper burr carrier...the lower burr carrier and the grinding chamber. for my bi-monthly cleaning I do not remove the lower burr carrier. Instead, I'll either use compressed air to blow the grinds away or if I'm feeling lazy I'll leave the grinder in the kitchen and use the vacuum cleaner to suck up the grinds but in order for the burr carrier to come out a 15mm socket removes the center bolt. It's a right hand thread
proxy.php

I use paper towel and Q-Tips soakied in hot water and Joe Glo to scrub the nooks and crannies, followed by a rinse towel using warm water
proxy.php

and here's a pic of the lower burr carrier/chamber put back together and clean. Notice that the lower burr carrier is made from brass...this is commercail grade...consumer grade carriers use plastic which do not spin true. Keeping the spinning carrier true allows for an even coffee grind which is important for espresso, not so important for drip coffee but imperative for esprersso. Those home espresso users having problems getting their shots to pull correctly, consistently...this is the area where problems begin so by using commercial quality grinders you eliminate that possibility, of getting an uneven grind

There are exceptions to this. I'm told the new high end Baratza grinders use plastic carriers that do not wobble but the home equivelant Ranchilio espresso grinders are notorious for unequal coffee grinds. Waht I've seen on a lot of the espresso forums, the noob buys all he/she can afford dropping the budget on an esprsso machine, then when it come time to purchase the grinder, they have little money left so they buy a consumer grade grinder, and ususally new, thinking (wrongly) it will be adaquate. Nothing can be further from the truth...so if you are perusing this thread and in the market for espresso equipment...spend more on a quality grinder and go cheap on your espresso machine. Just my opinion, others may have better and different ideas
proxy.php

pic of the doser cleaned...initially I'll use my garden hose to rinse out the grinds then I follow with a douche of joe glo/hot water and more garden hose rinsing and sometimes some seperate hot water rinse...I do this in my driveway/garage apron and being careful not to get any of the electrical components wet but if this is one of the bi monthly cleanings, I'll either blow this chamber or vacuum only
proxy.php

here's a pic of the upper burr carrier spotlessly clean. On this grinder, to install properly, you thread the carrier until it touches the lower burr. At this point I install the numbered adjustment wheel so the zero (number) setting is facing me. if we go back to this pic
proxy.php

where you see the #15, that's wehre i set the #0, so when I turn the adjustment wheel so the numbers increase, that opens up the adjustment between the two burrs. My initial adjustmet is is #18, and I'll increase or decrease according to what I need in the way of an adjustment

As mentioned earlier, I clean this grinder once every two weeks by blowing or vacuuming the ginds out, only doing a more thorough cleaning when warranted. I feel it's important to keep your coffee equipment clean in order to have good tasting coffee. I buy specialty grade coffee to roast and drink and I want to make sure I'm getting my monies worth by keeping my equipment clean


Best,


Jake
Reddick Fla.
 
Excellent tutorial. I do that after every bag I buy. A little OCD but I do the same with my tools. It'll look like new 20 years from now. My rice cooker of eightteen years finally craped out on me:( Well, not quite a lifetime but not bad.
 
Great tutorial.

Just a note about the frequency at which you want to do this. I recently had to replace a part on my Baratza Virtuoso, and took the grinder apart to figure out which part to replace. It was pretty clean inside, and I couldn't see any need for taking it apart just for cleaning. Perhaps my grinder just doesn't need this, or perhaps it's due to the fact that I rarely use dark, oily roasts. But I've been using it at least twice a day for about 2 years, or about 100 pounds of coffee. I do, of course, use the remove the top burr and use the supplied brush to brush off anything left over... Probably every few weeks, though they recommend once a week. I really have no idea what this means or how it translates for others, except, YMMV. Can anyone comment further?

BTW, for Baratza owners, there's plenty of PDFs and a few videos on how to do all kinds of maintenance and repairs.
e.g. http://baratza.com/troubleshooting_question.php?id=cg1&code=5
 
Last edited:
Thanks for the attaboys fellas:gunsmilie:

@Steve- Just guessing, since you mentioned you aren't grinding oily beans, that would probably be why your grinder is staying cleaner longer. I roast into 2nd crack which is why my grinder gets so oily but I think another reason is I grind very fine. For instance, the few times I have adjusted this grinder to grind for vac pot coffee, the setting that works best is #35...I'm typically grinding at half that size at #18 for espresso (2X18=36), so anytime you make finer grinds, it stands you create more grinds even though the weight stays the same

Hmm...maybe this is akin to nuclear fission, where you split the atom to create energy...or in this case, split coffee to create a mess:001_005:


Best,


Jake
Reddick Fla.
 
Thanks Jake! well done- I do not roast into 2nd crack and do not seem to get as much build up as you show. One tip that Scotto passed on to me on the rocky grinders is to use some Teflon tape on the upper carrier threads to reduce play and wobble.

I use the uncooked instant rice between cleaning and then vacuum the grinder out- seems to work pretty well for me.
 
@Steve- Just guessing, since you mentioned you aren't grinding oily beans, that would probably be why your grinder is staying cleaner longer. I roast into 2nd crack which is why my grinder gets so oily but I think another reason is I grind very fine. For instance, the few times I have adjusted this grinder to grind for vac pot coffee, the setting that works best is #35...I'm typically grinding at half that size at #18 for espresso (2X18=36), so anytime you make finer grinds, it stands you create more grinds even though the weight stays the same
Agree with your comment about finer grind. When I saw your pics it reminded me that it should be about time to clean my grinder, so I opened it up and saw a lot more accumulation than I had expected. Lately I have been grinding more espresso than my usual drip and saw a lot more smaller particles caking up. It might have also been my coffee, my target roast is to reach the verge of 2nd crack and sometimes it is a little shorter or longer, but I think the main reason was the finder grind.
 
I've heard of others pouring uncooked rice into the grinder, turning it on and letting the rice clean the burrs, and the reports are, this works well. I've never tried this myself. The 3rd wave roasters in the U.S. that roast for espresso (retailers, wholesalers) tend to keep their espresso roasts under 2nd crack, unlike traditional southern Italian espresso where venturing 2nd crack is the rule. I started drinking espresso via Cafe Con Leches in the lower Fla. Keys in the mid 80's through the late 90's when wifey and I lived in Big Pine Key and I did a lot of business in Key West and the lower Keys where the Cuban restaurants served this drink (1 oz. espresso to 8 ounces steamed milk), and back in those days Rowland coffee company supplied the coffee to these shops (Bustelo, Pilon). You can buy this coffee in just about any major grocery in Fla. and if you've had it and are familiar with roast doneness, these two coffees are taken well into 2nd crack (Vienna IMO). This is the coffee that formed my foundation in appreciating espresso. And to this day, I still like my coffee/milk drinks with plenty of sweetner and a roast brought into 2nd crack. I started roasting my own coffee around April 08' and have been roasting everything I drink since June 08'. April of that year i bought a 3 month subscription from sweetmarias where they sent 2 lbs of fresh roast to my door every two weeks, lasting for three months. This is when I got into making my own espresso and starting to roast my own coffee, doing practice roasts while getting SM's beans, but I've been stuck in a rut when it comes to roast doneness and I prefer to roast single origin coffees into 2nd crack, and for espresso. For me, it's all about espresso, why I roast. The research I did led me to believe that only fresh roasted coffee (under 14 days of age) is suitable for making espresso at home, which is why I started roasting coffee as where I live there has not been a suitable supplier of fresh roasted beans, and I never cared to be reliant on buying fresh roast by mail. SM's did a good job of it and set the benchmark for me. Although I have and use a vac pot and a coffee dripper, 99% of the coffee I drink at home is espresso...and getting back to another reason I believe my grinder gets oiled up, I'm typically roasting every 5 days. I use a Hot Top coffee roaster and my roast length is 280 grams of green beans to start every roast...and I'm drinking these roasts on day one, often in as few as 4 hours after roasting, so I'm also under the assumption that not only is my roast oily from getting into 2nd but it's also fresh and hasn't had time to lose moisture, what's left from roasting, which isn't much as the roasting process drives the moisture out of the bean but that bean up to 5 days old is very wet from the oils. I may be wrong but I beleive commercial coffee beans taken up to the same level of roast as I do, if the beans have some age on them, these older beans do not have the same level of moisture/oilyness. Again, I could be wrong but I have used commercial espresso roast in the past, back when I lived in Big Time Key and used a moka pot at home in the morning before leaving the house, and those grinds were never as oily as mine are today, and that's not because they didn't take their roast as high as I take mine, they did, and went further IMO...but the coffee is older and drier. What's the freshest roast date you've ever seen for *$'s? 8 weeks out was the date the local *$'s had on their roast board, when I used to go there to drink espresso. I have an idea the bags of Bustelo and Pilon I used to buy were even older, but I could be wrong

Please pardon me for going on about old stale coffee but that is why I roast for myself as empirically we've found (home roasters that roast for espresso) that the grinds do not tamp well when they get much over 10 days of age. that's not to say you can't pull a good shot of espresso from a bag of Lavazza straight from Italy but you're getting a much different shot using older grinds. We know some of the importers have gone to the trouble of using an injected gas to drive out oxygen from their roasted coffee containers yet the aged coffee, as good as it is, does not compare with fresh roast, regarding the ease at which the coffee grinds tamp and form a puck in the coffee basket. But to each his or her own


Best,


Jake
Reddick Fla.
 
Agree about beans getting dry with age, but the oils are still there. I don't think they stick to the grinder as much when dry, though. And they seem to dry out for me... certainly within 2 or 3 weeks. Moisture level affects the time to grind, consistency of grind, and the pour.

Another, somewhat related observation I'd make is that I can ignore cleaning my Chemex for about 100 pots--sometimes. (I do rinse it thoroughly with the leftover hot water and additional tap water at 120F--darned regulations & kids) But after just a few of pots of heavily roasted, oily coffee, a ring appears at the bottom. (That's specific to the Chemex--the other filters make for constant cleaning.) It's probably similar with grinders and everything else.
 
Top Bottom