What's new

It’s back

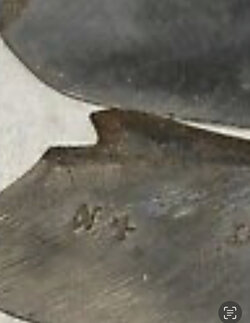
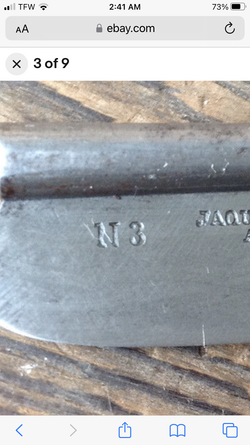
Once I knew what was missing I was able to do some research. There were several styles of stamping used to number these blades if they were part of a set I imagine.
I did some test “burns” to see what etching compound would work as well as how much time is needed per session. 30 second increments.
The pic with 2 images ,one , on the right was water vinegar and salt. The other with an acid based formula to create patina on metals.
It was all done with a 9V battery , some basic wires and the etching solution.
My mask was my wife’s nail polish. I did several variations of time, repeats etc. to find a happy medium.
For my stylus I have a mechanical pencil that I took a piece of steel rod, chucked it in my drill and spun it against a grinding wheel. you can also use a pin and simply stick it in a pencil eraser. It works.

Not perfect by any means considering the size but it no longer looks like some errant stamp or some blemish on the blade. View attachment 1654105View attachment 1654107View attachment 1654106KoiView attachment 1654108
IMG_2385.jpeg
IMG_2376.jpeg
IMG_2378.jpeg
IMG_2373.jpeg
IMG_2387.jpeg
View attachment 1654105View attachment 1654106View attachment 1654107View attachment 1654108
IMG_2385.jpeg
IMG_2376.jpeg
IMG_2378.jpeg
IMG_2373.jpeg
IMG_2387.jpeg
 
Last edited:
Two styles. I got close.this was probably closest to #4. I can go back and finesse it a bit more.

But really . Who’d know? Most see a number instead of a spit spot.

The most challenging part of this is.
Coat your blade with resist. Connect the electrical current. Scratch some design in your blade. Apply acid to etch the surface. Try to guess how long you should apply current and acid, rinse, repeat for how long until something goes wrong and you ruin your blade. No take backs. It’s toast . You sit and watch you blade literally sizzle and bubble and you’re hoping the resist doesn’t fail and bleed out. 9 volts does this. I’ve also used a battery charger which really ups the game! Intense.
Not like sanding where you can sand out prior grits. This is etched into the surface. Yeah, sand that out.
A bit unnerving to say the least. Should I go further for a deeper etch or just call it quits? This is how I did my GD’s.
Brrrrrr.
Nerve wracking to say the least.
 

Attachments

  • IMG_2404.jpeg
    IMG_2404.jpeg
    419 KB · Views: 13
  • IMG_2368.png
    IMG_2368.png
    2.6 MB · Views: 12
Last edited:
Cool, I like seeing and hearing DIY jobs.

I've tried some etching, I did not need any voltage, ferric chloride is some nasty stuff, it got labelled with the skull and crossed bones, stains your hands, clothes, stains stainless steel, turns polished steel black in a 3 second dip, etches brass with ease, patinas copper with a brush, did I say nasty? but no voltage!

My resist failed slightly it was hand cut from less than optimal material, but proved the concept, I wanted a custom logo on a brass cap, I need try again after being able to cut a better resist.
 
ferric chloride is some nasty stuff, it got labelled with the skull and crossed bones, stains your hands, clothes, stains stainless steel, turns polished steel black in a 3 second dip, etches brass with ease, patinas copper with a brush, did I say nasty? but no voltage!
Ah, that's good stuff too! And if you need to speed up or get deeper etching, you can warm it up slightly and agitate the solution.

My resist failed slightly it was hand cut from less than optimal material, but proved the concept, I wanted a custom logo on a brass cap, I need try again after being able to cut a better resist.
You can try photoresist film if the surface is flat and fairly polished. If not, photoresist spray can be used as well. I used to etch very complex figures in copper, sometimes with lines of 0.2 / 0.0078" width.

If you need very precise edges or details with photoresist, you can use a toner printer to print a mask on transparent plastic sheet (same dimensions and thickness as regular printer paper) and then you use the mask to develop the pattern on the photoresist, using UV light. The exposed photoresist can be washed off and next step would be etching in the ferric chroride bath.
 
Ah, that's good stuff too! And if you need to speed up or get deeper etching, you can warm it up slightly and agitate the solution.


You can try photoresist film if the surface is flat and fairly polished. If not, photoresist spray can be used as well. I used to etch very complex figures in copper, sometimes with lines of 0.2 / 0.0078" width.

If you need very precise edges or details with photoresist, you can use a toner printer to print a mask on transparent plastic sheet (same dimensions and thickness as regular printer paper) and then you use the mask to develop the pattern on the photoresist, using UV light. The exposed photoresist can be washed off and next step would be etching in the ferric chroride bath.
Y
True. But for something like this im
Not making a major commitment to it. Couldn’t justify a 15’ roll of film ( and try cutting something this small? No thanks)or a $20 can of spray to make a 3/32 scratch for a design that fits under a pencil eraser.
 
Last edited:
Ah, that's good stuff too! And if you need to speed up or get deeper etching, you can warm it up slightly and agitate the solution.


You can try photoresist film if the surface is flat and fairly polished. If not, photoresist spray can be used as well. I used to etch very complex figures in copper, sometimes with lines of 0.2 / 0.0078" width.

If you need very precise edges or details with photoresist, you can use a toner printer to print a mask on transparent plastic sheet (same dimensions and thickness as regular printer paper) and then you use the mask to develop the pattern on the photoresist, using UV light. The exposed photoresist can be washed off and next step would be etching in the ferric chroride bath.
I’m not dipping the entire blade . As the photos show the solution is on the end of a cotton swab so it cannot be agitated. What I’m showing is the entire process. The positive is connected to the blade, the negative is connected to the wet swab and the arc goes through the top of the swab.
No way to agitate the solution because there isn’t any.

And as far as warming it? This already sizzles and bubbles at the point of contact because of the arc. Again, no dipping is involved.
But thanks.
 
Last edited:
What I wanted to show here is using commonly found items ( none which are dangerous) most people have readily at hand you can do a basic etch.
Vinegar, salt, a battery, a bit of lamp wire , Q-tips ,nail polish and a pin.
Very little is needed . That’s the shopping list. No dipping required.
The actual etch took a minute and a half.
 
Last edited:
Top Bottom