I figured since I got some PMs from my posts in a car-stereo related thread, that I might as well just start up a thread explaining everything one will need to know to install a car stereo.
OK some background....I have been installing car stereos for poeple since I was 14 years old (I'm 27 now), from a simple tape deck and speakers, to large 3000w+ systems. Nothing has changed so far as installation and basic concepts, which is all most will need to upgrade/replace a stock system, so here we go:
1) find out what electrical system you car has:
Most cars are negative ground (the car chassis goes to the - terminal of the battery). This is important, since some older cars are positive ground. You cannot easily install a radio in a positive ground system. How you do this can be done in two ways
1a) buy a radio for positive ground vehicle (pricey)
1b) buy a regular negative ground radio, and make a custom mounting that will isolate the radio chassi (also negative ground) from the positive grounded panels of the car. You will also have to wire the + terminal to the sheetmetal nearby, and the - terminal to the ground wire found connected to the old radio.
2) make sure your speakers are NOT grounded to the chassis:
This is found on some older cars as well. If you have this, you will have to run new speaker wires to each speaker location if you plan on running a modern radio. This will avoid any risk of damaging the amplifier in the new unit.
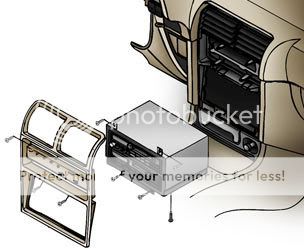
3) Radio sizes/types:
You have the obsolete knob type radios:
these types of radios have two movable knobs on each side of a protruded radio face. These are found in cassette/8track/radio variants only....some of the later models had CD-changer control (Kenwood for one). There are two sizings of this style radio, one of them having a wider center "nose" than the other. measure this part of your dash trim before shopping to make sure your purchase will fit.
DIN-type radios:
DIN radios are the current standard...and there are a few variants.
euro-DIN is the current standard in terms of width, and even GM's DIN+1/2 and the popular double-DIN radios foudn in many asian luxury cars.
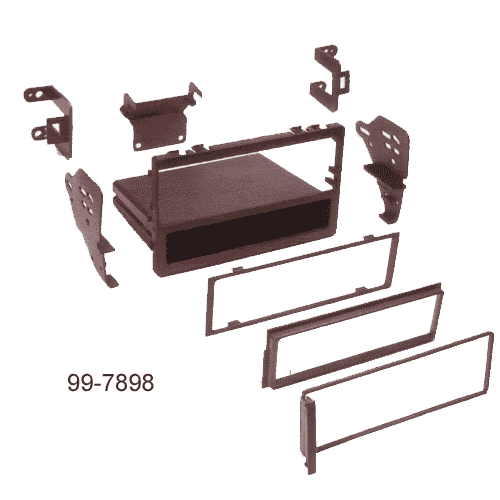
Then there was various carmakers that chose to use a wider or narrower version of the DIN standard. Your best bet is to measure the radio that's in there, and compare to what you plan on buying (measure from the inside of the trim ring of hte new unit if possible in stead of the faceplate....it will give a better estimate of proper fit)
4) speaker sizes:
You need to know only three things: width, height (for non-round speakers) and depth. Depth is particularly important for door-mounted speakers, so to not interfere with the function of your windows. All car speakers should be 4-ohm impedance (only relevant when installing an amplifier). Listen to speakers before buying, and get what sounds the best to you.
5) amplifiers/outboard processors:
Amplifiers will give you more power to drive difficult speakers, or to get mroe loudness. Outboard processors will REQUIRE an amplifier afterwards, and are there to perform equalization or other sound-processing functions. Processors are only used in the most high-end of car audio systems, and personally I think they are overkill for a car environment (not to mention extremely pricey). Amplifiers on the other hand can be had for a hundred dollars or more for a lower-wattage quality unit, and can really make a difference.
Subwoofers REQUIRE the use of an outboard amplifier. Bass requires moving HUGE amounts of air, which you cannot do on the 1-7w that the average radio puts out (those 100wx4 numbers are PEAK wattage, which has minimal basis in reality...in truth most radios only put out about 25w total across all outputs). That's where an amplifier comes into play. In my opinion, at least 100w RMS (continuous) is required for use of any subwoofer. I have ran all of the ones I used in my personal systems between 140-180w RMS. All amplifiers are to my knowledge negative ground, as are any audio processors.
.....for part 2, actual installation, look for my next post in this thread sometime soon.
OK some background....I have been installing car stereos for poeple since I was 14 years old (I'm 27 now), from a simple tape deck and speakers, to large 3000w+ systems. Nothing has changed so far as installation and basic concepts, which is all most will need to upgrade/replace a stock system, so here we go:
1) find out what electrical system you car has:
Most cars are negative ground (the car chassis goes to the - terminal of the battery). This is important, since some older cars are positive ground. You cannot easily install a radio in a positive ground system. How you do this can be done in two ways
1a) buy a radio for positive ground vehicle (pricey)
1b) buy a regular negative ground radio, and make a custom mounting that will isolate the radio chassi (also negative ground) from the positive grounded panels of the car. You will also have to wire the + terminal to the sheetmetal nearby, and the - terminal to the ground wire found connected to the old radio.
2) make sure your speakers are NOT grounded to the chassis:
This is found on some older cars as well. If you have this, you will have to run new speaker wires to each speaker location if you plan on running a modern radio. This will avoid any risk of damaging the amplifier in the new unit.
3) Radio sizes/types:
You have the obsolete knob type radios:
these types of radios have two movable knobs on each side of a protruded radio face. These are found in cassette/8track/radio variants only....some of the later models had CD-changer control (Kenwood for one). There are two sizings of this style radio, one of them having a wider center "nose" than the other. measure this part of your dash trim before shopping to make sure your purchase will fit.
DIN-type radios:
DIN radios are the current standard...and there are a few variants.
euro-DIN is the current standard in terms of width, and even GM's DIN+1/2 and the popular double-DIN radios foudn in many asian luxury cars.
Then there was various carmakers that chose to use a wider or narrower version of the DIN standard. Your best bet is to measure the radio that's in there, and compare to what you plan on buying (measure from the inside of the trim ring of hte new unit if possible in stead of the faceplate....it will give a better estimate of proper fit)
4) speaker sizes:
You need to know only three things: width, height (for non-round speakers) and depth. Depth is particularly important for door-mounted speakers, so to not interfere with the function of your windows. All car speakers should be 4-ohm impedance (only relevant when installing an amplifier). Listen to speakers before buying, and get what sounds the best to you.
5) amplifiers/outboard processors:
Amplifiers will give you more power to drive difficult speakers, or to get mroe loudness. Outboard processors will REQUIRE an amplifier afterwards, and are there to perform equalization or other sound-processing functions. Processors are only used in the most high-end of car audio systems, and personally I think they are overkill for a car environment (not to mention extremely pricey). Amplifiers on the other hand can be had for a hundred dollars or more for a lower-wattage quality unit, and can really make a difference.
Subwoofers REQUIRE the use of an outboard amplifier. Bass requires moving HUGE amounts of air, which you cannot do on the 1-7w that the average radio puts out (those 100wx4 numbers are PEAK wattage, which has minimal basis in reality...in truth most radios only put out about 25w total across all outputs). That's where an amplifier comes into play. In my opinion, at least 100w RMS (continuous) is required for use of any subwoofer. I have ran all of the ones I used in my personal systems between 140-180w RMS. All amplifiers are to my knowledge negative ground, as are any audio processors.
.....for part 2, actual installation, look for my next post in this thread sometime soon.

")