Little update for those interested. I finally managed to contact the razor manufacturer (through Barbieri Uniti) and exposed my concerns about the design, tolerances, covered tabs, provided them with my measurements, ..., and they, swiftly and honestly, responded the following:
"
I confirm that we have already received a few reports about the possible misalignment of the Bayonetta safety razor blade.
After withdrawing some parts for verification, we replicated the problem but did not find any significant manufacturing anomalies, simply the cap studs have a slight play when they lock into their 2 plate joints (that play is necessary to prevent the studs from locking into the joints, otherwise the razor would no longer open).
To solve the problem, simply pay a little attention to the blade when tightening the razor.
Once we had collected about 50 pieces all 50 of them with a bit of care (as per the video) no longer had the 'problem'.
"
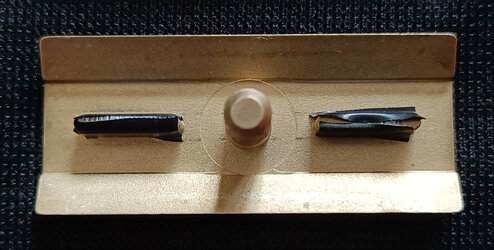
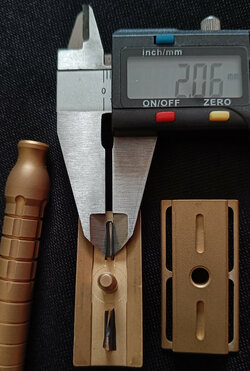
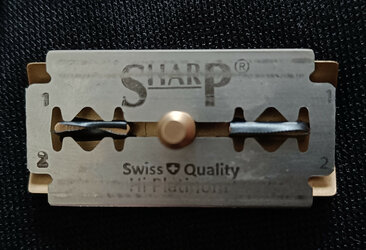
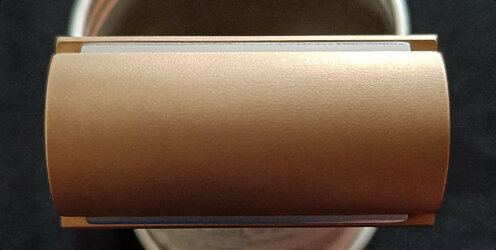
So basically, I was kindly told to deal with it, providing me a video depicting a variant of the top cap and base plate pinching method, which doesn't work reliably enough for me. However, since I was still thinking that the problem was due to the top cap pins being too thin, I took some electrical tape, wrapped the pins increasing their width from 1.81mm to 2.06mm and ... surprise, perfect alignment and blade reveal (at least to my naked eye) in a 100% consistent and repeatable way, no matter how I assemble the razor and with no apparent drawbacks. I might even keep and try the razor tomorrow. As you can see in the attached images, it is a crude and non long lasting solution, but maybe the same can be done with heat shrinking tube or something more durable.
"
I confirm that we have already received a few reports about the possible misalignment of the Bayonetta safety razor blade.
After withdrawing some parts for verification, we replicated the problem but did not find any significant manufacturing anomalies, simply the cap studs have a slight play when they lock into their 2 plate joints (that play is necessary to prevent the studs from locking into the joints, otherwise the razor would no longer open).
To solve the problem, simply pay a little attention to the blade when tightening the razor.
Once we had collected about 50 pieces all 50 of them with a bit of care (as per the video) no longer had the 'problem'.
"
So basically, I was kindly told to deal with it, providing me a video depicting a variant of the top cap and base plate pinching method, which doesn't work reliably enough for me. However, since I was still thinking that the problem was due to the top cap pins being too thin, I took some electrical tape, wrapped the pins increasing their width from 1.81mm to 2.06mm and ... surprise, perfect alignment and blade reveal (at least to my naked eye) in a 100% consistent and repeatable way, no matter how I assemble the razor and with no apparent drawbacks. I might even keep and try the razor tomorrow. As you can see in the attached images, it is a crude and non long lasting solution, but maybe the same can be done with heat shrinking tube or something more durable.