What's new

Quick Filarmonica 13 question on pins

I have a recently acquired Filarmonica 13 Sub-Cero. It's in good condition so doesn't need much done to it.
I've almost cleaned it to a point I'm happy with, mostly the tang needed work but blade is in excellent shape with zero honewear, in fact I don't think this Fili has ever been used.

I de-pinned the pivot end to give it a thorough clean but I'm wondering what the original pins are like.
This has the nail style pins and I have one I can use but I'd like to keep it as original as possible and know what the factory uses.

PXL_20210626_104227227.jpg
 
I'm fairly sure this razor has never been used before, it hasn't been honed ever, so I think they're originally the pin/nail style.
Here's the wedge end and, like the pivot, is a nail. I'll probably use the nail I already have as 1) it looks good and 2) it means I don't have to bother replacing both the wedge and pivot.
I have a Filarmonica 14 and it's a fantastic shaver I brought back from the dead. This thing wasn't cheap but if it shaves as good as the 14 it'll be worth it. The 14 is a double temple whereas this is the sub-cero, should be interesting to see if I notice the difference.
PXL_20210626_143241799.jpg
 
The Blade
Has a bit of tarnish and some pitting on the back but overall good shape.
Everyone loves pictures so.....
2021-06-30_124035.jpg


The bottom, near the edge, has some spider-webbing.
2021-06-30_124035a.jpg


This took a while to deal with as I had to mask the engraving and go down to 400 grit before the spider-webbing even considered budging. Then back up through the grits.
2021-06-30_124035b.jpg


Almost there
The tang has very fine pitting through the Sub-Cero. I've taken it down quite a bit but the remainder will stay to preserve the stamping. It gives it a bit of character.
PXL_20210629_110734327.jpg

PXL_20210629_120142122.jpg

PXL_20210629_120854126.jpg
 
The Scales
There's a little damage (melted/solvant?) on the ridged area and the Lyre has faded over time.
2021-06-30_124035c.jpg

PXL_20210621_150257254d.jpg


A small diamond tipped dremel bit cleaned up the melted grooves, by hand, not in a dremel.
The pic below is half way through the process and it looks better later on.
PXL_20210624_173155039f.jpg


This was a bit of an experiment but I filled in the Lyre with a gold marker and used a dremel bit to remove the excess.
I think I may have strained my eyes doing this as it's incredibly difficult where a tenth of a mm means everything.
PXL_20210629_131524876g.jpg
 
Peening Time
As per the original purpose of this thread I'm using a nail style pin to do this.
4x4 Jewelers anvil and dampening block with polished peen hammer.
The two yellow squares of paper in the bottom right are 2 layers of post-it note to cushion pins while peening.
PXL_20210629_131849450.jpg


A shot of the back with collar
PXL_20210629_133759268.MP.jpg


Snip
PXL_20210629_133941811.jpg


Quick file to ensure an even pin surface.
Notice the small brush. It's for cleaning records, the long part is great at brushing away metal filings before peening and the short part must have been made for cleaning the grooves on Filarmonica scales as well as the grooves on vinyl records.
PXL_20210629_134130898.jpg


The amount of overhang I like when peening. It looks like a lot in this shot but it's just right after careful filing to this level.
PXL_20210629_134250804.jpg


Tap Tap Tap Tap Tap Tap Tap Tap Tap Tap Tap Tap Tap Tap Tap Tap Tap Tap Tap Tap Tap Tap Tap Tap Tap Tap Tap Tap Tap Tap Tap Tap Tap Tap Tap Tap Tap Tap Tap Tap Tap Tap Tap Tap Tap Tap Tap Tap (maybe 15-20 mins)
PXL_20210629_141108303.MP.jpg
 
All back together again. I'm very happy with how the melted scale problem turned out, you wouldn't know it was ever there.
Also happy with how the Lyre turned out, it is more pronounced now yet still looks appropriately aged.
PXL_20210629_143010769.jpg


Bevel set on Shapton Kuromaku 1.5k
PXL_20210629_144233410.jpg


Narutaki Mukaida Japanese natural 4+ (Super smooth lapped to 800)
Dry
PXL_20210629_162227870.jpg


Wet
PXL_20210630_143721536.jpg


Shaved with it this morning. As with most Filarmonicas it was very good, smooth and close. It's very similar to a #14.
The toe and heal are as sharp as you're going to get, the middle quarter possibly needs more work as the non-show side may benefit from another bevel set. That can wait as someone who didn't set the bevel wouldn't notice at all. (it's at 90% potential)
PXL_20210630_100554946.jpg


The back still retains 3 spots of pitting. Looks like two eyes and a nose.
More noticeable on the picture than in real life. I took them down a few microns but what's left will stay as there's nothing active there and it's barely noticeable.
PXL_20210630_100621935.jpg


Small divot in the scales at the pivot pin. I might fix this at some stage but it's really not needed.
PXL_20210630_100747835.jpg


Man you guys do some good work. Fixing the fine details. I decide to make something beautiful, start working on it, get impatient, ignore details and just make something I can hurry up and shave with LOL.


Hat is off to you. Great job.
 
Man you guys do some good work. Fixing the fine details.
It's all in the little details. If I didn't fix them I'd remind myself every time I picked it up.

I decide to make something beautiful, start working on it, get impatient, ignore details and just make something I can hurry up and shave with LOL.
I decided to do something new and a little strange with this.
I said to myself your next shave has to be with this razor. That, of coarse, meant it had to be finished.
It's been 5 days growth since I got it so it on Saturday so it got as good a challenge as it was going to get and came though admirably.

Hat is off to you. Great job.
Thanks
 
Nice work @Legion!

How the heck did you sand around the tape and not leave any lines? What type of tape did you use? I ask because when I removed the tape after doing something similar, there were scratch marks at the edges of the tape that were difficult and problematic to remove.

How thick is your 4 x 4 jeweler's anvil, and what exactly is a dampening block? I ask because my anvil/block is 4 x 4 x 3/4 inch and when I lay it on a wooden workbench it does not fully absorb the shock from the taps. Can you post a photo of the dampening block?
 
How the heck did you sand around the tape and not leave any lines? What type of tape did you use? I ask because when I removed the tape after doing something similar, there were scratch marks at the edges of the tape that were difficult and problematic to remove.

It's just normal paper masking tape, this one is about an inch thick and marketed as tape for "Cars" when painting.
I cut a strip approx the length of the etch and used a Swiss army scissors to trim it to the shape of the etch which is a lot harder than it sounds. It's important to use the scissors and not the little knife to trim as the knife would scratch right up at the etch which would be almost impossible to rectify.
As to how I avoided scratch marks at the edge of the tape. This might sound ridiculous, as I've just made it up, but I used the "Kamisori technique" TM, that is for every 7 swipes of the sandpaper down near the edge, where the spider-webbing was, I used 1 up near the etch. In other words the sanding was graduated from etch to edge biased in favor of edge.

How thick is your 4 x 4 jeweler's anvil, and what exactly is a dampening block? I ask because my anvil/block is 4 x 4 x 3/4 inch and when I lay it on a wooden workbench it does not fully absorb the shock from the taps. Can you post a photo of the dampening block?

The anvil is a half inch thick. It's surprisingly heavy for its size. The Amazon listing says it's 2.37 pounds.
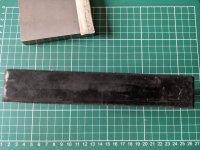
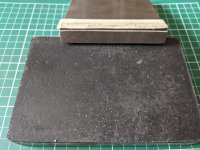
The dampening block is just a 6x4x1" block of rubber which, as you say, absorbs energy so it doesn't travel through whatever the jewelers anvil is sitting on.

Anvil on block
PXL_20210701_100003896.jpg

Block with other side of anvil
The yellow strip along the length is 3 small rectangular neodymium magnets covered in about 6 layers of the same masking tape for cushion. You have to be very careful putting a blade on this as those tiny magnets pact a hell of a punch and a razor will snap onto them if you don't carefully put the toe of the spine down first with both hands and then roll it so the edge makes contact, then carefully lower the rest of the blade on the strip.
The thickness of the magnets + 6 layers of tape allows the spine to touch the anvil and the apex to be positioned right at the edge with precision for sanding. I don't always use it as when your finished the blade has to be demagnetized which I feel can never be done 100%. I use a single paper staple (because it's so light) to test if I've removed all magnetism after using this contraption.
PXL_20210701_100030010.jpg

Thickness of block 1 inch
PXL_20210701_100101832.jpg
 
The amount of overhang I like when peening. It looks like a lot in this shot but it's just right after careful filing to this level.

When I first started peening, I left almost the diameter of the rod (1/16) for overhang but now I am finding the optimal overhang to be closer to about half the diameter of the rod. And if there is still too much play after forming the mushroom, I can simply file most of the mushroom off, squeeze, and re-peen.

Is this consistent with your experience, @Legion?

Not sure if this is directed at me or Legion?

For me it depends on the collars being used, if there are collars involved.
As the collar I used on this razor was very small I believe I used about the diameter of the pin. I don't really think about it and do it by eye.
If I was not using a collar I'd leave a bit more as it'd be a supporting structure.

If you go long you can generally deal with it but if you go short you're going to over-tighten the pivot as you chase more purchase.
On something like ivory this could be disastrous but in regular scenarios you'll just loose a collar or two.
 

Legion

Staff member
Generally the advised amount to leave as overhang is 1/2 the thickness of the rod. I’m never that exact, but I use about that to 2/3 the thickness.
 
Top Bottom