What's new

Polishing horn?

Hi All,
I am working on my first horn scales now.
506496F4-2A77-4DDC-8ACF-2BD3E40A25B7.jpeg


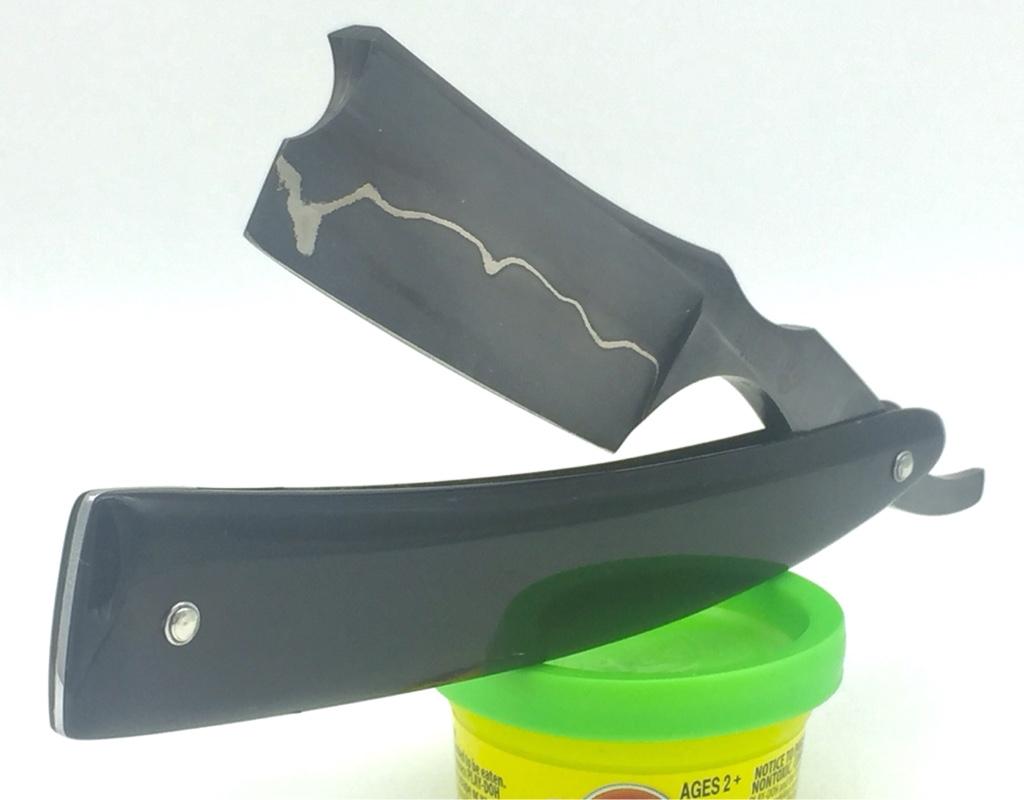
Before I start working on the ox horn, I am trying to get in some practice on Buffalo horn. My father-in-law bought a piece as a present for me and sliced it up on his bandsaw. So above what you see top to bottom - bandsaw face, shiny face as received (it is really glossier than the photo shows due to some label glue still coating the surface), plastic scales (with the white tape), my first finished (?) scales and a 2nd pair that has just been cut to shape with a bandsaw and drilled, but no sanding work yet. And NO the more finished scale didn’t start out the same size as the less finished set! :)

So from the starting material, I know I should be able to get a much better gloss than I currently have on the finished set. What I did there is machine sanded to shape with 80 and 120, then did a progression of hand sanding with dry W/D up to 1500, then used red rouge (jeweler’s polish) on a felt Dremel wheel.

The 2 thoughts that spring to mind:
1) I made too big a jump from dry 1500 to jeweler’s red rouge.
2) I need to go past jeweler’s rouge to something finer.

My options:
A) W/D - I have this at progressive increments up to about 8000. There is also the question of whether it will work better if I use them wet. I also could slap on some oil if makes sense.
B) Micromesh? Pads - I have these to even higher levels, I think 12000 or 16000 max
C) In addition to red rouge, I have white and green, but my understanding is that red is the finest of these 3
D) Diamond paste - I have 1u, 0.5u, 0.25u and 0.1u
E) For C & D I have the option of felt pads or buffing pads with my dremel

I am open to the idea of buying a polishing compound (Mother’s, Plastic Polis) etc if it makes sense, but I am kind of thinking that I already have enough (or more than enough) options that should be able to get the job done. Main issue at this point is just sorting out which options to try first. But even if you only have a suggestion as to where to focus (too big a jump, or not going fine enough), that will help me figure out which options to focus on.

I did similar experiments with acrylic earlier, I think my conclusion was that I needed to take the grit higher before jumping to jeweler’s rouge. But that was 3 months ago, and I can’t figure out where (or if) I wrote down notes on this. This time I will definitely write it down!
 
You are doing more than I do. I usually dry sand to 1000 then polish with white compound on a buffer.

Done

proxy.php


Sent from my iPhone using Tapatalk
 
A little more data from an experiment run quickly this morning.
I took a piece of the same horn. This piece has the original polished surface on one side, but my efforts to flatten this piece were unsuccessful. For now it is set aside to turn into wedges to contrast with the yellow ox horn material that I have waiting.

So I taped taped the coupon to separate into 4 segments and then went over all 4 with 1500 W/D to roughen then up.

segment D (bottom in photo below) Did White, Green, Red progression Using Dremel and felt pad. White took out the scratches, made a big impact. Green also improved noticeably. Red seemed to have very little impact. Final result was a satin finish, not as glossy as the original.

segment C (next up from bottom) Did 1.0u, 0.5u, 0.25u (all with felt pad), then 0.25u with buffing pad. This was the clear winner, Every stage (except perhaps the buffing pad) had a noticeable impact and the end result was very glossy, better than the original finish.

segment B (next up) Started with 0.25u. Left it satin. Then hit it with 0.5u followed by 0.25u. Still noticeably worse than segment C, shinier but grainier than segment D. There were a few low spots that the 1500 didn’t get into but the felt pads did. These ended up just as glossy as Segment C.

Segment A - I left untouched.

Also showing the scales after applying the 1.0u-0.25u progression to the scales. End results is that they are now as shiny as the plastic scales. They are not quite as glossy as the test coupon segment C. My take-away is that there were some scratches coarser than 1500 on my scales that hadn’t been obliterated.

Per @Doc226 comments: I guess another step would be if I can hop to the 1.0u diamond paste more quickly. After all the hard elbow work was the progression from 220 to 1500, which was done all by hand. Maybe I will take a whack at that later today.

For now I will declare these scales finished. These should be a good fit for a 4/8 or 5/8 razor. The other scales may or may not get worked on later today. Its intended for something much bigger like a 7/8 wedge. And both are really practice for making a set of ox horn scales for my 7/8 W&B. It came with an expertly attached massive fake antler scales that should have been used on a pocket knife. Throws the balance off horribly, doesn’t help that the W&B has no jimps, so the thing wants to spin in my hand the whole time I am shaving with it. I guess I shouldn’t complain, if it had had a respectable set of scales I wouldn’t have gotten it so cheap! :)

B0366DA1-1553-4FF2-ACBD-14AA472ED8DA.jpeg
 
I feel like the final shine on horns is mainly from waxing.
Using something like renwax that has poly in it really puts the final gloss on a surface.
 
For scales I usually use micro-mesh which I see you have but haven't tried yet.
The max it goes up to, mine anyway, is 12k but I can't see any reason to go higher as I doubt you'd notice.
Maybe micromesh segment D so you can compare to what you've already done. For horn I'd probably do it wet.
I also use beeswax on scales just for that final bit of shine and protection.

I don't think I'd ever use diamond paste as my OCD would kick in and I'd convince myself there's now diamond particles embedded in the scales. I have one of those packs that have 5, 3.5, 2.5, 1.5, 1, 0.5 0.25 and a syringe of 0.1, I'd use the lower stuff on a blade alright and the higher stuff on a balsa strop but it wouldn't occur to me to use it on horn scales.

Sounds like a good next step - both the micromesh and the polish. I made up some combo beeswax/carnuba which I left at my father-in-laws - I have used it for food-safe wooden items. I’ll get a piece of that and try it out.
 
I just used 00 and 0000 steel wool with food grade mineral oil on the Buffalo horn scales on my Wade & Butcher and they came out looking like new. I also bought some pure neatsfoot oil to nourish the scales, but I still have not gotten around to applying the neatsfoot oil yet.
 
Something is not right with your results. Not sure exactly but they should shine like new plastic with much less effort.

Maybe you are focusing too much on the fine particles and need to work more in the lower ranges. If you polish something that is not smooth, you will end up with polished ridges and scratches and won’t be smooth in the end. Diamond pastes etc are not needed as you can do all you need like Doc mentioned above (I don’t think he meant diamond paste by white compound). And be sure you are not burning the horn with that dremel tool and too many rpms - I like a slow buffer personally
 
Tried again last night just using the white rouge, but MORE - more rouge, more pressure, more time. I did get shinier results, still not quite as good as @Doc226 and also not quite as good as where I used the diamond paste. I suppose not all white rouge is created equal.
 
Not all wheels are created equal either. Doc's looks like a closed stitch wheel which are fairly hard.
Whatever wheel you're using have you tried raking it? If it's caked in compound it won't do any shining and may in fact burn the horn.
 
Not all wheels are created equal either. Doc's looks like a closed stitch wheel which are fairly hard.
Whatever wheel you're using have you tried raking it? If it's caked in compound it won't do any shining and may in fact burn the horn.

I have not tried raking (response delayed as I had to look that up). I did dress the wheel using 100 grit sandpaper. I do that regularly for all my felt wheels. Dremels have 2 options. A harder felt pad and a softer, fuzzier buffing pad. The one good part of Dremels is that I had bought the big bag of pads, which came with a lot of pad shafts. So I have a bunch of assembled pads on shafts loaded with different materials and kept in separate zip lock bags to avoid cross contamination. Nowhere near as heavy duty as what @Doc226 showed but its actually pretty convenient to run a grit progression with this setup and everything fits in a small toolbox.
 
Ah so all dremmel, not an actual buffer. (Forget the rake so)

I use the small felt wheels too sometimes but only on blades with a metal polish, never scales.
I think for scales a dremmel part is too small and could cause depressions if you're not careful. Horn might be ok with long consistent strokes.

Dressing the wheel is so important as, if the wheel gets caked to the point it's shiny, it does nothing but burn things especially with the high RPM of a dremmel.
As you say sandpaper is fine, I personally use one of the little dressing stones, the small rectangular blocks, that come with a stone wheel attachments set as it's more precise to use a small corner.

Did you ever get around to trying the micromesh?
 
I haven’t tried the micro mesh yet. I worked on the 2nd set of scales today. Used the power sander again for 80 and 120 grit. 220, 320, 600 W/D. Following @Doc226 I didn’t hold the sandpaper in my hand, but instead wrapped it around a wine cork. 600 W/D will give a little bit of shine. Then white rouge on the Dremel. That got a medium shine. Then I tried 0.25u diamond paste, but that didn’t make much difference - I didn’t reload the wheel and there probably was very little left. End result - a little less shine than on the first set of scales. Will still try a few things. Can always fall back on the micromesh.

I think as long as I hold off on the Dremel until the rouge stage, i don’t have to worry too much about divots.

I’ve got enough black horn for one more set of scales, or I might switch to the brown (yellow?) horn.
 
I really think you should give the micromesh a go. If you go up through the grits properly it's kinda foolproof.

If you had a full size buffer I'd recommend that for speed and go with Doc's advice.
I have one with 4" wheels but I don't use it much and I never used it on scales. I try to do everything by hand unless a power tool is essential like drilling the holes or maybe a final polish of the blade.

You say you go to 600 W/D before the dremel. Do you have anything higher than 600?
I have a feeling if you could go 800 and then to 1000 things might suddenly seem so clear.

Pay close attention to what LJS said
Maybe you are focusing too much on the fine particles and need to work more in the lower ranges. If you polish something that is not smooth, you will end up with polished ridges and scratches and won’t be smooth in the end.

Also just for the laugh, go as high as you can with the sandpaper and try any sort of metal polish. Just lay the scales on a flat surface and go mental with the polish on a cloth for 5 minutes and see what transpires. Use the other side of your test piece so you've nothing to loose.

I think as long as I hold off on the Dremel until the rouge stage, i don’t have to worry too much about divots.

Looking at your picture segment C, second last bit (the diamond paste, felt pad and dremel) it looks to me like there's two low points with a high point right in the middle from the shine on the left edge. Maybe it's just the light.
 
Its definitely a possibility. In my earlier work I took the W/D to 1500 before moving to the Dremel. I believe in the video @Doc226 went to 400. So I tried 600 to see if that was enough. And yes I do have W/D to take me almost as high as I can go with micro mesh. Just being lazy I guess.

I‘ve used micromesh on turned pens, so agree, it will get the job done. Will just take a bit longer so was trying the quick fix before going for the longer process that I have more confidence in. But I will have more time to work on it this weekend.

Thanks for all the comments!
 
If you've gone to 1500 in the past horn should be shining at that point. LJS's point may be relevant here.
Are you dry sanding or wet. If dry the paper could be clogged giving the impression, but not the reality, that the piece is smooth and ready for a step up to the next grit.
 
If you've gone to 1500 in the past horn should be shining at that point. LJS's point may be relevant here.
Are you dry sanding or wet. If dry the paper could be clogged giving the impression, but not the reality, that the piece is smooth and ready for a step up to the next grit.

dry sanding the horn so far. If I am doing wet on horn, should I use water or oil? Do you recommend wet sanding for the micro mesh as well, or just for the W/D sandpaper?

At this point my real issue is an embarrassment of riches. I have W/D up to 8000, and a micro mesh pack that goes to 12000. So in theory I might be able to almost get the same results From W/D or micromesh. Also just got some Flitz. I tried a quick hand-application, that increased the shine a bit, but my impression is that there are still some superfine scratches.

Note when I’ve done turned pens, typically I use sandpaper on bare wood up to about 2000, then apply CA, then use micro mesh to sand down the CA. I do that with dry sandpaper, dry micro mesh.

After finishing the 2nd scales, I noticed 2 small spots where I missed some clearly deeper scratches. So i think I will just go back to the 600 and start back up with the micro mesh. Luckily this set of scales was made from relatively thick material, I can afford to do a little more sanding. And of course I can always start making another set of scales. :) Just bought an old blade sans scales, so I know I have at least two heavier blades that will need scales near term.
 
Top Bottom