What's new

Ok, I'm in, pics up, what now?

Ok, You guys talked me into it. I finished getting the petrified rubber out of the handle, gave it a light rinse under warm water and a rub down with a paper towel. Looks to be a 20mm hole. Ever Ready 925 Black and Butterscotch.

In this pic, you can see the drill bit got away from me a touch and made a little egghead to the hole. I figure that it will not be seen with the knot in there. What do you think?


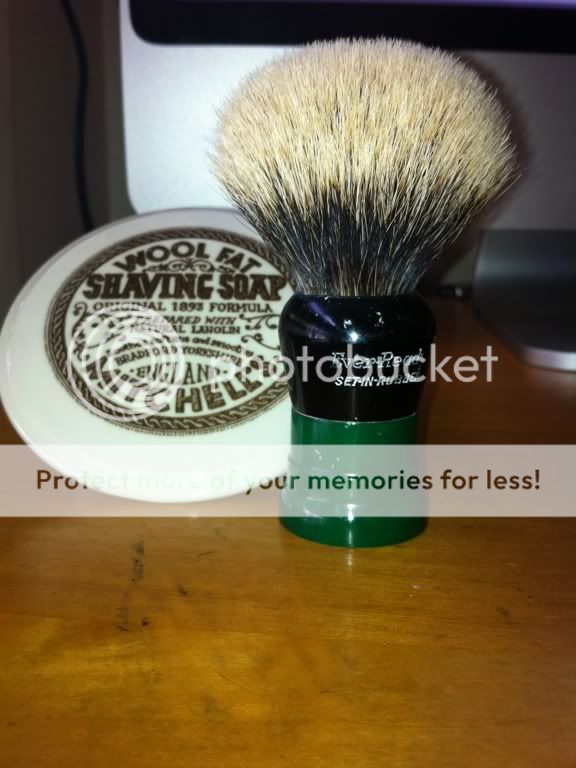
You can see the butterscotch part pretty well on this one.


The bottom is even darker.

 
Last edited by a moderator:
Now for the questions...

1) I don't want to wash off the color on the handle, but I do want to clean it well. Reading back through a bunch of posts, some people complained of ruining handles by soaks in hot water. So the Question is, What is the proper way to clean this thing up without damaging it or ruining it's character?

2) If I fill it with a wine cork, it seems like I run the risk of having water seep in (either around the knot or through the threads holding the two parts together). If I put lead shot in, I run the risk of having lead leach out. It seems that epoxy is the best overall choice, as there are several types and a million brands, What kind of epoxy is the most favored?

3) With all the choices available with respect to loft, and since this is my first restoration (and 3rd brush), is there an average preferred loft for face latherer?

4) I'm going with a Silvertip Grade A from TGN. With a 20mm hole, would I rather step down to an 18mm and know that it will fit in the hole, or go with a 20mm and have to fight it to get it in?
 
Last edited:
1) get you some Mothers plastic polish(any auto parts store) and just use a rag to rub it in and wipe it off. It's just like waxing a car. I do this to all my handles. Just yesterday I polished my new butterscotch handle and it takes a little of the color off but most of your color should be in the handle. As long as you don't go crazy on it you should be fine and have a nice shiny handle.

2)I use RTV silicone not epoxy. RTV is an adhesive/sealer and if I were you I would get you a tube of it and filler up a little below where you think you want the loft to be set, a lot easier to shim it up with a small piece of cork or something than to dig out epoxy or silicone. With RTV you can put a small dab on the bottom of the knot and still be able to get it out and test out different lofts before you set it for good.

3)Don't know this I use a bowl. I set mine to about 49-50mm though.

4)If our hole is 20mm then get the 20mm knot. You will have to rough the knot up at the base before you set it and rough your hole in the brush up too so it should make for a nice tight fit.

Good luck.
Post progress.


Also before you polish it take you a small paint brush and whatever color paint you want the writing to be, and paint the letters and then wipe the excess off. Do that a few times and let it dry and your writing will look much better.
 
Last edited:
Good start and good advice so far. I agree that the little chip won't be noticeable once the new knot is in place.

I'm looking forward to seeing the final product. Congratulations on the first steps!
 
Enlarge the hole and make it round, then lightly sand and polish the top edge of the hole so it's not jagged. It's EASY and will look MUCH better.
 
I would enlarge it also if you feel comfortable doing it, it will give you a larger knot and make it look better in the end. But being your first restore you could just leave it the way it is and chalk one up to remembering what not to do when getting a knot out.
 
There is some very good advice here so far and here is mine.

1.)For cleaning I just used a polishing compound followed by Flitz polish on my Butterscotch, if you go gently and slow you should be fine with this.

2.)I would fill the handle with a epoxy putty, I just filled 3 handles with a plumbers epoxy putty that you can get at any hardware store. As far as when it comes to setting the knot I would use a 5 minute epoxy I really don't think brand matters but a lot on here seem to like Devcon.

3.)For a loft Pobably some where between 44 and 48mm would work good if you face lather. I like the idea Matt had of using RTV and testing different lofts to see what you like.

4.)I would enlarger the hole to about 23mm maybe larger if you set you loft lower and put a 22mm knot in it, but if you are not comfortable doing this I would go with a 18mm knot for a 20mm hole.

Good luck with the restoration and please keep us updated and post pics of the final product.
 

Kentos

B&B's Dr. Doolittle.
Staff member
Good luck with the reknot. The only problem is you are goin to want to do a other when you find out how great the TGN knots are. I have the same handle in black and green hogged out to 24mm to accommodate a TGN finest. I added two nuts and some cut down wine cork to set my height in the handle. I attached everything but the knot into the handle temporarily with supeglue so I could test out different knot heights. When I was happy I poured epoxy into the handle and around the cork and nuts up to the top of the cork "shelf" let it cure, then secured the knot with more epoxy...just another way to skin the proverbial badger :).
 
Good luck with the reknot. The only problem is you are goin to want to do a other when you find out how great the TGN knots are. I have the same handle in black and green hogged out to 24mm to accommodate a TGN finest. I added two nuts and some cut down wine cork to set my height in the handle. I attached everything but the knot into the handle temporarily with supeglue so I could test out different knot heights. When I was happy I poured epoxy into the handle and around the cork and nuts up to the top of the cork "shelf" let it cure, then secured the knot with more epoxy...just another way to skin the proverbial badger :).

Thanks for that reply, I think I'll follow your lead on this one.
 
1. Toothbrush and toothpaste to clean, then if it isn't real scratched up, hand polish it with any plastic polish. I like Flitz. If it is scratched up and you want to get the scratches out you have to sand it. The grit will vary by the depth and severity of scratches. If only minor, then you can use a 3M pad, a red one.

2. Two Part Epoxy is Two Part Epoxy. Get the cheapest one if that's what you want to fill it with. I fill mine with wood filler.

3. 45mm to 48mm

4. Wait until you have the knot in your hand. Measure it, then decide what bit. Knots plugs vary, only slightly usually, but they vary.
 

Kentos

B&B's Dr. Doolittle.
Staff member
Here's mine for reference. 24mm finest extra stuffed fan shaped set at around 47mm or so. It has a bunch of back bone and in hindsight maybe setting to 50mm may have relaxed it a bit, and I tend to like to really splay the brush on my face. I like it at 47 tho and its a keeper...i set the nuts first for a bottom heavy brush...setting the nuts higher might be a good idea too so when floating in the sink it might float knot down...or at least lower than mine now...YMMV of course :)

proxy.php
 
Last edited:
Here's mine for reference. 24mm finest extra stuffed fan shaped set at around 47mm or so. It has a bunch of back bone and in hindsight maybe setting to 50mm may have relaxed it a bit, and I tend to like to really splay the brush on my face. I like it at 47 tho and its a keeper...i set the nuts first for a bottom heavy brush...setting the nuts higher might be a good idea too so when floating in the sink it might float knot down...or at least lower than mine now...YMMV of course :)

proxy.php

That looks good
 
Enlarge the hole and make it round, then lightly sand and polish the top edge of the hole so it's not jagged. It's EASY and will look MUCH better.
I knew someone would beat me to it. Sandpaper makes a quick job of it and you can easily control how much material is removed.

Devcon 5 minute epoxy. Use only epoxy if you want some weight to the handle. Use the cork (and don't worry about water leakage!) if you want the weight to stay the same.

And those recessed letters look as though they will easily accept some paint, if you want to bring them back to life. Is there a small chip or ding right next to the "R"?
 
Last edited:
I finally got some traction on this project. I didn't want to spend another dollar until I finished at least some of my last project, so I sold a couple of razors and bought the knot.

20mm Silvertip with extra stuffing from TGN.

I guess I need the Flitz to get it polished up.
 
Top Bottom