What's new

My Grande Journey

Chan Eil Whiskers

Fumbling about.
Yer cooking with gas now lol.

Shes from Atlanta Jim, and plays the club scene pretty regular from what I gather. Might be worth catching a show some night, she sure can sing.

My family was in Atlanta when the phone book was one page.

I avoid it like the plague.

I've looked for their shows elsewhere and will continue to.

Sometimes I do find reason to go to Atlanta. I think most recently we went to a traveling Broadway musical at the Fox mostly because we'd been able to get the kind of tickets which you had to get season tickets twenty years ago to get now (meaning close to the stage where you can see and hear). It was a fun day, but probably marginally worth it considering the traffic. Eight lanes of traffic (in one direction), and I do mean traffic, on a Saturday morning, is not my cup of tea.

Listening to Martha Wainwright now.

Happy shaves,

Jim
 

Esox

I didnt know
Staff member
My family was in Atlanta when the phone book was one page.

I avoid it like the plague.

Thats a long time.

I'd likely avoid it too, the same as Toronto. 5 million people in the Greater Toronto Area and I think they're all on the highway at the same time twice a day lol.
 

Esox

I didnt know
Staff member
While I was out yesterday I picked up this Dremel polishing kit.

Dremel Cleaning/Polishing Accessory Set (20-Piece)-5000684-01 - The Home Depot - https://www.homedepot.com/p/Dremel-Cleaning-Polishing-Accessory-Set-20-Piece-5000684-01/202713172

$24 in Canada! $27 with tax! What gives?!

https://www.homedepot.ca/product/dremel-20-piece-cleaning-and-polishing-set/1000100719

A better picture to see whats actually included.

IMG_3184.JPG


A stainless steel wheel, nylon wheels, grinding stones, arbors and polishing pads with a small tub of red polishing compound of some unknown grit.

With this is hand, when I get around to it, I'll give my Regent a good going over and see how good a job can actually be done with a Dremel and their attachments.

This will be the before picture.

IMG_1827.jpg


I'll do my best to duplicate the same picture when its finished.
 

Esox

I didnt know
Staff member
This is after 20 minutes work. I didnt use any wet sandpaper, but I'll have too.

The first 10 minutes using the included Dremel polishing compound No.421.

IMG_3190.jpg


The camera and lighting doesnt show it, but theres very fine metal flake in it. Its actually pretty aggressive and works more like a cutting compound than a polishing compound. It leaves light swirl marks behind.

I only used one of the smaller cotton wheels and through using it, its developing a triangular shape instead of the barrel shape it originally had. Thats a good thing.

For the second 10 minutes, I used AutoSol. That took care of the swirl marks and gave the Brass some depth, almost like you're looking into a liquid, but I think my jewelers rouge will enhance that quite a bit. I havent used it yet but I will after some light work with wet sandpaper. I'll need to get a bit of my green and red bars I gave to a friend back and use them along with my white and see which works the best.

It is now a highly reflective surface that the camera isnt doing justice. The scratches to my naked eye are barely noticeable but I want them gone.

IMG_3186.jpg


I spent some time on the safety bar too. It's coming up pretty well but will need quite a bit of very gentle polishing to make perfect.

IMG_3189.jpg


20 minutes. The same work would have been done in less than 5 minutes on my bench mounted wheel but its difficult to be as precise and theres a risk of bending the safety bar using it. Not to mention it getting caught or snagged and flying out of my hand.

Using the Dremel makes it very easy to be extremely precise. Both in location and pressure applied. I sure wish my eyes were as good as they were 5 years ago!

I'll keep working on it here and there, as well as my NEW SC, and post pics as I progress. To do this properly however, the razor would need to come completely apart and each piece polished separately. I'm not doing that though.
 

Chan Eil Whiskers

Fumbling about.
Dremel vise..jpg


My Dremel vise makes things a lot easier. The blue part was found on eBay. Actually the guy sells a couple of variations and mine's not the one pictured, but mine is similar. My Dremel is fixed in place, but I can move the object being worked on without having to mess with the tool.

Most brass in my limited experience can be hand polished. I think you taught me about that.

Just looking at the Regent in the before photos those scratches look pretty deep.

Happy shaves,

Jim
 
This is after 20 minutes work. I didnt use any wet sandpaper, but I'll have too.

The first 10 minutes using the included Dremel polishing compound No.421.

View attachment 1056801

The camera and lighting doesnt show it, but theres very fine metal flake in it. Its actually pretty aggressive and works more like a cutting compound than a polishing compound. It leaves light swirl marks behind.

I only used one of the smaller cotton wheels and through using it, its developing a triangular shape instead of the barrel shape it originally had. Thats a good thing.

For the second 10 minutes, I used AutoSol. That took care of the swirl marks and gave the Brass some depth, almost like you're looking into a liquid, but I think my jewelers rouge will enhance that quite a bit. I havent used it yet but I will after some light work with wet sandpaper. I'll need to get a bit of my green and red bars I gave to a friend back and use them along with my white and see which works the best.

It is now a highly reflective surface that the camera isnt doing justice. The scratches to my naked eye are barely noticeable but I want them gone.

View attachment 1056799

I spent some time on the safety bar too. It's coming up pretty well but will need quite a bit of very gentle polishing to make perfect.

View attachment 1056800

20 minutes. The same work would have been done in less than 5 minutes on my bench mounted wheel but its difficult to be as precise and theres a risk of bending the safety bar using it. Not to mention it getting caught or snagged and flying out of my hand.

Using the Dremel makes it very easy to be extremely precise. Both in location and pressure applied. I sure wish my eyes were as good as they were 5 years ago!

I'll keep working on it here and there, as well as my NEW SC, and post pics as I progress. To do this properly however, the razor would need to come completely apart and each piece polished separately. I'm not doing that though.

It looks to be polishing up nicely. You'll know when it's perfect.


Esox

I didnt know
Staff member
View attachment 1056846

My Dremel vise makes things a lot easier. The blue part was found on eBay. Actually the guy sells a couple of variations and mine's not the one pictured, but mine is similar. My Dremel is fixed in place, but I can move the object being worked on without having to mess with the tool.

Most brass in my limited experience can be hand polished. I think you taught me about that.

Just looking at the Regent in the before photos those scratches look pretty deep.

Happy shaves,

Jim

Yep, that would make things easier, but then I cant do it sitting watching TV with a towel on my lap haha.


It looks to be polishing up nicely. You'll know when it's perfect.


Thats Rave (I'm really a raven!) @Raven Koenes when he's cleaning his collection lol.

This is more me hahaha.

Screenshot_2020-01-27 full metal jacket pvt pyle - Google Search.png
 

Esox

I didnt know
Staff member
Since the MMOC needs a fresh blade and I already had it out, all it needed was a Feather blade.

IMG_3196.JPG


Hard to see where the bottom door starts, its so shiny.

Standard three pass, very little buffing, very close, comfortable BBS.

However... its been quite a while since I used a razor that lacks blade support and I suspect it will be quite a while again. No blood, no irritation, no problems but it was a very insecure feeling shave compared to what I'm use to...

If I was using this razor more often, I'd cut and fit a clear plastic shim then hit it with a heat gun so it takes the shape of the blade tray. Then, it would be up to my standards, and I might just do that anyway.

It sure makes my other razors look messy lol.
 

Chan Eil Whiskers

Fumbling about.
Since the MMOC needs a fresh blade and I already had it out, all it needed was a Feather blade.

View attachment 1056877

Hard to see where the bottom door starts, its so shiny.

Standard three pass, very little buffing, very close, comfortable BBS.

However... its been quite a while since I used a razor that lacks blade support and I suspect it will be quite a while again. No blood, no irritation, no problems but it was a very insecure feeling shave compared to what I'm use to...

If I was using this razor more often, I'd cut and fit a clear plastic shim then hit it with a heat gun so it takes the shape of the blade tray. Then, it would be up to my standards, and I might just do that anyway.

It sure makes my other razors look messy lol.

Looking too good to be in the same picture with those others.
 

Raven Koenes

My precious!
Since the MMOC needs a fresh blade and I already had it out, all it needed was a Feather blade.

View attachment 1056877

Hard to see where the bottom door starts, its so shiny.

Standard three pass, very little buffing, very close, comfortable BBS.

However... its been quite a while since I used a razor that lacks blade support and I suspect it will be quite a while again. No blood, no irritation, no problems but it was a very insecure feeling shave compared to what I'm use to...

If I was using this razor more often, I'd cut and fit a clear plastic shim then hit it with a heat gun so it takes the shape of the blade tray. Then, it would be up to my standards, and I might just do that anyway.

It sure makes my other razors look messy lol.
My precious, I mean Fatips, are so much more polished
 

Esox

I didnt know
Staff member
Picture time!

Regent.

Where once were scratches, there are now...much less.

That took quite a bit of work with 600grit wet paper followed by polishing with AutoSol and the Dremel cotton wheel. It has a very nice, even, reflective finish, but will improve again with the use of jewelers rouge.

IMG_3207.jpg


The SB also got a light going over with wet paper. I'm not sure it would ever get to where I'd like it to be, but its better than it was.

IMG_3208.jpg


The handle got a quick polish with AutoSol and the Dremel too.

IMG_3209.jpg


The nylon brushes in that Dremel kit work really well for cleaning the nooks and crannies, but even with the Dremel polishing compound on the bristles, they dont polish.

IMG_3210.jpg


My NEW SC.

A light polish with AutoSol. You can still see some very fine scratches. Those will come out when using jewelers rouge. As it is, its very reflective with a very even polish. The quality of the Brass is really very good in these razors as was the initial finishing from the factory.

IMG_3216.jpg


The handle also got a quick going over.

IMG_3217.jpg


As you can see, its very shiny. The camera doesnt pick up the reflective qualities of the base well enough. Its like looking at a liquid and will improve again with jewelers rouge.

IMG_3218.jpg


The bottom side of the base got a quick polish as well.

IMG_3219.jpg
 

Esox

I didnt know
Staff member
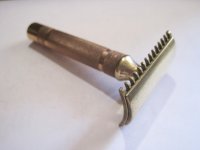
You might remember this razor...

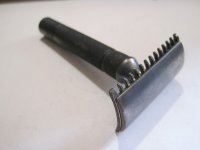
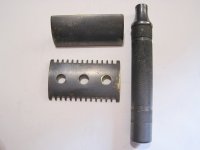
The Canadian one is undergoing an experimental transformation at the moment. I'm forcing a patina on it.

Just a preliminary test, but its looking like it will work just fine.

Below is before and after a simple quick soak in the solution. Rinsed under running water and buffed with a paper towel so it wont come off on my fingers.

More soaks, with buffing between and cure time, will increase the depth of colour. If I want it shiny new again, its a simple 10 second scrub with Bar Keepers Friend, or a few minutes with a polishing compound and back to shiny bare brass.

IMG_2653.jpg IMG_2658.jpg

IMG_2654.jpg IMG_2657.jpg

IMG_2656.jpg

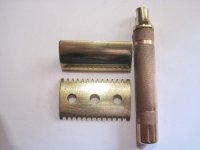
Its had a change.

I removed the patina I forced with BKF and a toothbrush, which actually took more work than I imagined.

Then I gave it a quick single polish with AutoSol so I could see what I was working with.

IMG_3211.jpg


IMG_3212.jpg


Still showing remnants of the forced patina, I'm surprised how well that solution penetrated the Brass, but it really is dead straight and square.

IMG_3213.jpg


This razor will need a lot of work to give it a glass like finish and I'm honestly not sure if I will. I may just artifically age it with the solution again and call it good.

IMG_3214.jpg
 

Chan Eil Whiskers

Fumbling about.
Nice, Mike.

Looks like you're having fun making 'em look good.


MMOC.open.handle.shiny.640.JPG


The old brass GEM/ER razors polish up amazingly well in my experience (and I did it all by hand mostly just using a brass toothbrush, rags, and Flitz).

Brass is beautiful!

Happy shaves,

Jim
 

Esox

I didnt know
Staff member
The hard part would be stripping the chrome without damaging the brass. I might give that a go if I get bored enough haha.
 
Top Bottom