What's new

My First Brush Restore...

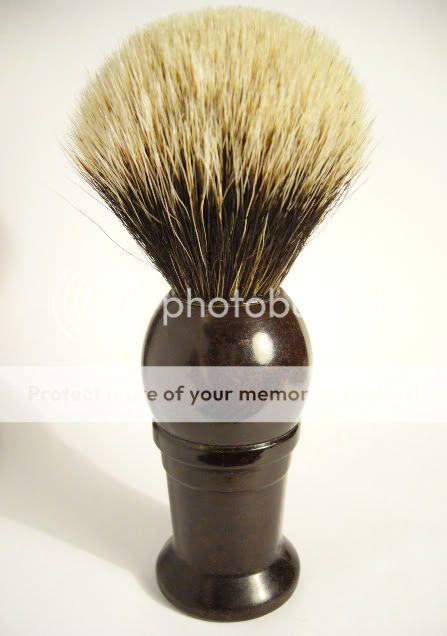
I got my Fuller brush today and it looked good no major cracks or scratches. I took the knot out and drilled out the base and now I have a hollow handle.

I have this Loctite Plastix Bonder and I hope it works. I've never used a bonder before so I'm alittle nervous about using it. If anyone has any advice for me before I start that would be great.

I also have no idea how big this hole is and what size knot to order from Nibs!? I know that I want the knot to have some backbone to it maybe 45mm? If anyone could show me a great knot for this brush that would also be greatly apprectiated.
 

Legion

OTF jewel hunter
Staff member
From memory the hole in those brushes is about 20mm? Someone will correct me if I'm wrong. For gluing brushes I would recommend buying some two part epoxy rather than plastic bonder.

There are a lot of choices regarding knots. I'm partial to The Golden Nib's finest badger, myself. Here is what the 20mm looks like, set at about 50mm

proxy.php
 
Last edited:
Arggh, can't remember and didn't write it into my restore thread.

I do know that I've got a 20mm Finest set at 45mm on mine, so it's at least 20mm :biggrin1:
 
I set two 20mm Finests at 45mm--one a fan the other a bulb extra stuffed. I really like the ES set at 45mm...I would prefer the fan at ~42mm.

That looks like it will be a great restore.
 
So my knot should be a 20mm finest extra stuffed. What can I shine this sucker up with? What about a loctite Marine Epoxy would that work? Sorry for all the stupid questions.
 
Slap a ruler across the top of that before you order (if you only plan on ordering one knot)...to verify that it is 20mm +.

The Extra Stuffed set at 45mm needs about 22mm at the top to fit. That is one dense knot. The 20mm fan set at 45 will go in about a 21mm hole.

That locktite epoxy should do...check the cure time on it. I do not like 5 minute stuff as I always feel pressured to get everything squared up too fast. I use 24 hour set epoxy..but something with a half hour set time would be fine.

I use Wenol polish...Flitz also works. Any mild metal polish should work quite well. Do not be too agressive on the base of this though.
 
Last edited:
I grabbed some better epoxy and filled it about 3/4 of the way. I ran into a few issues. While it was sitting I noticed some heat that was about 20 min into the curing. Then about 1 hour in I noticed that around the top of the epoxy had shrunk and there was space. Then I noticed alittle epoxy seeping from the line where the black and orange meet.

I quickly cleaned it away and taped it real tight from topand to bottom to try and hold it tight. Anyone had any of these problems? Am I still ok?
 
I've always used something as a fill with the epoxy. For handles my preference has been a wine cork trimmed and whittled down to fit. How did it work out?
 
I'm guessing its ok. I wish I would have used a cork to fill it but you live and learn. I'll let it set for a few days before I order my know as I'm still not sure what size knot to use.
 
I just did a similar restore, just finished it yestersay.

I Filled the center with 2 part clear auto/marine epoxy no extra filler, worked just fine. And the hole for the knot is about 20mm, but I used a 22mm Silver tip from TGN. All I ended up doing it using the dremmel I sanded the whole a little larger a little bit at a time until I got the new knot to fit. Then set the loft and epoxied in place
 
Nice....it is a great feeling finishing your first brush.

On a side note I used Meguiar's PlastX on my handle it polished it up to a fantastic shine....I can see myself in the black bakelite and it brought out the swirls in the orange section.
 
I'm thisnking of setting it at about 48mm! So hope fully I wont have to drill it out much.
 

Legion

OTF jewel hunter
Staff member
To polish you can sand it with fine wet dry sandpaper and then buff with brasso. That should get it shiny!
 
Don't think you'll be disappointed.

I used this knot in my FIRST restore and it's this brush/knot and a Silvertip A that are really the only 2 brushes in my rotation.......

( My other 7 restored brushes with other knots just sit in a cupboard till I find the appropriate display cabinet :glare: )
 
Last edited:
Among the problems encountered when using some epoxy adhesives on old brush handles is the exotherm, or heat kick, that is generated when the epoxy polymerizes (hardens). This is something especially prevalent with fast-setting epoxies. Usually you will find that the faster the epoxy; the greater the heat kick. And along with the unwanted heat you will normally experience unwanted shrinkage. The heat aspect is especially nasty if you have an old handle made of two different materials which are held together with old glues. This glue is sometimes hide-glue, which will promptly melt when heated.

All this I learned the hard way. My first project was a beautiful ivory (the real deal... elephant ivory) and ebony handle that looked something like a Simpson #3 Tulip. I intended to use five-minute epoxy to fill most of the cavity (it was about 1" deep) to within about 1/4" of the top. Bad idea... the heat-kick separated the ebony ring about half way around, and then a jagged crack went through the ring the rest of the way. Fortunately I have a friend with a lathe, who also happens to be a gunsmith. After he reamed the hardened epoxy out of the handle for me, we glued the handle back together with cyanoacrylate glue (super glue... super strong and no glue seem). Now that I was back to where I started, he suggested that I use an epoxy called Acraglass Gel. This is a slow setting epoxy that is used for bedding rifle actions into wood and plastic stocks. And, because shrinkage and heat cannot be tolerated in that application, it is perfect for setting knots in shaving brushes. The stuff isn't cheap, at $18 street-price for the kit, but I have used the same kit for four brushes (and a bunch more other repairs) and I still have enough left for about ten more brush restorations.
 
Last edited:
Top Bottom