Cool. No hurry.
I wish I were decent with my photoshop-clone program, but I'm terrible at it. I need lessons from a teenager.
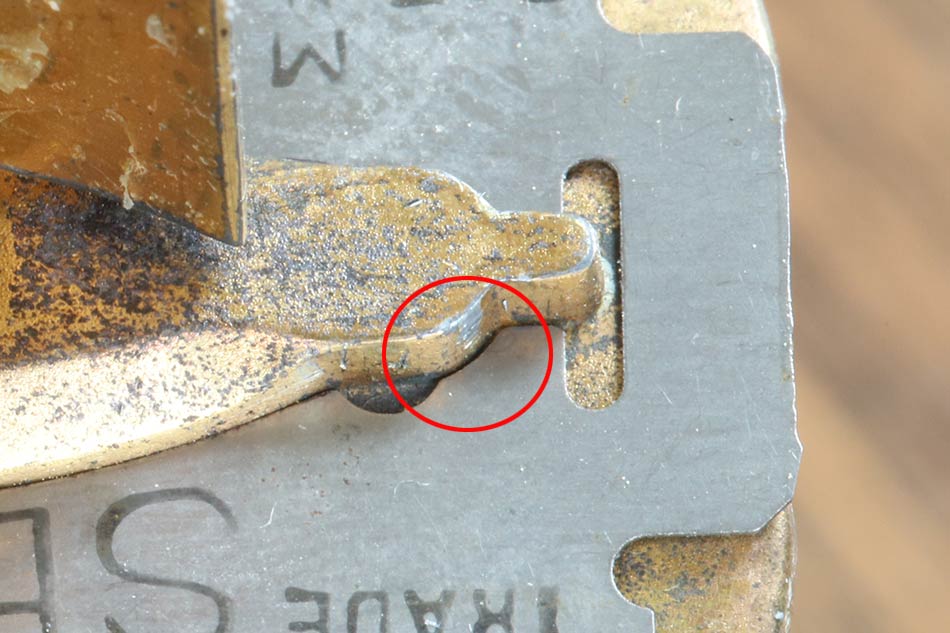
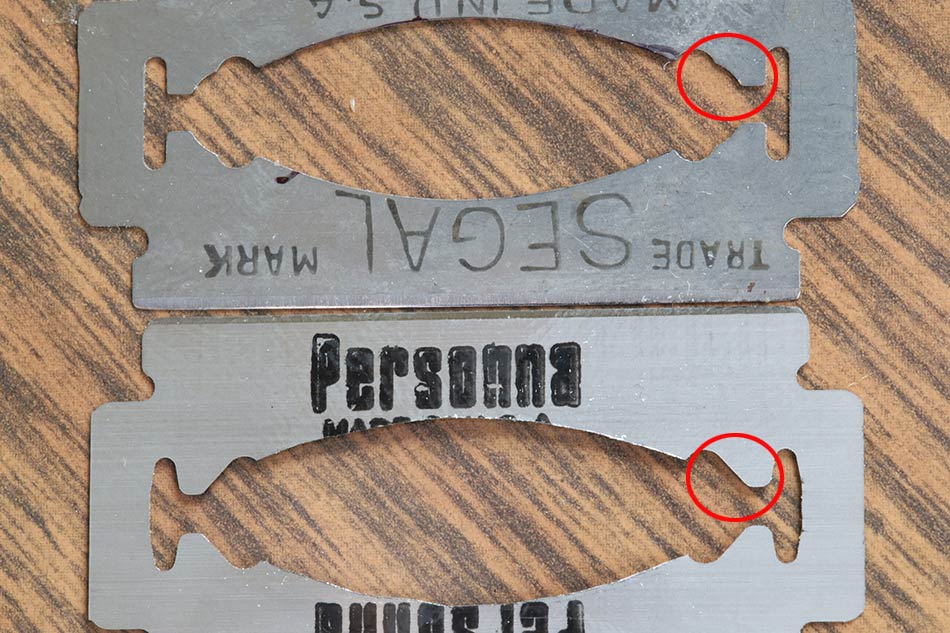
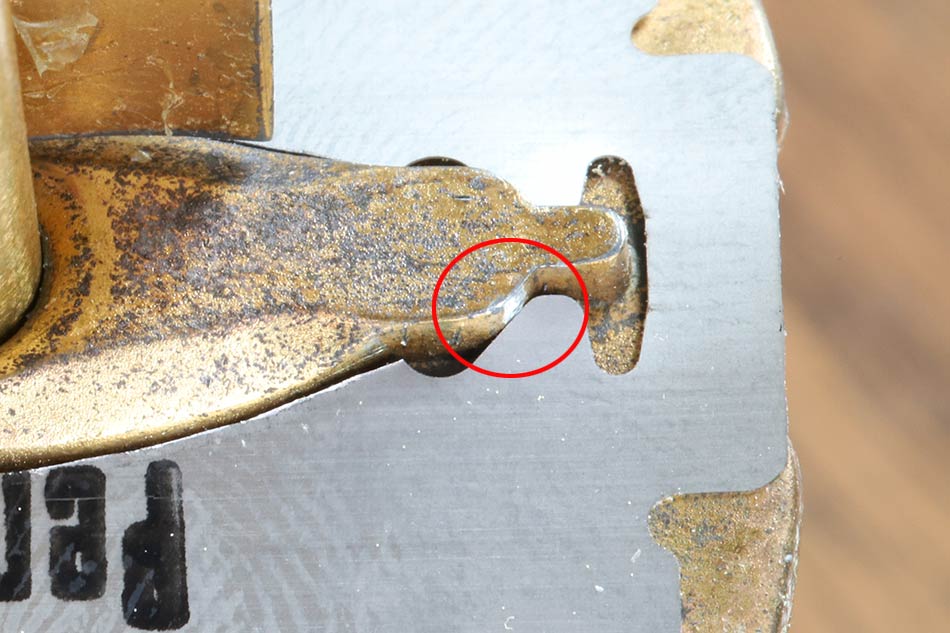
So after giving this some thought through the day then finally getting some blades in front of the camera, I see what the last major difference is between the Segal blade and the Gillette design, with respect to modification. The end tabs that position the blade are shaped differently. Here you can see how the Segal has just a tiny bit of metal removed at the indicated spot on the tabs, in comparison:
So this time instead of freehand, I did the Sharpie outline, and just ensured my cut fell completely outside the black line. The first attempt this afternoon went perfectly. As I mentioned, this may have already been obvious to others but I didn't "put two and two together" until this weekend.
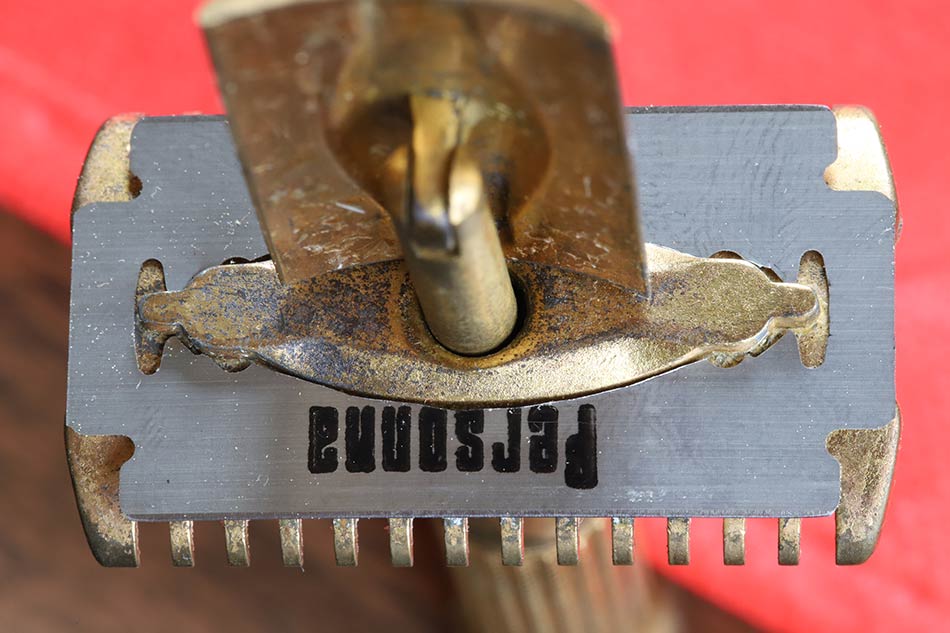
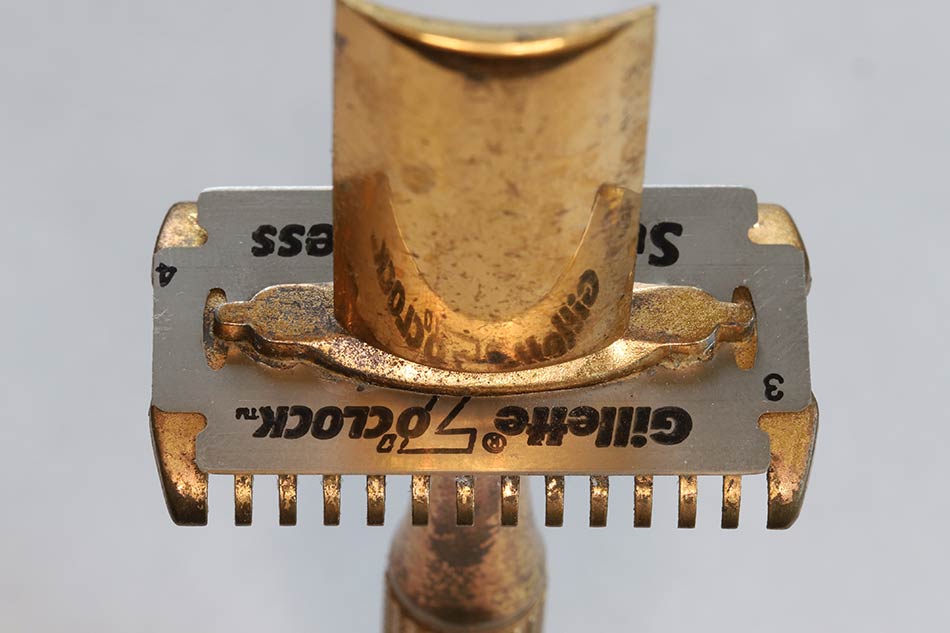
Here is the loaded Segal blade:

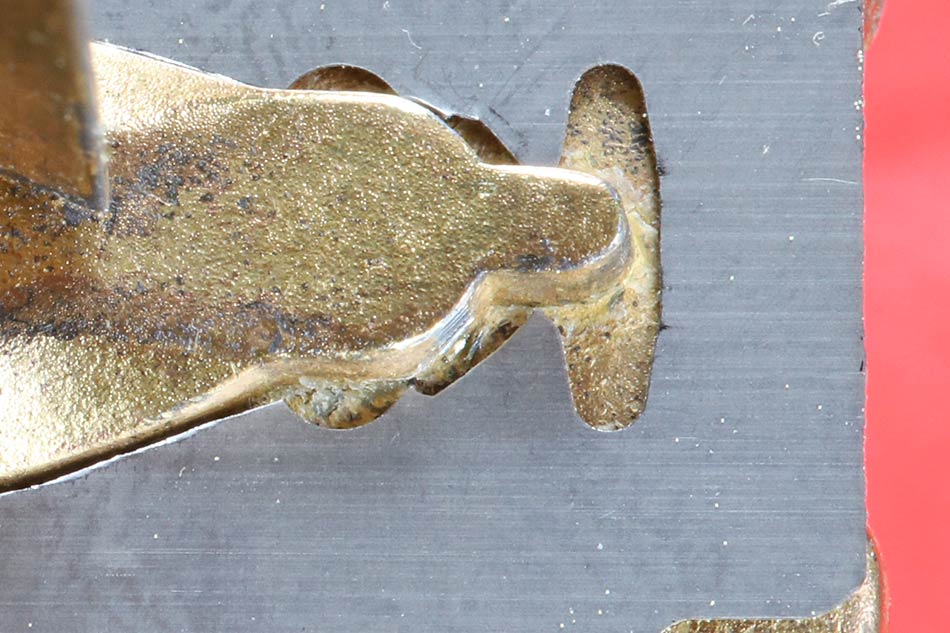
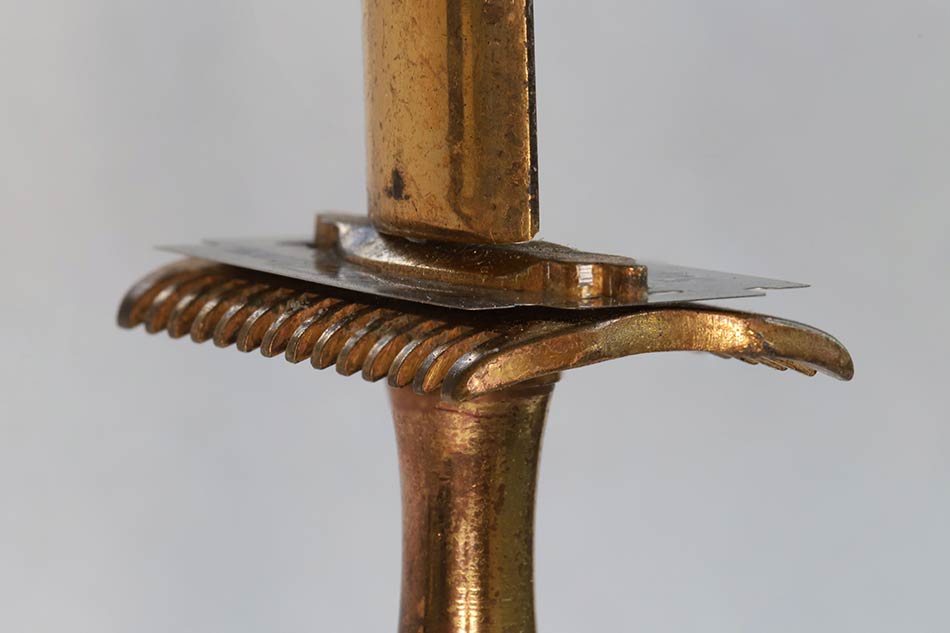
I'm inclined to say it's not worth me trying to nip off that tiny bit of metal, only because it will be too easy to overcut and ruin a blade. Better for me to simply push these tabs down. They will flex up a bit, and you can see where I am wearing off metal from the razor at that point doing this:
But leaving them a tight, press down fit will still keep the side to side positioning integrity I believe, and be better for assuring blade alignment. I only have cut Personna blades but I would guess just about any other modern blade should be shaped nearly identically. If those tabs are evenly pressed so they both have approximately the same amount of side to side contact, all should align well. Much of what will make that easier would be to have the oval cut reasonably close to the correct size. An overly generous oval cutout could permit one tab to flex up while the other stays straighter, skewing the blade alignment.
So along that track I'm going to return to the Sharpie outline method. When I align the blades for marking I do so with the edges sitting on a piece of wax paper, to reduce the possibility of causing edge damage.
The things we do in the name of shaving.
")