
My experience with film exactly. Even though I was getting excellent edges, I went and bought a set of Shapton stones. Bad move and total waste of money. Even with continued use and knowing how to hone, I never achieved an edge as good as the film. In any case, if you get the urge, think twice. My only experiment as of late is comparing diamond pasted edges to a 14k finish. Both provide excellent results but a slightly different feel. I like both and will try 14k on a few other bladesI’ve been experimenting with different grips and strokes and really got a good pace like this. When I flip the edge up I have some trouble with my return stroke, and also get slower. I guess it’s a matter of motor skills and practice. The way shown in the video is fairly new to me, but I was happy with the consistency and speed I was able to achieve. It was also my first time using acrylic and hand honing with film, I think it was pretty decent. Before that I was using a bench marble tile, but the hand honing is easier to keep the pressure light while being consistent and relatively fast. Also easy to clean up the hone between different grits (not the case of today’s session)
about my edges... since I discovered lapping film over a year ago I’ve been getting the best shaves of my life. I don’t think it can get much better than this. HHTs are amazing, shaves are smooth and the edges are sharp and long lasting. I showed a HTT to my wife and even she was impressed, hehe
I’m looking forward to trying balsa with diamond pastes, but I certainly could live with my current edges without a problem.
Yesterday I did a full honing from bevel correction with 12u through 1u on my new razor that was lacking sharpness from the factory the same way you see in the video and today’s shave was remarkable.
One of the things I like the most is to strop a freshly honed razor. The way the edge sounds is just beautiful
You are using an out of date browser. It may not display this or other websites correctly.
You should upgrade or use an alternative browser.
You should upgrade or use an alternative browser.
Lapping film, try it.
- Thread starter Blix
- Start date
Slash McCoy
I freehand dog rockets
I have been experimenting with PSA films lately. The jury is still out. IF THEY ARE PROPERLY APPLIED, WITH ZERO BUBBLES OR DUST OR LINT UNDERNEATH, they seem to be of adequate tolerance at least up through 3u, and maybe all the way out to 1u. The problem is getting the film stuck to the plate perfectly. It is very easy to fumble the ball and leave an air bubble beneath the film. When you pull it up to try to reposition, the adhesive layer is disturbed and the film stretched or even creased. I have wasted several pieces of film. I am experimenting with various methods of applying it including applying it underwater in a sink. Piercing bubbles with a needle raises a tiny burr in the film's surface. I am thinking about drilling a couple hundred very small holes in the acrylic plate and lapping it down smooth, to relieve bubbles but that would be a lot of work. Next time I get a bubble I might try slicing lengthwise through the bubble, with a DE blade or exacto blade. Maybe that would work better than a poked hole in the film. Poking a hole in the film to relieve a bubble does not disturb the surface greatly at coarse grits but at 3u and 1u it puts deep scratches in the bevel of the razor being honed.
The best method I have found so far of applying PSA film is to peel the backing off about 1/3 and gently fold it down the strip of film. Then I align the protected corner that will be at the right hand edge of the plate with the corner of the plate, and also align the film edge with the edge of the plate, and as I hold up the unprotected end, I carefully press down on the film right next to where the backing is folded underneath it. Then I begin rolling it down onto the plate with the edge of my left hand as I hold tension on the unprotected corner with my right hand. When all of the unprotected film is adhered to the plate, I lift up the 2/3 of the film that still has the protective backing, reach underneath it and grab the bitter end of the backing paper with my left hand, and begin pulling it bit by bit as I roll the newly exposed film onto the plate with the edge of my right hand. As the protective paper is pulled out from beneath the film, the film is pressed onto the plate. When only a little of the backing paper remains stuck to the film, I stop and hold the end of the film up as I remove the paper, then carefully roll that last bit onto the plate.
Because of the difficulty in doing this perfectly, I still recommend plain back film generally. I am only messing with PSA because I have been doing an awful lot of honing recently and it is faster to dedicate a plate to each grit and leave the film stuck on. Generally I still stay with the plain back for the 1u stage though I have used the PSA 1u film and it seemed to be not too bad. I follow up the film with a pasted balsa progression, anyway.
Plain backed film won't let you down. PSA film can. Some guys buy PSA film and leave the backing paper on. Remember that the backing paper is not made to tolerance! Plus it can swell from water, and you are paying extra for it. It makes no sense to buy PSA film, and leave the protective backing paper on, and float it on the plate.
I have said all along that The Method has evolved and may continue to evolve. PSA use might or might not become part of the Method credo.
I have been using PSA-backed 3M for over a year without a problem. In some countries it's the most readily available option.
It's annoying when a hair or dust particles stick to the adhesive, but you can remove them with water or your nail and it's fine.
It's annoying when a hair or dust particles stick to the adhesive, but you can remove them with water or your nail and it's fine.
I have the PSA stuff and don't want it haha. It's still unused. Can somebody please post a link or something to the correct film I need to buy?
It is available on eBay in assortment packs for about $25 including shipping. Expecting two packs any day now. Just search “lapping film” and find one that ships from the US.
Would 10mm (3/8") Plexiglass be thick enough to hone on, or would that be to thin?
Slash McCoy
I freehand dog rockets
Too thin, IYAM. As you have read, The Method specified 3/4" or 1" thick, for very good reasons. If you are willing to make one compromise, you will make others. They add up. You end up getting an okay edge or maybe a great edge, when you could have had a WOW edge. Random materials and random techniques get random results. Meh. You are probably tired of mediocre results or you would not be reading this thread, right?Would 10mm (3/8") Plexiglass be thick enough to hone on, or would that be to thin?
^^^
Thanks for getting back so quick.
I thought it would be to thin, just wanted to verify.
I'm not stuck as I have 10mm glass, which is ideal for sharpening my knives, however, it's a bit heavy to hold comfortably for Straights. At the moment 3/4" or 1'' Perspex is difficult to obtain in Australia and shipping charges to Australia make it prohibitive.
rbscebu
Girls call me Makaluod
I disagree with Slash on this one. I could not access thick acrylic for love or money. The thickest I could get was 8mm.Too thin, IYAM. As you have read, The Method specified 3/4" or 1" thick, for very good reasons. If you are willing to make one compromise, you will make others. They add up. You end up getting an okay edge or maybe a great edge, when you could have had a WOW edge. Random materials and random techniques get random results. Meh. You are probably tired of mediocre results or you would not be reading this thread, right?
To use the acrylic, I glued it to a piece of 6mm thick ceramic tile cut to the the same size. This was done to keep the acrylic stable. I then glued some light wood about 18mm thick to the tile piece. This gave the whole setup some thickness to protect my delicate manicure from the blade while honing hand held.
I disagree with Slash on this one. I could not access thick acrylic for love or money. The thickest I could get was 8mm.
To use the acrylic, I glued it to a piece of 6mm thick ceramic tile cut to the the same size. This was done to keep the acrylic stable. I then glued some light wood about 18mm thick to the tile piece. This gave the whole setup some thickness to protect my delicate manicure from the blade while honing hand held.
A good Idea. I would mess about too, if I had a half decent workshop to play in, so I go for the easier option.
A good Idea. I would mess about too, if I had a half decent workshop to play in, so I go for the easier option.
I have used 20mm and 15mm successfully, but when I tested 5mm it was not truly flat.
Hooray! Finally read all 143 pages.
Early on in the thread, I thought this is going to be an interesting read, especially on discovering that one of the main protagonists had managed to get himself banned on a different SR forum for promoting the virtues of lapping film, big lol.
I'm a long time DE saver and purchased my first SR way back in 2008 from here off Buy-Sell-Trade and added to that with a couple off EBay. However, I lost interest when the blade dulled and wasn't prepared to invest in expensive stones.
It was sharpening my own kitchen knives and wanting to get a better edge, that reignited my interest in Straights, as I only had a King 1000/6000 stone, a balsa strop, loaded with Autosol, with a homemade Kangaroo skin paddle strop and needed a finishing stone, but didn't want fork out the coin. I'd seen the lapping film on Utube for knives and tools and it all clicked when a link sent me back to this forum. So far I've put a bevel on my 3 SR's using the King and I'm just waiting for some ordered film, which is late to arrive and complete the journey.
A very enjoyable and knowledgeable thread to read, thanks to all.
rbscebu
Girls call me Makaluod
I agree. I found the same with 5mm. 6mm is generally what I would consider to be the absolute minimum to use. A minimum of 8mm is better.I have used 20mm and 15mm successfully, but when I tested 5mm it was not truly flat.

 Finally made it through all 143 pages. I am waiting on an invoice from NanoLapTech and then hopefully, my film will be on its way. I have wanted to try shaving with a straight razor for a while, but did not want to have to buy the stones to keep it sharp. After reading every post in this thread, I think I am going to give it a go. While I wait on my film, I plan to read the other threads in the Method. Once my film arrives, I will skim back over this thread before using it.
I have been experimenting with PSA films lately. The jury is still out. IF THEY ARE PROPERLY APPLIED, WITH ZERO BUBBLES OR DUST OR LINT UNDERNEATH, they seem to be of adequate tolerance at least up through 3u, and maybe all the way out to 1u. The problem is getting the film stuck to the plate perfectly. It is very easy to fumble the ball and leave an air bubble beneath the film. When you pull it up to try to reposition, the adhesive layer is disturbed and the film stretched or even creased. I have wasted several pieces of film. I am experimenting with various methods of applying it including applying it underwater in a sink. Piercing bubbles with a needle raises a tiny burr in the film's surface. I am thinking about drilling a couple hundred very small holes in the acrylic plate and lapping it down smooth, to relieve bubbles but that would be a lot of work. Next time I get a bubble I might try slicing lengthwise through the bubble, with a DE blade or exacto blade. Maybe that would work better than a poked hole in the film. Poking a hole in the film to relieve a bubble does not disturb the surface greatly at coarse grits but at 3u and 1u it puts deep scratches in the bevel of the razor being honed.
The best method I have found so far of applying PSA film is to peel the backing off about 1/3 and gently fold it down the strip of film. Then I align the protected corner that will be at the right hand edge of the plate with the corner of the plate, and also align the film edge with the edge of the plate, and as I hold up the unprotected end, I carefully press down on the film right next to where the backing is folded underneath it. Then I begin rolling it down onto the plate with the edge of my left hand as I hold tension on the unprotected corner with my right hand. When all of the unprotected film is adhered to the plate, I lift up the 2/3 of the film that still has the protective backing, reach underneath it and grab the bitter end of the backing paper with my left hand, and begin pulling it bit by bit as I roll the newly exposed film onto the plate with the edge of my right hand. As the protective paper is pulled out from beneath the film, the film is pressed onto the plate. When only a little of the backing paper remains stuck to the film, I stop and hold the end of the film up as I remove the paper, then carefully roll that last bit onto the plate.
Because of the difficulty in doing this perfectly, I still recommend plain back film generally. I am only messing with PSA because I have been doing an awful lot of honing recently and it is faster to dedicate a plate to each grit and leave the film stuck on. Generally I still stay with the plain back for the 1u stage though I have used the PSA 1u film and it seemed to be not too bad. I follow up the film with a pasted balsa progression, anyway.
Plain backed film won't let you down. PSA film can. Some guys buy PSA film and leave the backing paper on. Remember that the backing paper is not made to tolerance! Plus it can swell from water, and you are paying extra for it. It makes no sense to buy PSA film, and leave the protective backing paper on, and float it on the plate.
I have said all along that The Method has evolved and may continue to evolve. PSA use might or might not become part of the Method credo.
I've found the easiest way to apply the film to the plate is to spray the plate and film with water, this will allow you to slide the film about if misaligned. Also you can re-lift the film multiple times until you get it correctly placed. Either a credit card or squeegee can be used to smooth the film down without air bubbles. I finish off with the squeegee on top of a piece of parchment cooking paper. it's best to let the film dry out for a couple of hours, or overnight after using this method, before honing.
Slash McCoy
I freehand dog rockets
Didn't work very well for me. The PSA film doesn't slide at all. When it touches, it sticks, even when wet. And any time I have to peel it back up, it stretches and creases the film. For me, the best way is to line it up exactly right and just roll it down onto the plate. YMMV. It might be a workable method for some folks but not for me. I have been meaning to try it in a sink full of water, with the plate actually under water, just haven't got around to it yet.I've found the easiest way to apply the film to the plate is to spray the plate and film with water, this will allow you to slide the film about if misaligned. Also you can re-lift the film multiple times until you get it correctly placed. Either a credit card or squeegee can be used to smooth the film down without air bubbles. I finish off with the squeegee on top of a piece of parchment cooking paper. it's best to let the film dry out for a couple of hours, or overnight after using this method, before honing.
This is a BIN link:
Does this look good enough?
I'm struggling to find lapping film without the PSA backing here in the UK. I don't want to have several pieces of acrylic - trying to keep the setup as minimal as possible!
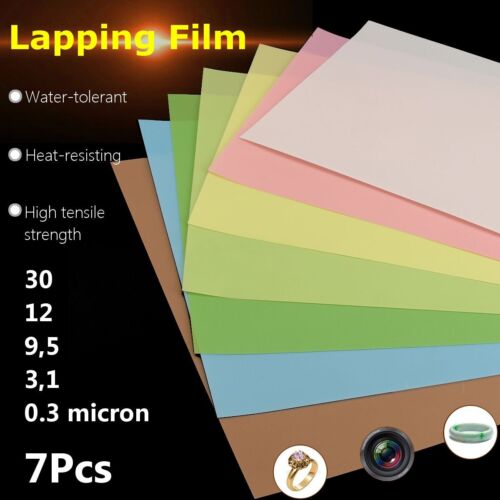
Pack Of 7 Lapping Film Sheets Superfinishing Fine Polishing Maintenance Paper | eBay
Find many great new & used options and get the best deals for Pack Of 7 Lapping Film Sheets Superfinishing Fine Polishing Maintenance Paper at the best online prices at eBay! Free delivery for many products.
www.ebay.co.uk
Does this look good enough?
I'm struggling to find lapping film without the PSA backing here in the UK. I don't want to have several pieces of acrylic - trying to keep the setup as minimal as possible!
Last edited:
Nevermind!
I've ordered a 20mm thick piece of acrylic it's 12"x 3".
I've also ordered 30, 9, 3, 1 micron 3M lapping film.
I've already got a linen strop with crOx and my leather strop of course.
I'm excited to work through the 'Method' on one of my vintage straights!
I've ordered a 20mm thick piece of acrylic it's 12"x 3".
I've also ordered 30, 9, 3, 1 micron 3M lapping film.
I've already got a linen strop with crOx and my leather strop of course.
I'm excited to work through the 'Method' on one of my vintage straights!
Nevermind!
I've ordered a 20mm thick piece of acrylic it's 12"x 3".
I've also ordered 30, 9, 3, 1 micron 3M lapping film.
I've already got a linen strop with crOx and my leather strop of course.
I'm excited to work through the 'Method' on one of my vintage straights!
you may use the same piece of acrylic even wish PSA films... they stick like a post-it, so every easy to attach and detach. Enjoy it!
Took my razor through the progression.
I set the bevel on 30u... It took a long time to get a good burr across the whole of the blade... The middle part was stubborn, but I got there in the end. Then I ran through 60 laps on each of the 9, 3 and 1u films. It tree tops hair like crazy all along the blades edge! I have not used any picopaper or crOx or anything!
Test shave tomorrow!
It was a little time consuming, but very simple to do!
Similar threads
- Replies
- 2K
- Views
- 83K
- Replies
- 33
- Views
- 4K