What's new

Kamisori honing

Hi everyone,

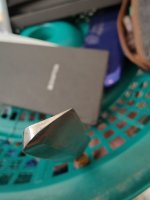
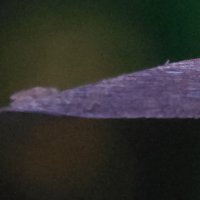
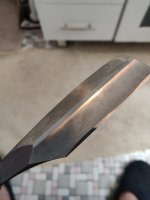
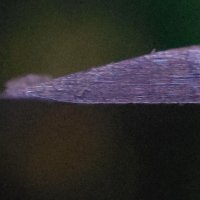
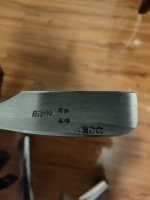
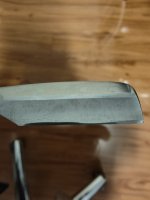
I have been trying to get a new kamisori to be shave ready and by training to imitate some YouTube videos with no luck. I've been trying to set a bevel with a shapton 2000 glass stone and before I get rid of even more metal I thought of trying my luck for advice. Not sure if there's anything equivalent to the burr method for kamisoris. I've attached photos if it's any help.
 

Attachments

  • IMG20210925122554.jpg
    IMG20210925122554.jpg
    6.1 MB · Views: 49
  • IMG20210925122252.jpg
    IMG20210925122252.jpg
    1 MB · Views: 53
  • IMG20210925121737.jpg
    IMG20210925121737.jpg
    5.5 MB · Views: 50
  • IMG20210925122250.jpg
    IMG20210925122250.jpg
    1.5 MB · Views: 52
Like any edge, Kamisori edges make burrs as you sharpen, so the burr method applies.

What I think I see in your third picture is a polished heel, an oddly small bevel on the toe side of the middle, and an unpolished toe. A picture of the bevel on the other side might be useful.

It looks to me as though you are putting weight on the heel side, favoring it as you hone. You need to be more even front-to-back, and get similar contact/pressure on the toe side. This is a common mistake; I've rehabbed a number of used kamisoris where the honers did the same thing. It's really easy to do if you are not paying close attention to the toe getting as much contact/pressure as the heel.

Holding the stone flat on my palm, down by my knee helped me naturally apply pressures where I wanted them as I honed. Alternately, if you have a holder for your stone, you could hone on the bench, and rest a finger very lightly on the toe side, to make sure you are honing evenly.

Use little to no pressure. This is a new razor, so very light pressure is the way to happiness. Pressures above "the weight of the razor" are only for fixing major problems.

So, next step: slightly emphasize the toe, get that side polished the same all the way along the bevel. Then feel on the other side to see if you have a burr. If you do, all is well. Same process on the other side (it will probably take far fewer strokes). Then edge-leading strokes on alternate sides until the edge is nice and scary all the way along (cutting into a cherry tomato with different parts of the blade is a common test for a good apex). Then you can move on to the next stone.

If you haven't watched Doc226 videos yet, I recommend them. His videos made me a much better honer.
 
I use the fingernail, tomato, arm hair shave tests. IME you need some torque when honing a kamisori more so than a hollow ground , when bevel setting
 

Kentos

B&B's Dr. Doolittle.
Staff member
What does the Ura look like?

Here is one of my shave ready ones
image.jpg

image.jpg

image.jpg


You will get uneven wear on most traditional Kamisori as they are hand made. What ratio are you using? There is so little metal on a Kamisori that I don’t try to get a burr, rather I do a 5:1 ratio until I establish a bevel which for myself means it will treetop my leg hair.
 
Are you using the shapton hr or the regular one? Is it a hard steel or is it on the softer side (below 60)?
If you get good results with your other kami, and if this is different, a different stone might be better suited. I have one razor on the softer side, which i don‘t like using my shapton’s on. Me Naniwa gouken stones seem to do better on some steel.
TI razors seem to like shapton hr more.
 
Hmm. There are some suggestions made I’m not sure if I agree with.

But at the end of the day you simply need a good edge. I don’t like lap counts and ratios like many seem to, and I also find kamis to be the easiest to sharpen…….also notice some people eat them up on stones getting no where.

I’m going to use English terms and not Japanese ones here. Think of the kami like a chisel with a flat side and a bevel. Work the flat first and get it flat - this is the first stage and the primary work. I often use a lot of pressure here (good luck flexing most kamis). Then flip it and work the bevel side very finely for a very fine edge. I’ve seen quite a few famed Japanese hone masters do exactly this way numerous times with little effort, fewer strokes, and acclaimed success. You should give it a try if you haven’t. Flat first -100%, then flip and hone bevel side. Don’t do it that way or go back and forth and you will not have the same results.
 
Here is a good example. See how much the flat is worked? The bevel side is for the fine tuning. Heavy lifting done to the flat side primarily like a chisel.

 
A large part of honing is pressure, knowing how much pressure and when to use it, is key, and a definitive bevel set test.

Note in the Gilmore/Sakamoto video how much pressure he is using on the razor, (watch his fingers). He is also using a fine stone and nagura, going to a 2 k you are not going to get a fine edge, but a rough one. There is a lot of “weight of the blade” advise, that is misunderstood. There is a time and place for that, but generally not at bevel setting.

Being able to verify the bevels meeting is key. The most definitive, (and easiest) way to verify a fully set bevel is to look straight down on the edge, any shiny reflections are where the bevels are not meeting.

TNT, Hair, and Tomato/grape test work but each must be calibrated and multiple test to the whole edge. Of the three above the tomato test is the most accurate.

Below is a great video of Doc226 honing a razor and using the tomato test, note how he repeatedly test cut the tomato on the whole edge. He has calibrated his test to a high degree.

Doc’s talks about pressure on the stones in the progression and demonstrates the tomato test, note how he tests the whole edge.

Doc has “calibrated” his tomato test, in his hands and brain. Not just that the edge cuts, but how much pressure, how it feels and is consistent from heel to toe. Calibration takes time to acquire, looking straight down on an edge, no matter your experience, one can see if a bevel is fully set, or not.

All test work if you know how to use them and understand what the results mean.

Honing kamisori is technically different from side to side, but the principals of honing a razor are the same, pressure, fully setting a bevel, testing, polishing, and finishing.

 
Some extra pics. To answer a some questions above, I've been using a 7:1 ratio on a shapton hr grit 2000.
 

Attachments

  • IMG20210926100051.jpg
    IMG20210926100051.jpg
    4.7 MB · Views: 49
  • IMG20210926100043.jpg
    IMG20210926100043.jpg
    5.5 MB · Views: 48
Not gonna sugarcoat it: you have some real problems there with that kami. The bevel is dramatically uneven. In order to even that out, which isn't required provided it's set, will require a lot of honing and you will probably ruin the slight hollow ground on that side of the razor. You may even consider a piece of tape then try to get a straight even micro-bevel. The pressure used must have been quite uneven. It will never be a looker at this point but it could still be turned into a great shaver, but I don't think there is much room for error at this point in the game.
 
Not gonna sugarcoat it: you have some real problems there with that kami. The bevel is dramatically uneven. In order to even that out, which isn't required provided it's set, will require a lot of honing and you will probably ruin the slight hollow ground on that side of the razor. You may even consider a piece of tape then try to get a straight even micro-bevel. The pressure used must have been quite uneven. It will never be a looker at this point but it could still be turned into a great shaver, but I don't think there is much room for error at this point in the game.

True. I'm still puzzling over that odd wave in the bevel. I don't know how one could even make that happen on a new razor.

That said, I have several much-uglier kamisoris that are great shavers, including a couple that I had to take a Dremel to, to make more of a scoop-out for honing. My favorite kamisori of all is practically a wedge at this point, and that doesn't make me like it any less.
 

Kentos

B&B's Dr. Doolittle.
Staff member
In the end it’s up to you, however the ratio’s are meant to drive home the fact that you need to hone mostly on the wedge side vs the hollow side. So if you do 50 laps on the wedge, maybe do ten on the other. The reason is you can always hollow out the soft edge side to give more life to the razor, but the hollow side can’t.

If you want to search Japanese language videos use 日本剃刀研ぎ方
 

Kentos

B&B's Dr. Doolittle.
Staff member
True. I'm still puzzling over that odd wave in the bevel. I don't know how one could even make that happen on a new razor.

That said, I have several much-uglier kamisoris that are great shavers, including a couple that I had to take a Dremel to, to make more of a scoop-out for honing. My favorite kamisori of all is practically a wedge at this point, and that doesn't make me like it any less.

The edge and spine wear look parallel to me in the pic so might just be the grind.
 

Kentos

B&B's Dr. Doolittle.
Staff member
Some extra pics. To answer a some questions above, I've been using a 7:1 ratio on a shapton hr grit 2000.


Ok, so get a sharpie and ink both bevels. On your finest stone with a bit of water lightly run the razor once on both sides to see where the bevel is hitting the stone. Then you can see where you need to concentrate more work.
 

Kentos

B&B's Dr. Doolittle.
Staff member
If you can,torque the razor with your fingertips towards the bevel as you make your edge leading passes. Also place the finger tips as close to the edge as possible. Think of trying to relieve as much pressure as you can from the spine side. There is one video where the guy places some thin material under the fingertips to prevent wearing off skin on the stone.

 
You're not torquing enough to the edge. On a Kami, this is difficult, some people cheat and use the fingers to bring the pressure down to the edge. I don't like doing that, but I've done it. I don't advocate doing that, for several reasons. I'm just acknowledging the existence of the technique.

You need to bring the bevel on the Omote back a bit more - it will be uneven but there should be no real 'skinny' bevel parts.
Stop pressing 'down', you're wearing the Omote heavily. Just learn to apply torque...
The 2k is fine for someone with experience, try using a finer stone for the time being. It will take longer but you won't get in trouble so fast.
To set up the initial bevel, you'll need to hone more on the omote, that's where the 7:1, 10:1 ratios come in. JimR used to suggest 7 on the Omote and 1 on the Ura for Tosuke, and higher ratios for other makers. I prefer to play it by ear, whatever works is what works though.
Once you get the bevel on the Omote done right, you can really get that edge to sing.
 
Lots of hollow left on that flat side (omote) to hone. That is where they wear out and when that is completely flat it is time to regrind or toss. You have lots of room to work still. But you need to be working on the flat (omote) and keep pressure towards the edge not spine.
 
Top Bottom