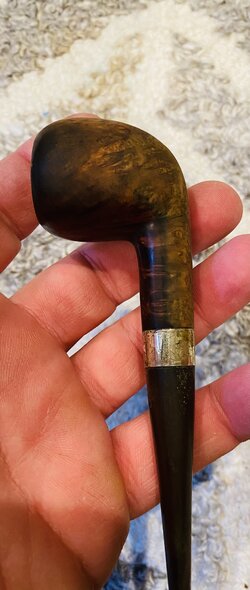
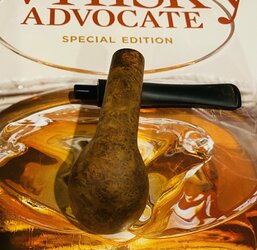
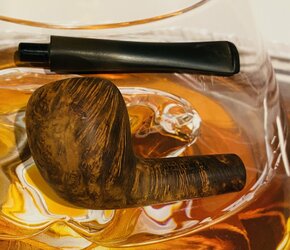
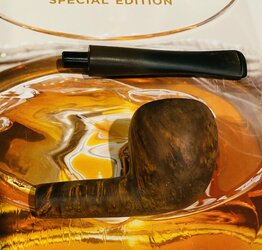
It came out great! Good job!
You are using an out of date browser. It may not display this or other websites correctly.
You should upgrade or use an alternative browser.
You should upgrade or use an alternative browser.
JC's first pipe restoration thread
- Thread starter JCinPA
- Start date
- Thread starter
- #22
JCinPA
The Lather Maestro
It came out great! Good job!
I would say it came out OK, but that's largely because it was pretty OK to begin with. The satin shine on the stem is acceptable, and the butcher block treatment from Howard's is nice, but it made me realize that for a really first-rate job, you do, in fact, need cotton wheels.
Hand work is OK, glad I tried it. I need to go to the next level, though. I think I may try steaming out some dents in this one, since it's a learner/project pipe. Maybe then I'll have to try some stain, too. It is fun, I will say that.
Sweet!
Why do these threads make me want to jump in rabbit holes?
Why do these threads make me want to jump in rabbit holes?
- Thread starter
- #24
JCinPA
The Lather Maestro
Sweet!
Why do these threads make me want to jump in rabbit holes?
Inorite?? lol I just snagged a vintage metal pipe reamer on eBay. I have a search saved for an older T-handle reamer set, they were more durable. Going to Lowes later to see about some cotton buffing wheels.
Well, it keeps me out of the bars, and the War Department seems to ignore me when I'm fiddling with a pipe (little shake of the head and an eyeroll, but no commentary). I could fall into worse rabbit holes.
Phil, I know you're kind of a handy guy, if you start reading the restoration stories on that site, you'll be done for. Here's one for a pipe I just bought for them. Fascinating what one can do with an old beater.
Parker of London Bark 576 – rebornpipes
Posts about Parker of London Bark 576 written by rebornpipes
Whether I wind up smoking them, or just gifting them to others - the idea of making something beat up and old look and perform like new intrigues me no end. I'm a "fiddler" and this may be a trail that I try to walk down.Inorite?? lol I just snagged a vintage metal pipe reamer on eBay. I have a search saved for an older T-handle reamer set, they were more durable. Going to Lowes later to see about some cotton buffing wheels.
Well, it keeps me out of the bars, and the War Department seems to ignore me when I'm fiddling with a pipe (little shake of the head and an eyeroll, but no commentary). I could fall into worse rabbit holes.
Phil, I know you're kind of a handy guy, if you start reading the restoration stories on that site, you'll be done for. Here's one for a pipe I just bought for them. Fascinating what one can do with an old beater.

Parker of London Bark 576 – rebornpipes
Posts about Parker of London Bark 576 written by rebornpipesrebornpipes.com
View attachment 1368975
Looks darn nice to me, John. 

A word to the wise - try to get a wheel with stitching close to the edge.Going to Lowes later to see about some cotton buffing wheels
Separation of layers causes drag and heat.
1 is better than 2.
1.
2.
- Thread starter
- #28
JCinPA
The Lather Maestro
A word to the wise - try to get a wheel with stitching close to the edge.
Separation of layers causes drag and heat.
1 is better than 2.
1.
View attachment 1368996
2.
View attachment 1368997
Actually, Phil, from what I've seen, most pipe makers and restorers remove the first couple of rings of stitching from the outer side. Apparently it's very different from metal polishing and floppy wheels work better. Many remove the stitching and double the wheels to give more width to it, and they use faily low speed. Others here who have restored may correct me, but most instructions and videos I've seen have a lot of the stitching purposely removed.
I usually use Flitz polish after the micromesh. (Be sure to rinse it off after). It shines the stems nicely and is supposed to help protect against further oxidation. Lastly I finish the stems off with Brebria polish, and then a light coat of carnuba wax. I do all of this by hand, and this is more time consuming than a buffer, but works pretty well.
I have used very fine grit wet or dry sandpaper to remove rim charging. I place the paper (wet) on a flat surface and work the bowl rim in a twisting or circular motion to remove rim char. Inner radius of the bowl is addressed with a rolled-up piece of sand paper worked like a file.
For my experience with variable speed drivers, the lower speed does help prevent heat, but bear in mind an open wheel has more surface area for drag, and a typical bench grinder fitted with a wheel and a variable speed knob will produce less torque at lower speeds. This means that you can easily bog the machine down and you get a mess on the item you are buffing.Actually, Phil, from what I've seen, most pipe makers and restorers remove the first couple of rings of stitching from the outer side. Apparently it's very different from metal polishing and floppy wheels work better. Many remove the stitching and double the wheels to give more width to it, and they use faily low speed. Others here who have restored may correct me, but most instructions and videos I've seen have a lot of the stitching purposely removed.
Low speed, light touch.
My favorite style pipe reamer. Very versatile:Inorite?? lol I just snagged a vintage metal pipe reamer on eBay. I have a search saved for an older T-handle reamer set, they were more durable. Going to Lowes later to see about some cotton buffing wheels.
Well, it keeps me out of the bars, and the War Department seems to ignore me when I'm fiddling with a pipe (little shake of the head and an eyeroll, but no commentary). I could fall into worse rabbit holes.
Phil, I know you're kind of a handy guy, if you start reading the restoration stories on that site, you'll be done for. Here's one for a pipe I just bought for them. Fascinating what one can do with an old beater.

Parker of London Bark 576 – rebornpipes
Posts about Parker of London Bark 576 written by rebornpipesrebornpipes.com
View attachment 1368975
- Thread starter
- #33
JCinPA
The Lather Maestro
^^^^^^^^^^^^^
Just snagged one of those on eBay. Kleen Reem brand.
Just snagged one of those on eBay. Kleen Reem brand.
- Thread starter
- #34
JCinPA
The Lather Maestro
OK, Final (at least for the time being) on one of the estates @Whisky so generously sent me. My micromesh sanding pads came in and I decided to attack the stem again and ran up through all the grits 1500-12000, then some whitening toothpaste and my thumb, and then again with the CIF cream. It's very mild, I think it's main intended use is for glass induction cooktops. Thorough cleaning with dish soap and alcohol, then some Obsidian pipe stem oil. I have some Howard Butcher Block conditioner I use on a cutting board, and it is a mix of food-grade mineral oil, beeswax, and carnauba wax, and while not providing that hard shine you get after buffing with Carnauba, I like the nice satin finish it leaves. Buffed it with a microfiber cloth. And I used the sanding pads on the char on the rim which you can see in earlier photos in this thread.
I think I will give her the inaugural smoke later today, but I can see using this as a further learning platform. There are some dents on the right side (from the smoker's perspective) which I might try steaming out, which will likely require restaining. And by then I will likely have my buffing wheels. So I may not be done with this one yet. But I'm fairly happy with how it turned out for all hand work. Again, it wasn't a basket case to begin with, but it sure looks better now!


I think I will give her the inaugural smoke later today, but I can see using this as a further learning platform. There are some dents on the right side (from the smoker's perspective) which I might try steaming out, which will likely require restaining. And by then I will likely have my buffing wheels. So I may not be done with this one yet. But I'm fairly happy with how it turned out for all hand work. Again, it wasn't a basket case to begin with, but it sure looks better now!
- Oxiclean soak for stem
- Murphy's oil soap and toothbrush for stummel
- Alcohol treatment for bowl and airway
- Micromesh sanding pad treatment of stem
- CIF cream polish of stem with t-shirt
- Micromesh sanding pad of rim (only 6000-12000)
- Obsidian stem oil
- Howard's Butcher Block Conditioner
- Microfiber cloth buff
Good job,.... next!
Looks good.
ylekot
On the lookout for a purse
That came out nice!
You got me hooked.Phil, I know you're kind of a handy guy, if you start reading the restoration stories on that site, you'll be done for. Here's one for a pipe I just bought for them. Fascinating what one can do with an old beater.

Parker of London Bark 576 – rebornpipes
Posts about Parker of London Bark 576 written by rebornpipesrebornpipes.com
View attachment 1368975
I picked up a couple of pipes today, a hand made Stanwell selected briar 36 apparently by Sixten Iversson, a GBD virgin 9487 and a Sasieni Royal Stuart 93S. Apparently Royal Stuart is considered a Sasieni second.
From a couple of websites I have pics of how they "ought" to look:
The Stanwell
The GBD
and the Sasieni
They don't look like that right now, but they are not in bad shape and I got them pretty cheaply at $70 for the bunch.
I honestly just selected these because I like the shape and style.
So - next stop, the restoration thread and I'm off!
Thanks a lot John for sucking me into this whirlpool!

I bought this pipe in a lot because I could tell it had excellent grain. Nice Birdseye along the bottom and flame grain up top. The stamping is so faint all I can read is “Imported Briar” and “Custom Delux.” I’ll probably lose the stamps as I sand down the stummel. The original stain was very dark and something had bleached the color from the stain along the bottom of the pipe- you can see this in the pic when the pipe is assembled. The pipe has one good size fill but the bowl looks good and the drilling is straight. It had a stinger but when I pulled it out it literally fell apart. I’ll try to smoke it as is and maybe find a replacement stinger if the draw is too open. My plan is to sand the stummel down and then restrain it using a redish color.


- Thread starter
- #40
JCinPA
The Lather Maestro
@luvmysuper Happy to be an enabler, sir! Sixten Ivarsson is super famous in the pipe world, and GBD pipes, in my experience, are outstanding values. The proportions of the Sasieni don't call to me, but it is handsome, nonetheless. That's a terrific lot for $70!
Be sure to check out that lighter oxidation link, it seems to be a game changer, and if the rebornpipes guys are selling the method, you can be assured it works. That site is a wealth of information on refubishing pipes. Have fun!

 rebornpipes.com
I've seen some results of the method on pipemagazine forum and it's amazing. Can't wait to try it. I'm going to work on #2 this weekend.
Be sure to check out that lighter oxidation link, it seems to be a game changer, and if the rebornpipes guys are selling the method, you can be assured it works. That site is a wealth of information on refubishing pipes. Have fun!

A BIC lighter and Oxidation
Blog by Rob Hardy and Steve Laug Thanks to a serendipitous discovery by a friend of mine, Rob Hardy (incoinnu on Smokers Forums), who also does refurbishing as a hobby we have worked out a very dif…
I've seen some results of the method on pipemagazine forum and it's amazing. Can't wait to try it. I'm going to work on #2 this weekend.
Similar threads
- Replies
- 33
- Views
- 3K
- Replies
- 5
- Views
- 915
- Replies
- 96
- Views
- 5K


