What's new

How To Use a Pasted Balsa Strop

My 0.1μm hanging balsa technique must have improved (become lighter) over the past year or so. After each shave, I use to maintain my SRs with the following progression:

Clean Cloth Strop (help taut, weight of blade only and no noticeable strop deflection while stropping)​
6 to 12 standard laps to clean and dry the bevel​
0.1μm Balsa - Hanging
15 standard laps​
6 short X strokes​
15 standard laps​
8 short X strokes​
End-for-end the balsa​
15 standard laps​
10 short X strokes​
15 standard laps​
12 short X strokes​

Over time, I felt that my edges were deteriorating just a tad. I put this down to my hanging laps becoming lighter. A couple of months ago I adjusted my post-shave maintenance to:

Clean Cloth Strop (help taut, weight of blade only and no noticeable strop deflection while stropping)​
6 to 12 standard laps to clean and dry the bevel​

0.1μm Balsa - Hand Held (not hanging) weight of blade only​
15 standard laps​
6 short X strokes​
End-for-end the balsa​
15 standard laps​
8 short X strokes​
0.1μm Balsa - Hanging
15 standard laps​
10 short X strokes​
End-for-end the balsa​
15 standard laps​
12 short X strokes​

Only a slight change but a noticeable improvement in keeping the edge at its optimum. Now I don't feel the need to put a SR through a full balsa progression after every 20 to 30 shaves to see if there is any edge improvement.
How did you come up with that progression?
96 strokes on a charged balsa. It probably does not take up that much time, but still, is there a point of diminishing returns at some stage before that lap count?
 

rbscebu

Girls call me Makaluod
How did you come up with that progression?
96 strokes on a charged balsa. It probably does not take up that much time, but still, is there a point of diminishing returns at some stage before that lap count?
It takes me less than 2 minutes per shave to perform my post shave maintenance. I normally spend about 30 to 45 minutes in total enjoying my daily morning shaves so that 2 minutes is inconsequential in the scheme of things. My shaving time use to be only about 20 to 30 minutes. Drinking a cup of good tea (or coffee) while shaving helped to extend the time.

As for how I came up with that progression, I took the advice previously posted in this thread and very slightly modified it to suit my desires. Basically my maintenance progression is IAW this thread.
 
  • Like
Reactions: JPO

Slash McCoy

I freehand dog rockets
How did you come up with that progression?
96 strokes on a charged balsa. It probably does not take up that much time, but still, is there a point of diminishing returns at some stage before that lap count?
If you are using sufficiently light pressure to get optimum effect, it takes about that many laps. And there is hardly any feedback, so you kind of have to count laps and see where you get silent treetopping. You will hear naysayers say BS, you can't use less pressure than the weight of the blade, or that it would no good, but if you are holding the balsa vertically, you can indeed brush against it with much less pressure than a blade's weight. But pressure that light requires a lot more laps. The old 6 to 8 laps like how they did it on CrOx pasted leather after a like number of laps on a barber hone, won't get this kind of edge.

I would say the point of diminishing returns is somewhat more than 100 laps. The thing is, it is almost impossible, doing it this way, to create a wire or fin edge, so no harm no foul. If you went for 1000 laps I don't think it would hurt anything except maybe the balsa, easily fixed by re-lapping and applying new diamond paste. 100 laps doesn't take long. I used to go 50 but on rare occasions I would see that the edge was slipping a little, especially as I began using even less and even more less pressure.
Thanks for the explanation.
 

rbscebu

Girls call me Makaluod
@albsat asked me if I could post a video of stropping with a pasted hanging balsa strop. Here it is. I did my best but it may not be the clearest.


I am using a composite balsa strop, balsa on ceramic tile on structural PVC foam (painted). The strop is about 300mm x 75mm x 35mm thick. My left elbow is resting on the table. I am holding the top end of the balsa strop in my non-dominant (left) hand between my thumb and middle finger so that the strop can swing freely as I strop. This is the most comfortable way for me to hold it.

In the video I do 15 standard laps and finish with 6 short X strokes up new the top of the strop. My post-shave maintenance routine is:

Clean Cloth Strop (help taut, weight of blade only and no noticeable strop deflection while stropping)​
6 to 12 standard laps to clean and dry the bevel​

0.1μm Balsa - Hand Held (not hanging) weight of blade only​
15 standard laps​
6 short X strokes​
End-for-end the balsa​
15 standard laps​
8 short X strokes​

0.1μm Balsa - Hanging
15 standard laps​
10 short X strokes​
End-for-end the balsa​
15 standard laps​
12 short X strokes​
 

rbscebu

Girls call me Makaluod
REPLACING YOUR BALSA

After about 10 to 15 years of use, lapping and re-pasting, you are probably going to have to replace the balsa on one or more of your balsa strops.

During my travels, I damaged the balsa on one of my 0.1μm balsa strops. I was able to sand the damage out but it left my balsa rather thin so I eventually decided to replace it. Here are the steps that I took:
  1. First I sanded the last of the balsa off the substrate. My substrates are ceramic floor tiles. As I used contact (rubber) adhesive to bond my balsa to the substrate, that adhesive does not readily sand off.
  2. I needed something to soften the contact adhesive so that I could scrape it off the tile. What ever is used to soften the adhesive must work by softening the adhesive but also it must not damage the substrate. Be careful if your substrate is acrylic. I had a little bit of acetone that worked but it was not going to be enough. I then tried mineral turpentine.
  3. I laid a couple of pieces of paper towel on the contact adhesive and then saturated the paper towel in mineral turpentine.
  4. The saturated paper towel was left on the contact adhesive for about 30 minutes. It was then reasonably easy to scrape the adhesive off the tile surface using a paint scraper.
  5. I then thoroughly washed to tile surface with a little detergent and water to remove any trace of the turpentine and then allowed it to dry.
  6. My substrate is 300mm x 75mm so I cut my new balsa 2mm bigger to 302mm x 77mm using a box cutter (Stanly knife) and a steel rule as a guide.
  7. New contact adhesive was then applied to both the surface of the tile and the underside of the new balsa. This adhesive was then allowed to evaporate for about 15 to 20 minutes.
  8. I then mated the two glued surfaces together being careful that they were properly aligned the first time as, once together, they cannot be adjusted. I allowed everything to set overnight.
  9. The following morning, I sanded to sides and ends of the balsa to match the tile. The balsa was then lapped flat and new diamond paste applied.
IMG_20220827_165212.jpg
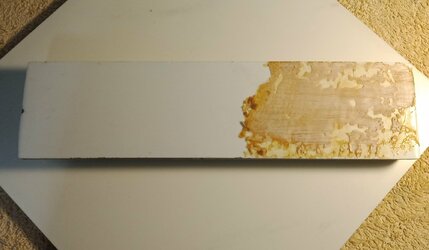
Half of the adhesive removed

IMG20220827170745.jpg
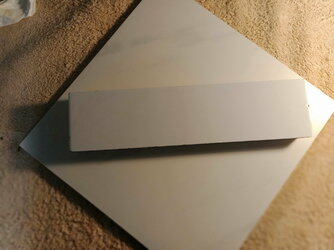
All clean and ready for the new balsa

IMG20220827171427.jpg
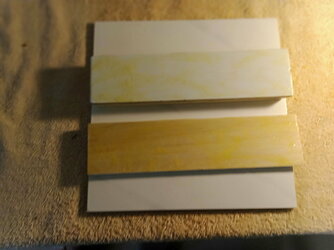
Balsa and tile surface with new adhesive applied and waiting to evaporate

IMG20220827173945.jpg
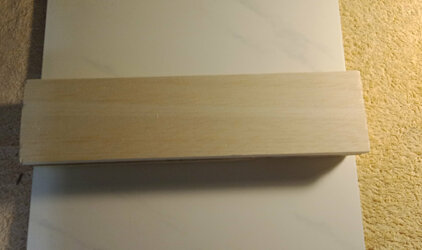
All done and ready to lap and paste
 

rbscebu

Girls call me Makaluod
APPLYING PASTE

I have never been overly happy with my method of applying diamond paste to my balsa strops. I use to dab it on in lots of small dots using my finger. After rubbing it down, I still had small faint dots showing where I had applied the paste. This still worked well but my OCD was not fully satisfied.

Last weekend was time to re-lap and re-paste my balsa strops. As always, I start with the 0.1μm strops (2) then the 0.25μm and finally the 0.5μm. I do this about every 3 months. This time I tried something different when applying the paste. I placed about ½ to 1 teaspoon of liquid (not gel) Isocol rubbing alcohol into a small saucer. Next the correct amount of paste (about the sixe of three grains of rice) was applied to the pad of my finger and I worked that well into the rubbing alcohol in the saucer. This was done until all the paste was in suspension with the alcohol and there was no solid particles of paste on my finger or in the saucer. Then, dipping the pad of my finger into the alcohol/paste mix, I "painted" the mix onto the surface of my lapped balsa using my finger pad. This spreads easily and evenly all over the balsa surface. (I don' paste the last 25mm at each end of the balsa strop as my edge rarely gets there.)

Once the "paint" is applied, I allow the Isocol to evaporate for about 30 minutes. Then using a clean cotton/polyester cloth I bub down the balsa surface as normal. I am then with what I consider a perfectly pasted balsa strop.

If you are OCD a bit like me, give it a go.
It’s definitely a lot easier to all ply the paste if you thin it out. My Techdiamond Tools High Concentration diamond paste is oil based and I cut it with mineral oil. It doesn’t take much oil to make it spreadable. Just a couple of drops.
 
Last edited:

rbscebu

Girls call me Makaluod
It’s definitely a lot easier to all ply the paste if you thin it out. My Techdiamond Tools High Concentration diamond paste is oil based and I cut it with mineral oil. It doesn’t take much oil to make it spreadable. Just a couple of drops.
I agree. I also use TechDiamond pasted. I decided on using rubbing alcohol rather than mineral oil as it evaperates out of the balsa. Rubbing alcohol also works with water based diamond pastes whereas mineral oil would not.
 

rbscebu

Girls call me Makaluod
Today I put together a 300mm x 75mm balsa strop, lapped it and applied some 0.1μm diamond paste. This balsa strop will be included in the "Bengall" SR starter's kit I am putting together to soon PIF. Here it is all finished, including the paste application. My method of applying the paste is here.

DSCF1132.JPG


DSCF1133.JPG


DSCF1134.JPG

The balsa strop weighs in at 380g (about half the weight of the same in acrylic) and consists of (from bottom to top):
  • 16mm thick balsa wood (painted after gluing)
  • 5.5mm thick ceramic tile
  • 8mm thick balsa wood
The 16mm balsa/tile bond is epoxy adhesive and the tile/8mm balsa bond is spray contact adhesive. The light yellow acrylic paint was applied after all adhesives had set.
 
Today I put together a 300mm x 75mm balsa strop, lapped it and applied some 0.1μm diamond paste. This balsa strop will be included in the "Bengall" SR starter's kit I am putting together to soon PIF. Here it is all finished, including the paste application. My method of applying the paste is here.

The balsa strop weighs in at 380g (about half the weight of the same in acrylic) and consists of (from bottom to top):
  • 16mm thick balsa wood (painted after gluing)
  • 5.5mm thick ceramic tile
  • 8mm thick balsa wood
The 16mm balsa/tile bond is epoxy adhesive and the tile/8mm balsa bond is spray contact adhesive. The light yellow acrylic paint was applied after all adhesives had set.
That is one pimped up balsa plate you have there:)
Nice.
 
.......

Thing 5. Maintaining it.

After a few weeks, you may find that the balsa needs a refresh of diamond. You could just add a bit more, about half of what you used when you first pasted the balsa, but for BEST POSSIBLE results, which are the only kind of results worth pursuing, go ahead and re-lap the balsa. Sure, you got it flat, but it isn't flat anymore. Flatter is better.
......
Slash, sorry if this was asked previously but I bailed after getting to page 26 of this discussion.
When you re-lap the balsa, do you have separate sandpaper/tile constructs for each grade of diamond pasted balsa you are using to avoid contamination of the finer grades with the coarser or do you re-lap each of the grades of diamond pasted balsa on the same piece of sandpaper? If you just use the same piece of sandpaper how are you avoiding contamination? Thanks.
 

rbscebu

Girls call me Makaluod
@GMM, there are two acceptable ways.

You can use one sheet of sandpaper to re-lap all of your balsa strops provided you start with the finest (0.1μm) followed by 0.25μm and then 0.5μm. That sheet of sandpaper can then never be used again for lapping balsa except for the 0.5μm.

The second way is to use a separate sheet of sandpaper for each grade of paste, one each for 0.1μm, 0.25μm and 0.5μm (3bsheets in total). These same three sheet can then be used again when you later wish to re-lap your balsa strops. If using 3 sheets, be sure to make each sheet with the paste grit it is suitable for so as to avoid cross contamination in later re-lappings.
Thanks.
Are you gluing the sandpaper to a flat hard base such as a tile? If so, what adhesive do you recommend to allow ease of removal for replacement with the other sheets?
 

Slash McCoy

I freehand dog rockets
Slash, sorry if this was asked previously but I bailed after getting to page 26 of this discussion.
When you re-lap the balsa, do you have separate sandpaper/tile constructs for each grade of diamond pasted balsa you are using to avoid contamination of the finer grades with the coarser or do you re-lap each of the grades of diamond pasted balsa on the same piece of sandpaper? If you just use the same piece of sandpaper how are you avoiding contamination? Thanks.
The Cebu Kid nailed it. His answer right above mine. I do the balsa with the finest grit first, because if you contaminate the coarser with some finer, it is no big deal. It is only a catastrophy if you contaminate the finer, with some of the coarser.

Have a bronze bristle gun cleaning brush or a stiff bristle nylon toothbrush on hand for clearing the sandpaper. It loads up quickly with balsa.
 
  • Like
Reactions: GMM

steveclarkus

Goose Poop Connoisseur
Thanks.
Are you gluing the sandpaper to a flat hard base such as a tile? If so, what adhesive do you recommend to allow ease of removal for replacement with the other sheets?
You don't glue it. Just lay it on a perfectly flat surface like a foot square piece of plate glass or granite. I use plate glass myself. I also go from 120 grit to 220 to 320. The 1um is the one you will do most frequently as it is used daily.
 

rbscebu

Girls call me Makaluod
@GMM, I find no need to stick the sandpaper to the tile. Just holding it in place with my other hand works fine for me. Besides, you don't need to apply a lot of downward pressure when lapping balsa. It is not like you are lapping a hard Arkansas whetstone.

If you find that you just must stick the sandpaper down (perhaps you only have one arm), you can use a very light coating of spray contact adhesive on the tile. Just make sure you remove all traces of contact adhesive from the tile once you have finished with that stuck piece of sandpaper.

I concur with @Slash McCoy in using a stiff bristled brush to clean the sandpaper of balsa dust buildup while lapping a balsa strop. I found that a bronze or nylon brush was quickly worn when used on the sandpaper. I now use a stainless steel wire brush.
 

Slash McCoy

I freehand dog rockets
Thanks.
Are you gluing the sandpaper to a flat hard base such as a tile? If so, what adhesive do you recommend to allow ease of removal for replacement with the other sheets?
You can go old school, with Barge brand contact cement, but I prefer 3M or Loctite brand spray adhesive. Acetone is helpful in removing residue from past glueings. If you don't let it stand for long on the acrylic, you can use that, no problem.
 
Top Bottom