What's new

Gold Dollar of Classic Quality (a.k.a. W59) - My setting up

rbscebu

Girls call me Makaluod
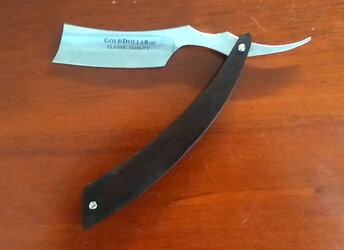
The Gold Dollar W59 is an interesting SR, particularly for its rather unique profile. The W59 stands apart from other SR's mainly due to its pronounced Spanish point. It also has a heavily curved spine profile that adds mass to either end of the blade, increasing its mass-moment of inertia.

Profile Open.jpg

With its pointy Spanish point toe, this SR can look rather intimidating to someone new to SR shaving. For the same reason, this SR is not recommended for someone starting out in the gentlemanly art as it does take a lot of concentration to use effectively.

Some vendors of this SR claim that it is stainless steel. It probably is alloyed with some chromium but definitely not enough to be classed as a stainless steel by most.

Over the past two years, I have now purchased ten of the W59 SR's. My first I cracked while honing (beginners mistake). The second I enjoyed shaving with so much, I decided to put together a M7DS and have them engraved in Chinese. That set was eventually almost given away to a Chinese friend of mine. That has left me with two W59's for my shaving pleasure. The following is how i prepare my W59's for shaving.

The gear I use for setting up my W59's includes:
  • Synthetic whetstones (previously lapped flat);
    • 400/1k
    • 3k/8k
    • 10k
  • Diamond pasted balsa strops
    • 0.5um
    • 0.25um
    • 0.1um
  • Electrical insulation tape
The W59 is factory honed with a rather pronounced smile on the edge. Of the ten that I have honed, this smile has been from about 2mm to a little over 3mm. Not an insignificant amount. To complicate this matter, the shoulders on the blade's spine are straight (not curved to be parallel to the edge's smile). This is not a great problem, although it does make it more difficult to initially hone and maintain as well as increasing the blade's bevel angle from the middle of the edge length to the ends. None of this is to my liking so I need to remove the smile and re-hone the blade starting with a 180deg bevel angle.

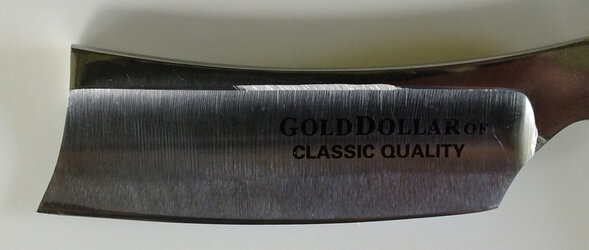
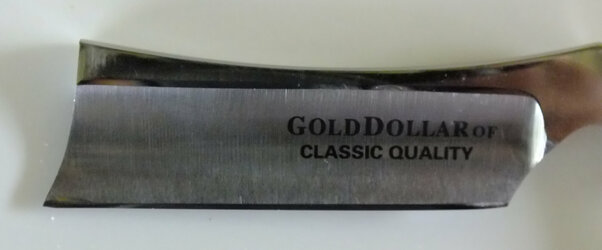
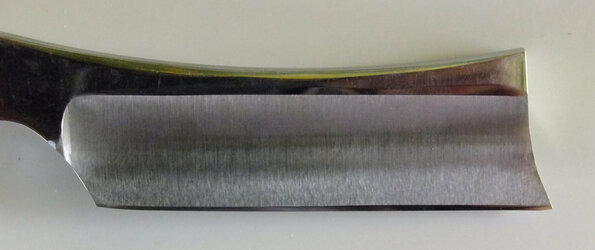
Here is the blade as received. The smile on this blade's edge is not too bad but I still wanted to remove it.

DSCF0351.JPG DSCF0352.JPG
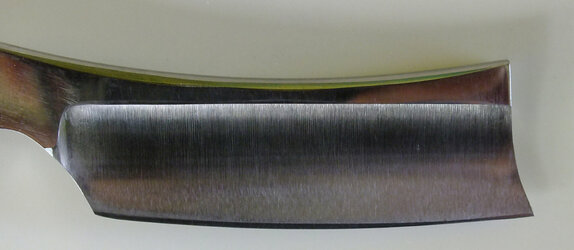
Using the side of my 400 grit whetstone, I bread-knifed the smile out almost to the heel and the toe. This effectively gave me a 180deg. bevel for almost the full length of the edge.

DSCF0353.JPG DSCF0354.JPG
Next step was to reset the bevel. I taped the spine with two layers of insulation tape and started to remove metal from the edge on both sides. As one tape started to wear through, I replaced it, hence the reason I used two layers. The tape reduced the final spine wear that can occur when removing so much metal.

As the bevel started to approach an apex, I removed all the tape and stepped up to the 1k whetstone. On the 1k whetstone, I roughly set the bevel. By the term "roughly" I mean there was still a few spots of light reflected off the edge. From there I moved on to the 3k whetstone where I finished setting the bevel to where there was no light reflection from the edge and it would just tree-top my chest hair, but not well.

The 8k and 10k whetstones were then used to further refine the bevel/edge. This got the edge to were it would tree-top with ease at about 3mm to 5mm. Final refinement was performed with a full diamond pasted balsa strop progression to the finished product.

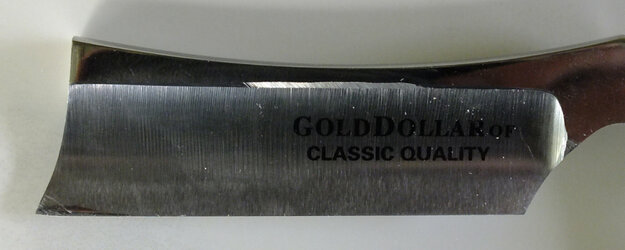
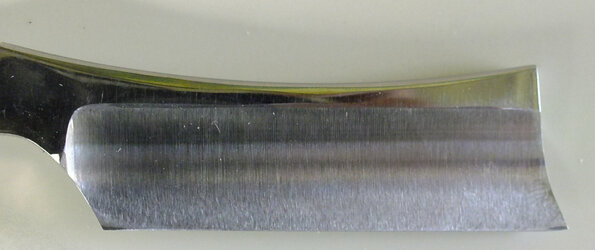
DSCF0355.JPG DSCF0356.JPG
Now the edge was tree-topping at about 10mm almost without even touching the hair. This blade was now at my shave-ready standard. It took about 15 to 20 minutes to bread-knife the smile out. The bevel-set and refining took about another 45 minutes.

I don't like muted toes!
 
Last edited:
I didn't breadknife the two I have. I also didnt tape them. It did require a lot of lifting to get the whole blade. I like the rolls in blades and prefer to hone them as they are rather than flatten them. I also didnt tape their club razor. I don't have photos as I'm moving soon and have most of my stuff packed away.
 

rbscebu

Girls call me Makaluod
I didn't breadknife the two I have. I also didnt tape them. It did require a lot of lifting to get the whole blade. I like the rolls in blades and prefer to hone them as they are rather than flatten them. I also didnt tape their club razor. I don't have photos as I'm moving soon and have most of my stuff packed away.
I am also not a taping type of bloke. There are however times when I do tape, like when I have a lot of metal to remove and I would rather not excessively wear the spine down. This was the case with the W59.

How much smile in an edge is a personal preference thing. I don't mind a bit of happiness, like about 1mm or less. The W59's are just a little too happy for my liking.
 
The Gold Dollar W59 is an interesting SR, particularly for its rather unique profile. The W59 stands apart from other SR's mainly due to its pronounced Spanish point. It also has a heavily curved spine profile that adds mass to either end of the blade, increasing its mass-moment of inertia.


With its pointy Spanish point toe, this SR can look rather intimidating to someone new to SR shaving. For the same reason, this SR is not recommended for someone starting out in the gentlemanly art as it does take a lot of concentration to use effectively.

Some vendors of this SR claim that it is stainless steel. It probably is alloyed with some chromium but definitely not enough to be classed as a stainless steel by most.

Over the past two years, I have now purchased ten of the W59 SR's. My first I cracked while honing (beginners mistake). The second I enjoyed shaving with so much, I decided to put together a M7DS and have them engraved in Chinese. That set was eventually almost given away to a Chinese friend of mine. That has left me with two W59's for my shaving pleasure. The following is how i prepare my W59's for shaving.

The gear I use for setting up my W59's includes:
  • Synthetic whetstones (previously lapped flat);
    • 400/1k
    • 3k/8k
    • 10k
  • Diamond pasted balsa strops
    • 0.5um
    • 0.25um
    • 0.1um
  • Electrical insulation tape
The W59 is factory honed with a rather pronounced smile on the edge. Of the ten that I have honed, this smile has been from about 2mm to a little over 3mm. Not an insignificant amount. To complicate this matter, the shoulders on the blade's spine are straight (not curved to be parallel to the edge's smile). This is not a great problem, although it does make it more difficult to initially hone and maintain as well as increasing the blade's bevel angle from the middle of the edge length to the ends. None of this is to my liking so I need to remove the smile and re-hone the blade starting with a 180deg bevel angle.

Here is the blade as received. The smile on this blade's edge is not too bad but I still wanted to remove it.

Using the side of my 400 grit whetstone, I bread-knifed the smile out almost to the heel and the toe. This effectively gave me a 180deg. bevel for almost the full length of the edge.

Next step was to reset the bevel. I taped the spine with two layers of insulation tape and started to remove metal from the edge on both sides. As one tape started to wear through, I replaced it, hence the reason I used two layers. The tape reduced the final spine wear that can occur when removing so much metal.

As the bevel started to approach an apex, I removed all the tape and stepped up to the 1k whetstone. On the 1k whetstone, I roughly set the bevel. By the term "roughly" I mean there was still a few spots of light reflected off the edge. From there I moved on to the 3k whetstone where I finished setting the bevel to where there was no light reflection from the edge and it would just tree-top my chest hair, but not well.

The 8k and 10k whetstones were then used to further refine the bevel/edge. This got the edge to were it would tree-top with ease at about 3mm to 5mm. Final refinement was performed with a full diamond pasted balsa strop progression to the finished product.

Now the edge was tree-topping at about 10mm almost without even touching the hair. This blade was now at my shave-ready standard. It took about 15 to 20 minutes to bread-knife the smile out. The bevel-set and refining took about another 45 minutes.

I don't like muted toes!
Great write up and very helpful!
 
The Gold Dollar W59 is an interesting SR, particularly for its rather unique profile. The W59 stands apart from other SR's mainly due to its pronounced Spanish point. It also has a heavily curved spine profile that adds mass to either end of the blade, increasing its mass-moment of inertia.


With its pointy Spanish point toe, this SR can look rather intimidating to someone new to SR shaving. For the same reason, this SR is not recommended for someone starting out in the gentlemanly art as it does take a lot of concentration to use effectively.

Some vendors of this SR claim that it is stainless steel. It probably is alloyed with some chromium but definitely not enough to be classed as a stainless steel by most.

Over the past two years, I have now purchased ten of the W59 SR's. My first I cracked while honing (beginners mistake). The second I enjoyed shaving with so much, I decided to put together a M7DS and have them engraved in Chinese. That set was eventually almost given away to a Chinese friend of mine. That has left me with two W59's for my shaving pleasure. The following is how i prepare my W59's for shaving.

The gear I use for setting up my W59's includes:
  • Synthetic whetstones (previously lapped flat);
    • 400/1k
    • 3k/8k
    • 10k
  • Diamond pasted balsa strops
    • 0.5um
    • 0.25um
    • 0.1um
  • Electrical insulation tape
The W59 is factory honed with a rather pronounced smile on the edge. Of the ten that I have honed, this smile has been from about 2mm to a little over 3mm. Not an insignificant amount. To complicate this matter, the shoulders on the blade's spine are straight (not curved to be parallel to the edge's smile). This is not a great problem, although it does make it more difficult to initially hone and maintain as well as increasing the blade's bevel angle from the middle of the edge length to the ends. None of this is to my liking so I need to remove the smile and re-hone the blade starting with a 180deg bevel angle.

Here is the blade as received. The smile on this blade's edge is not too bad but I still wanted to remove it.

Using the side of my 400 grit whetstone, I bread-knifed the smile out almost to the heel and the toe. This effectively gave me a 180deg. bevel for almost the full length of the edge.

Next step was to reset the bevel. I taped the spine with two layers of insulation tape and started to remove metal from the edge on both sides. As one tape started to wear through, I replaced it, hence the reason I used two layers. The tape reduced the final spine wear that can occur when removing so much metal.

As the bevel started to approach an apex, I removed all the tape and stepped up to the 1k whetstone. On the 1k whetstone, I roughly set the bevel. By the term "roughly" I mean there was still a few spots of light reflected off the edge. From there I moved on to the 3k whetstone where I finished setting the bevel to where there was no light reflection from the edge and it would just tree-top my chest hair, but not well.

The 8k and 10k whetstones were then used to further refine the bevel/edge. This got the edge to were it would tree-top with ease at about 3mm to 5mm. Final refinement was performed with a full diamond pasted balsa strop progression to the finished product.

Now the edge was tree-topping at about 10mm almost without even touching the hair. This blade was now at my shave-ready standard. It took about 15 to 20 minutes to bread-knife the smile out. The bevel-set and refining took about another 45 minutes.

I don't like muted toes!
what do you mean? can you dm me so you can walk me through what i need to do with my razor
 

rbscebu

Girls call me Makaluod
This Gold Dollar W59 has now become my most favoured SR. Besides being laser keen, it is my most comfortable. I also like the concentration needed while shaving to keep that toe out of my skin. The edge is maintained on a 0.1μm diamond pasted hanging balsa strop.
 
Top Bottom