Summary
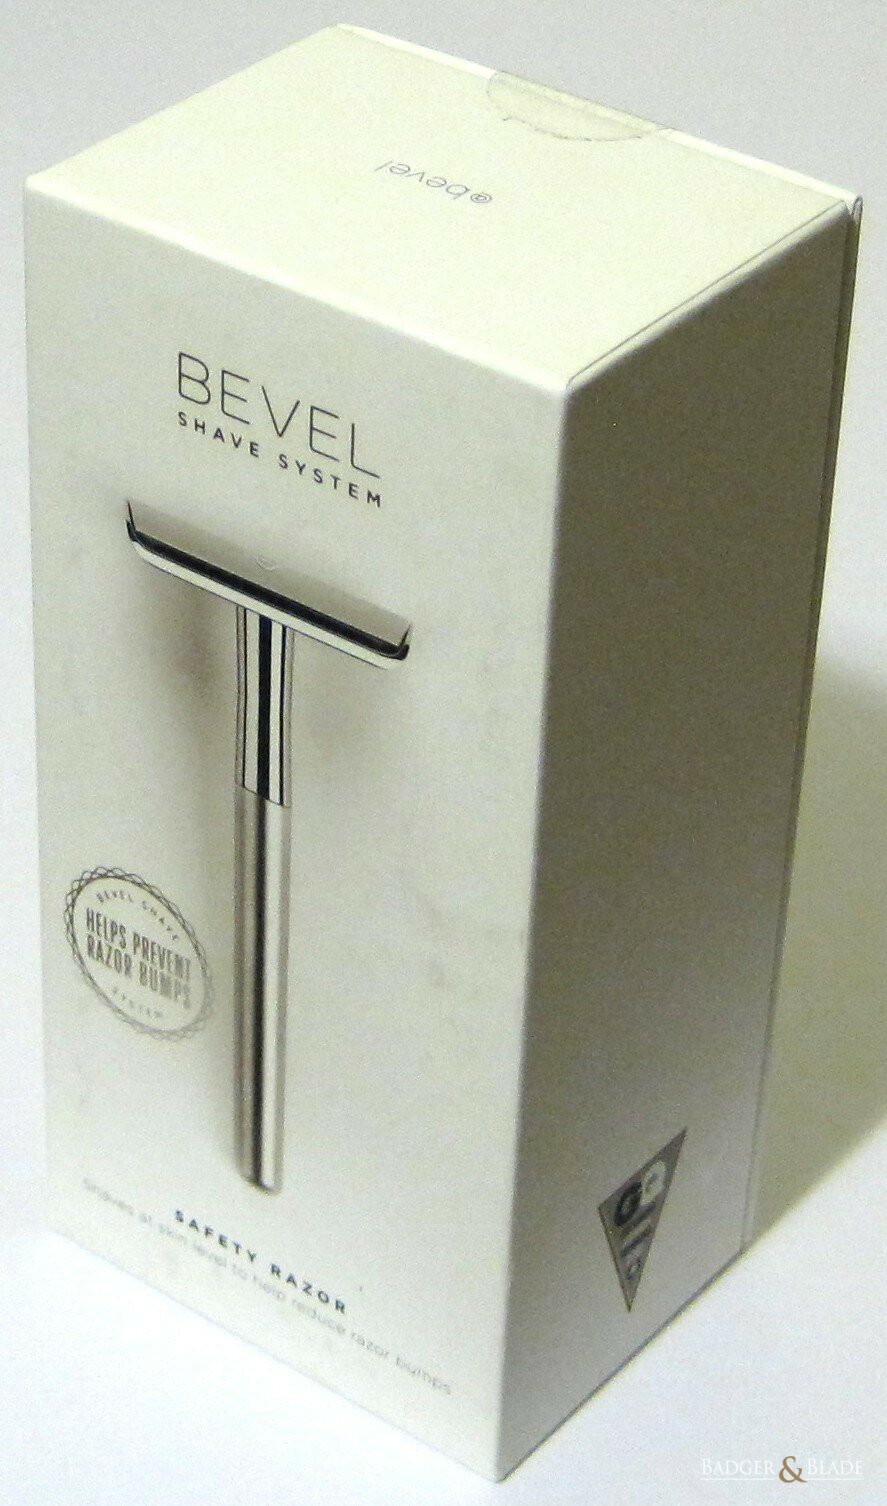
- The Bevel double-edge (DE) safety razor can be found in Target stores. It comes nicely packaged and has a fine appearance, but surface imperfections indicate that the razor is not made with the highest standards of quality.
- General measurements were made of the Bevel without a blade, including measurements for mass of 88.65 g and length of 108.19 mm
- Blade play with the Bevel is frustratingly large due to narrow side pins/posts that cause excessive blade rotation
- Photo analysis techniques were significantly improved and supplemented with physical measurements and objects. For a nominal 21.96 mm wide blade loaded in the Bevel, blade gap was measured with accurate micrometer-measured feeler gauge blade combinations to be 0.68 mm, blade angle was measured as 30.23 deg, blade exposure was found to be 0.08 mm, and guard span was determined as 1.27 mm.
- Modifying the Bevel with two layers of painter's tape strips under the cap edges and one shim under a Kai blade for fairly neutral blade exposure, smaller guard span, and more blade rigidity worked well for me
- The Bevel is much less aggressive than the Edwin Jagger (EJ) because the guard span with the Bevel (1.27 mm) is about half as much as that with the EJ DE89 head (2.25 mm), which probably results in less bunching up of skin ahead of the blade in the Bevel, yielding smaller blade-to-skin angles and less irritation. Somewhat greater blade rigidity with the Bevel might also contribute to its milder character compared to the Edwin Jagger.
- Friction from the Bevel's smooth straight guard seems a little more, although similar, compared to the EJ DE89's smooth scalloped guard
- The Bevel's textured, tapered handle does not eliminate slip, but slipping was found to be a minor issue
- Assembling and disassembling the Bevel is more dangerous compared to some other razors because, with the Bevel, it is easier to lose grip of the textured handle and it is more difficult to securely grip the sloped sides of the head
- Cleaning the Bevel is simple
Introduction
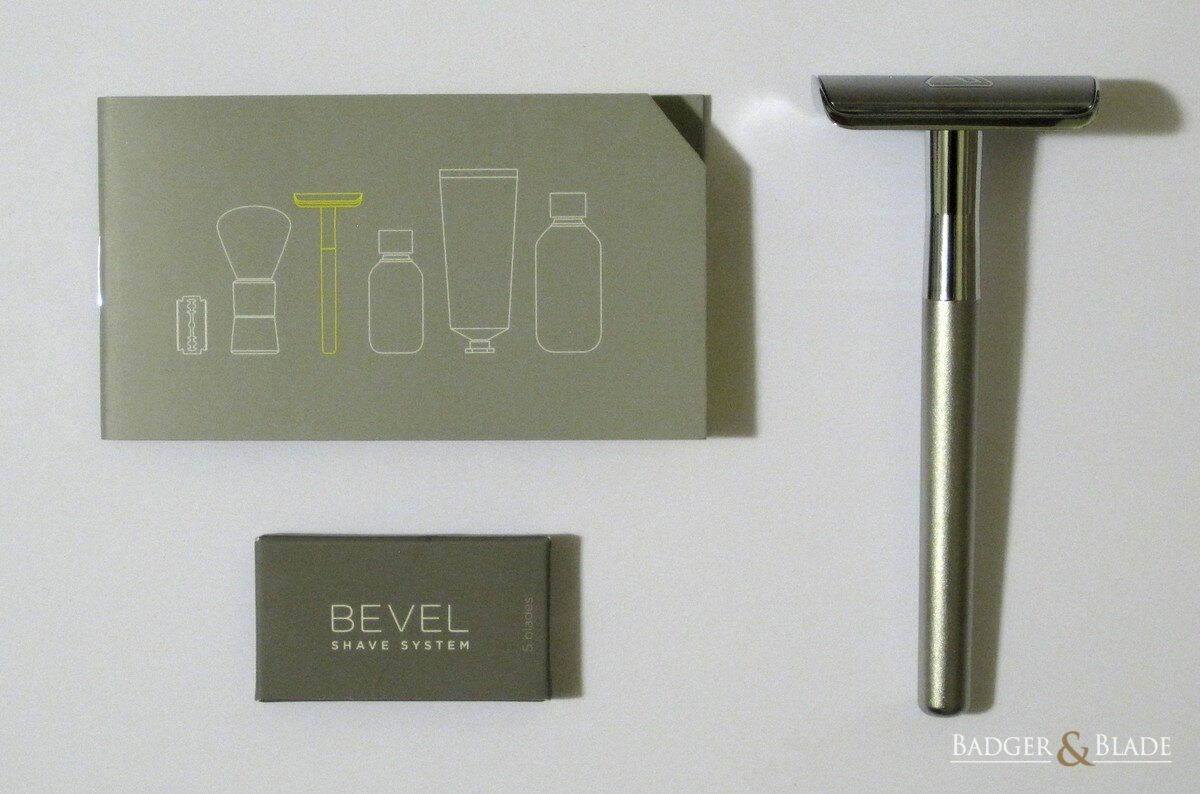
The Bevel double-edge (DE) safety razor is the centerpiece of the "Bevel Shave System" that is marketed as "the first and only end to end shaving system designed to help reduce shaving irritation and razor bumps." The system includes the razor, blades, brush, priming oil, shave cream, and restoring balm. Components can be purchased individually and a subscription service can be used to regularly obtain the temporary components. The Bevel can be bought online through Target and Amazon and can be found in Target stores for around $40 to $50. Other than Bevel's statement that their razor is "generously weighted with solid brass", no details are given about materials or methods used to make the Bevel razor. Since the Bevel's box states that the razor is "Designed in the USA", it appears that the Bevel is not made in the United States.
After using the PAA DOC Satin for several months (URL), briefly trying the Dorco PL602 (URL), and then using the EJ Kelvin for about nine months (URL), I started shaving with the Bevel on October 30, 2017. The Bevel is thus my fourth DE safety razor, but my third safety razor as a daily driver. It was purchased online from Target on February 4, 2017.
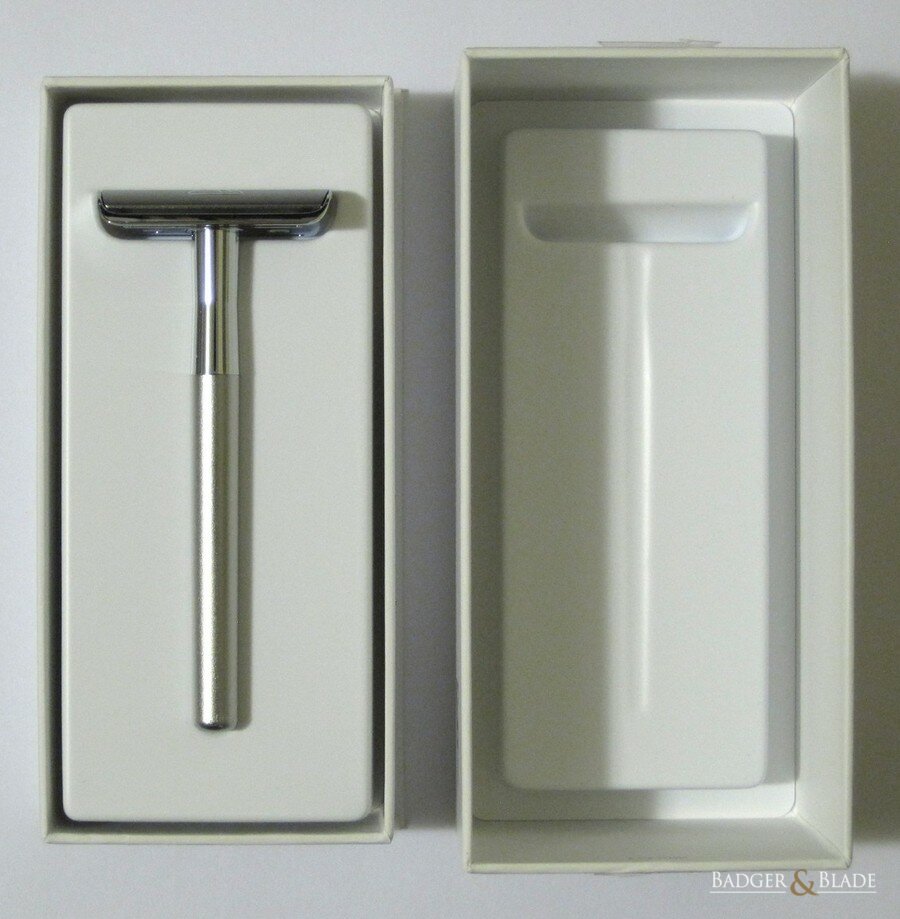
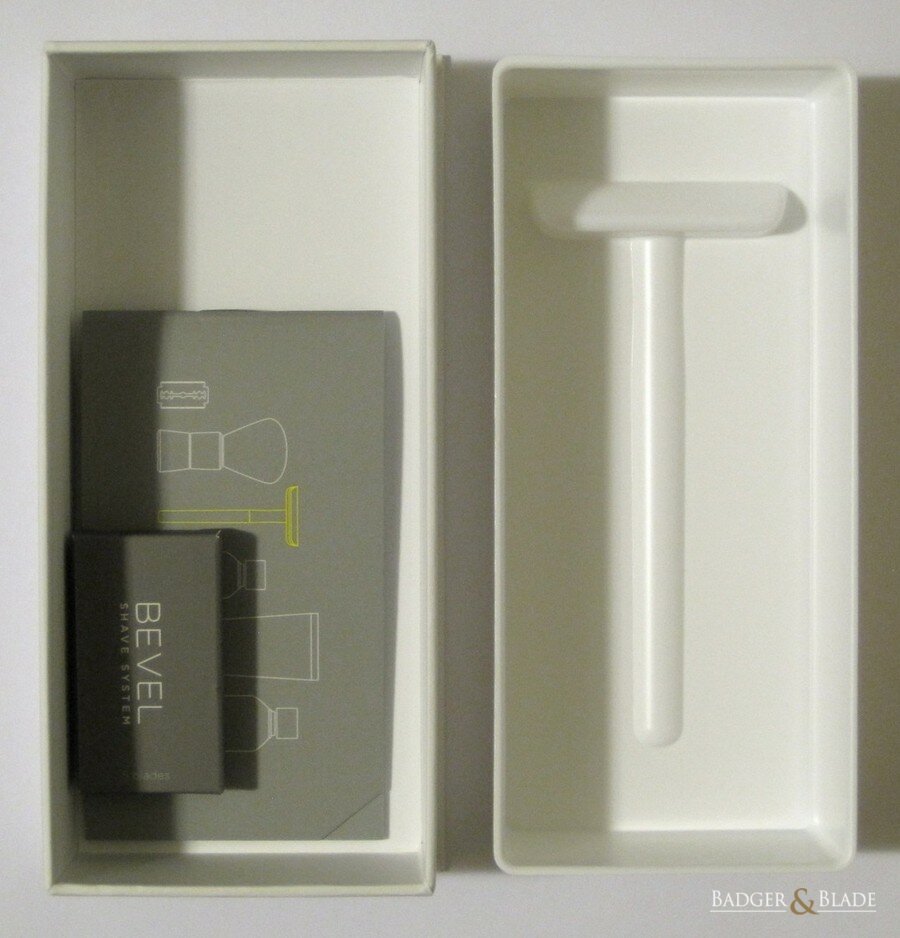
Nice Packaging with Razor Perfectly Protected
As shown below, the Bevel comes perfectly protected in its box by plastic that closely surrounds the razor. When the razor and the larger plastic support underneath the razor are removed from the box, an insert and a box of five razor blades are revealed. They are securely held in place by clear removable glue dots.
(Click on image for full-resolution version)
(Click on image for full-resolution version)
(Click on image for full-resolution version)
(Click on image for full-resolution version)
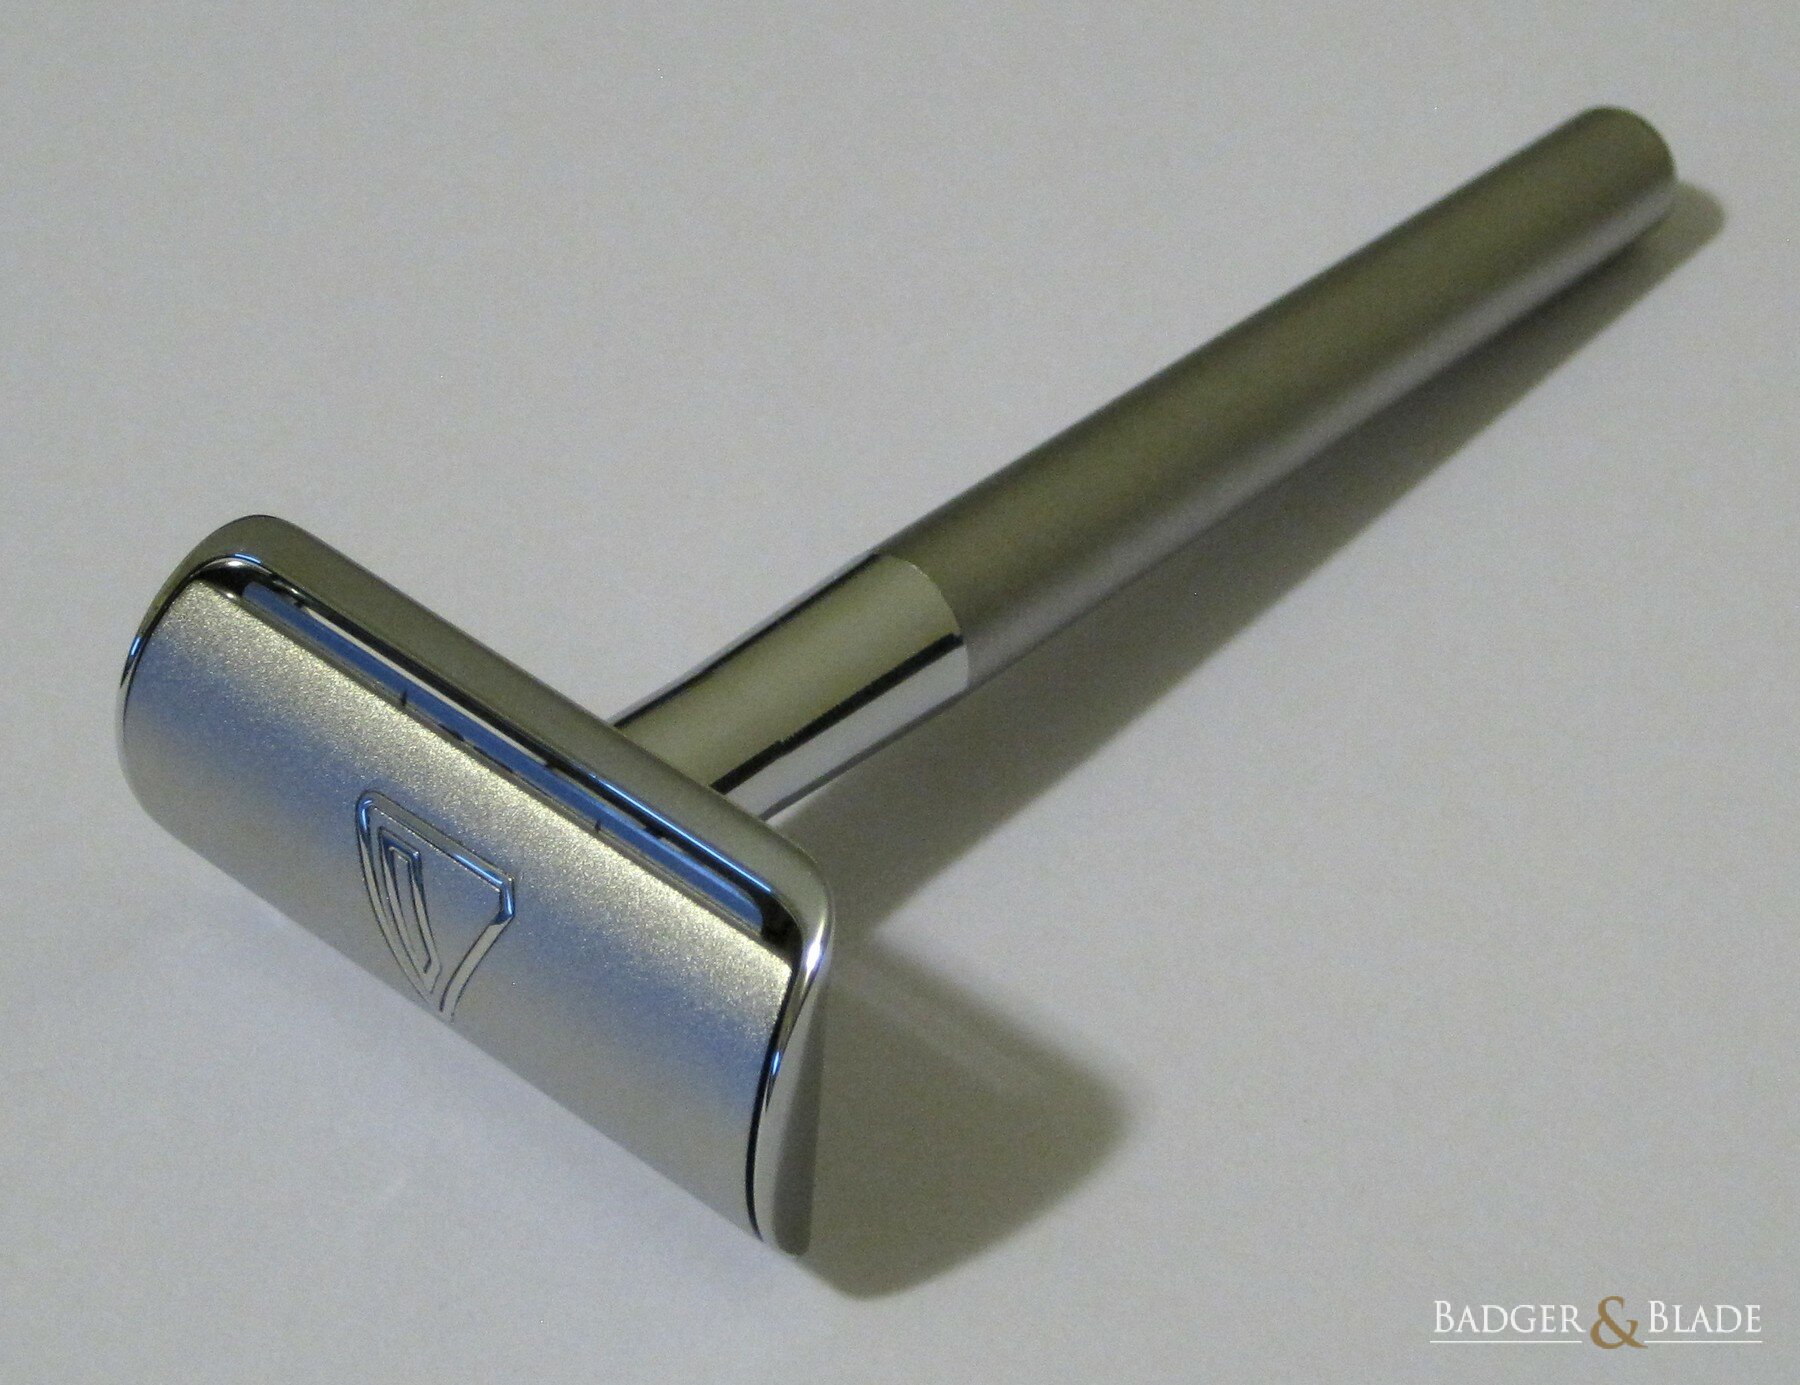
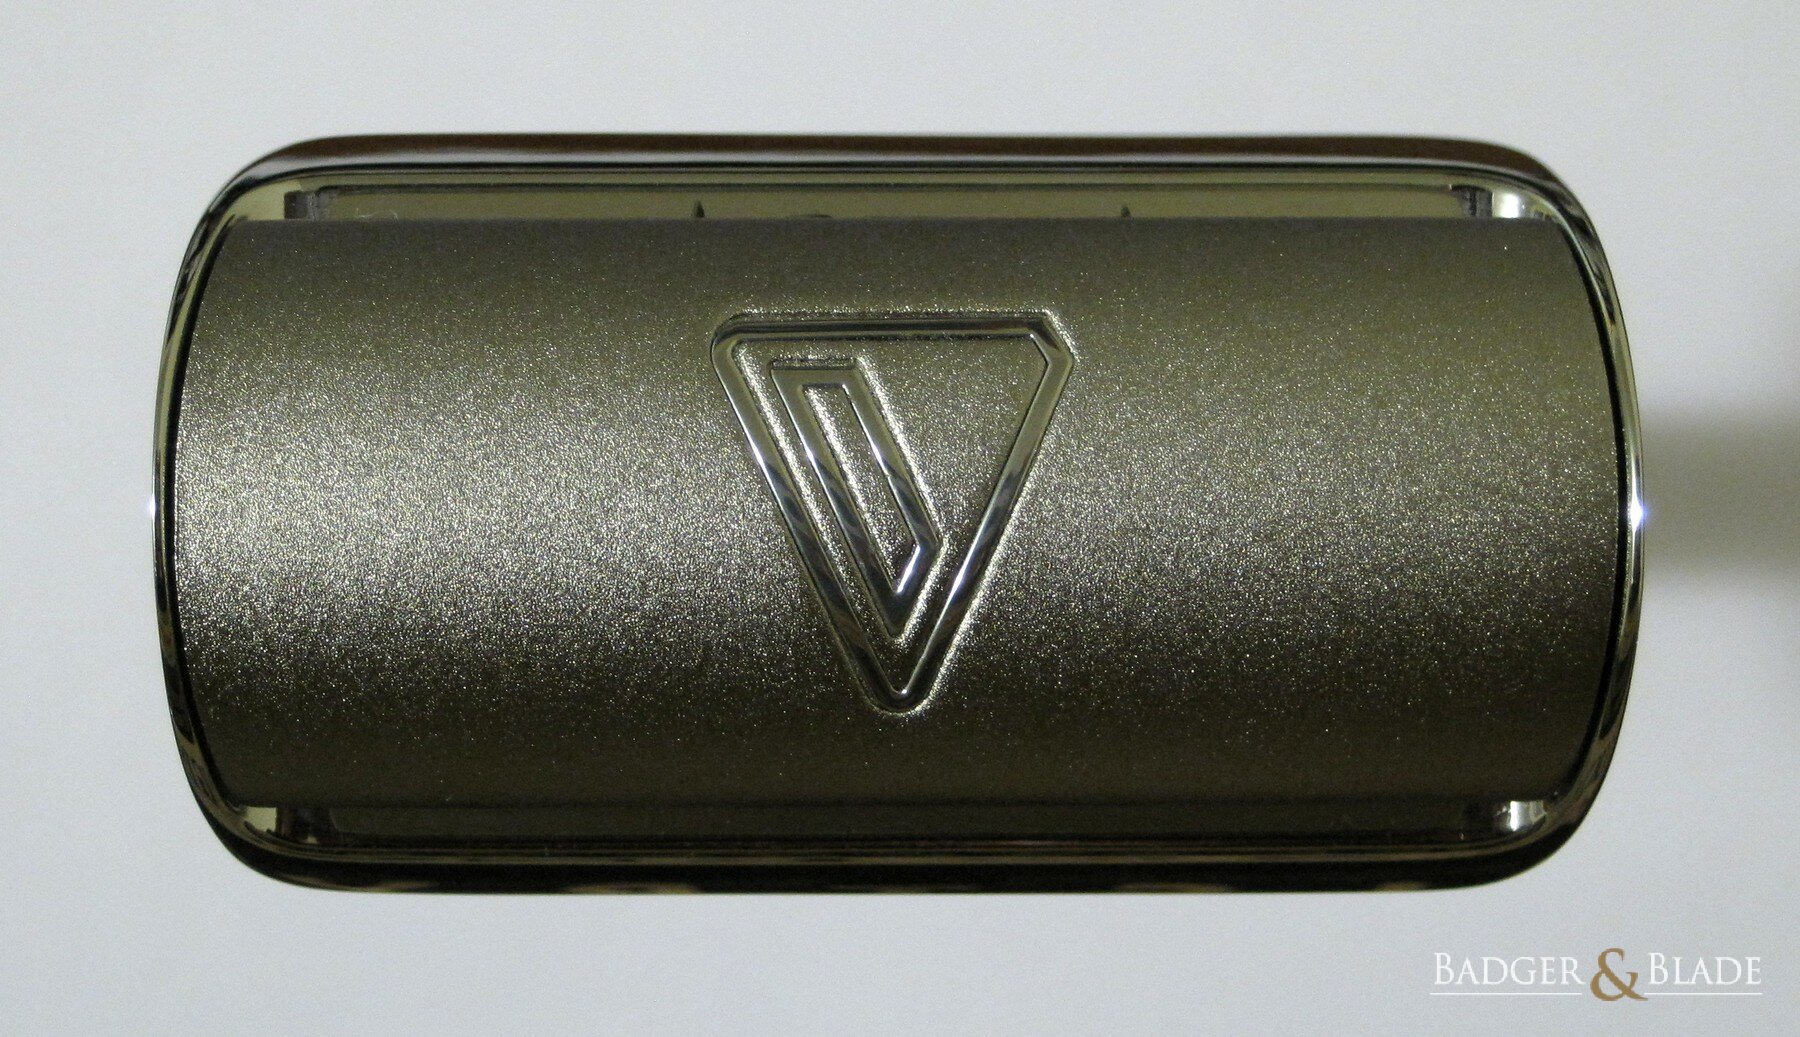
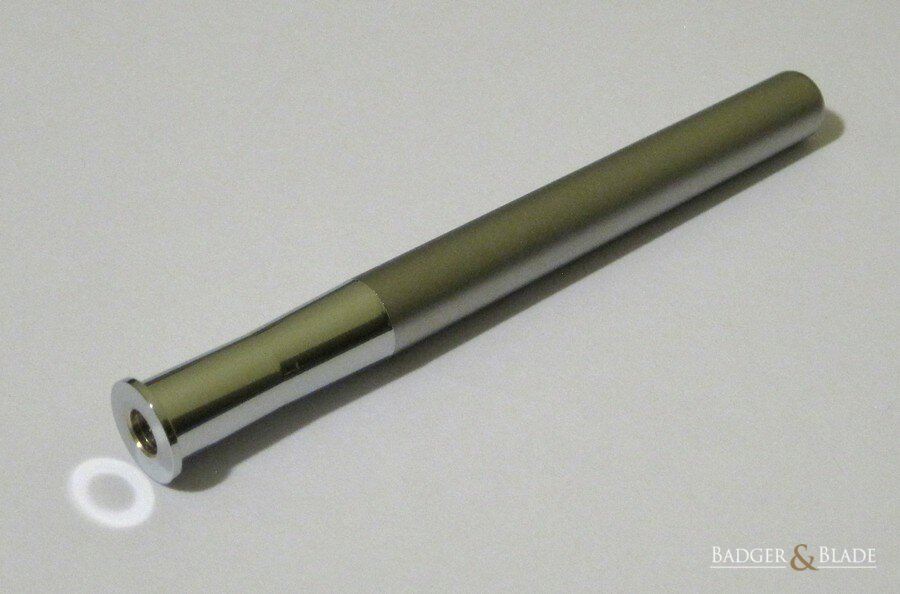
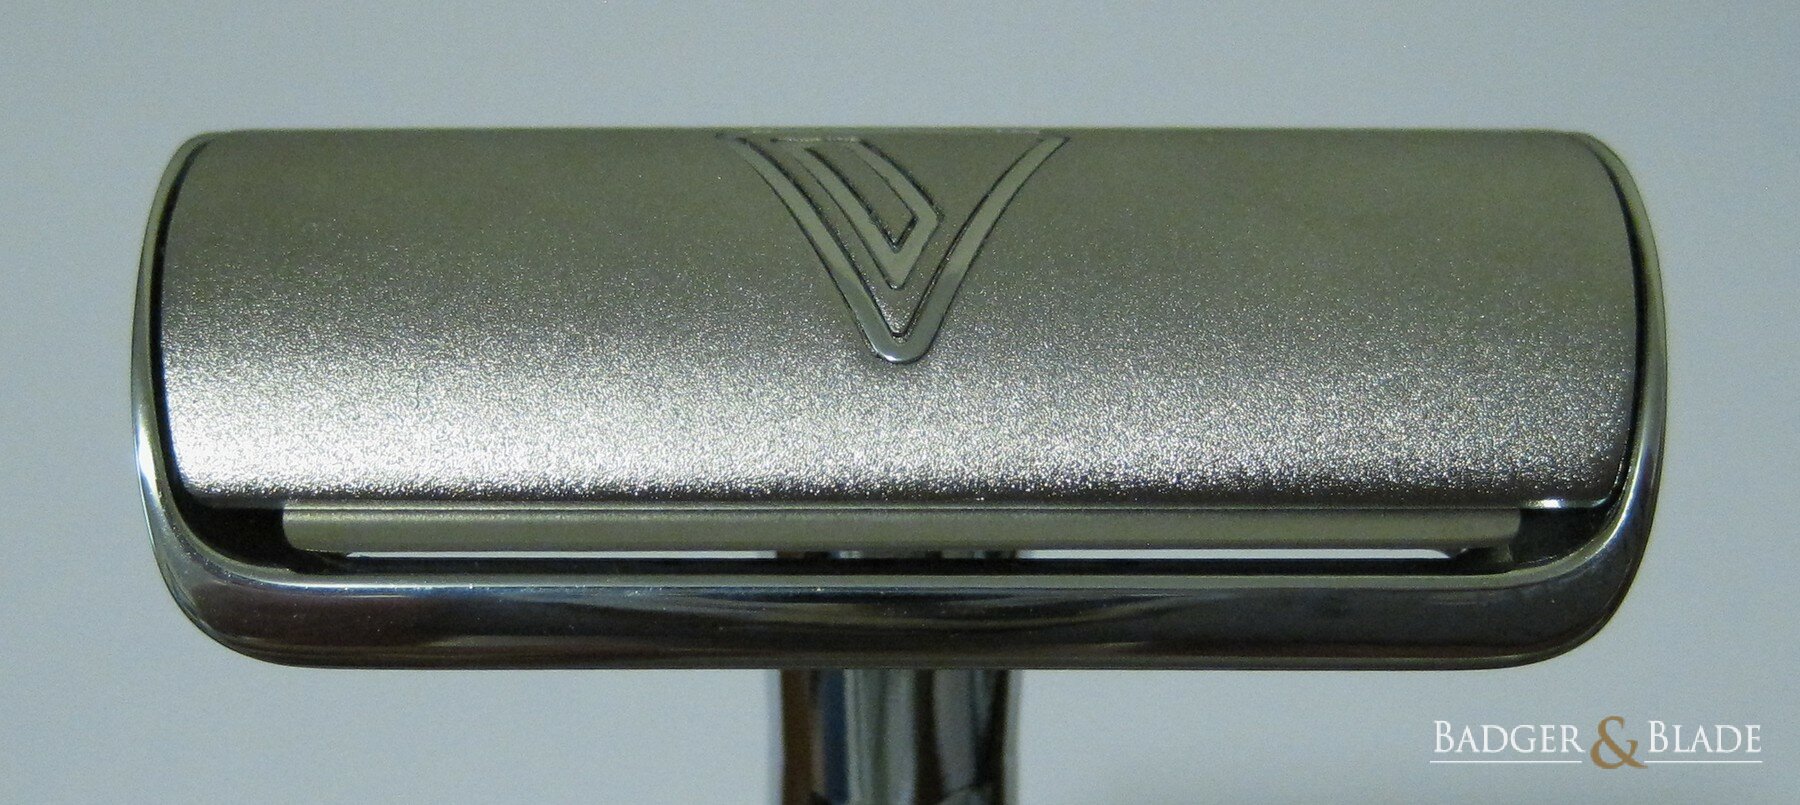
Fine Appearance with Textured and Smooth Chrome Plating
The Bevel safety razor has a textured cap, a smooth chrome-plated baseplate, and a handle that is partially smooth and mostly textured. The Bevel logo can be seen on the cap. Overall, the razor has a fine appearance, but there is nothing remarkable about it.
(Click on image for full-resolution version)
(Click on image for full-resolution version)

(Click on image for full-resolution version)
(Click on image for full-resolution version)
(Click on image for full-resolution version)
(Click on image for full-resolution version)
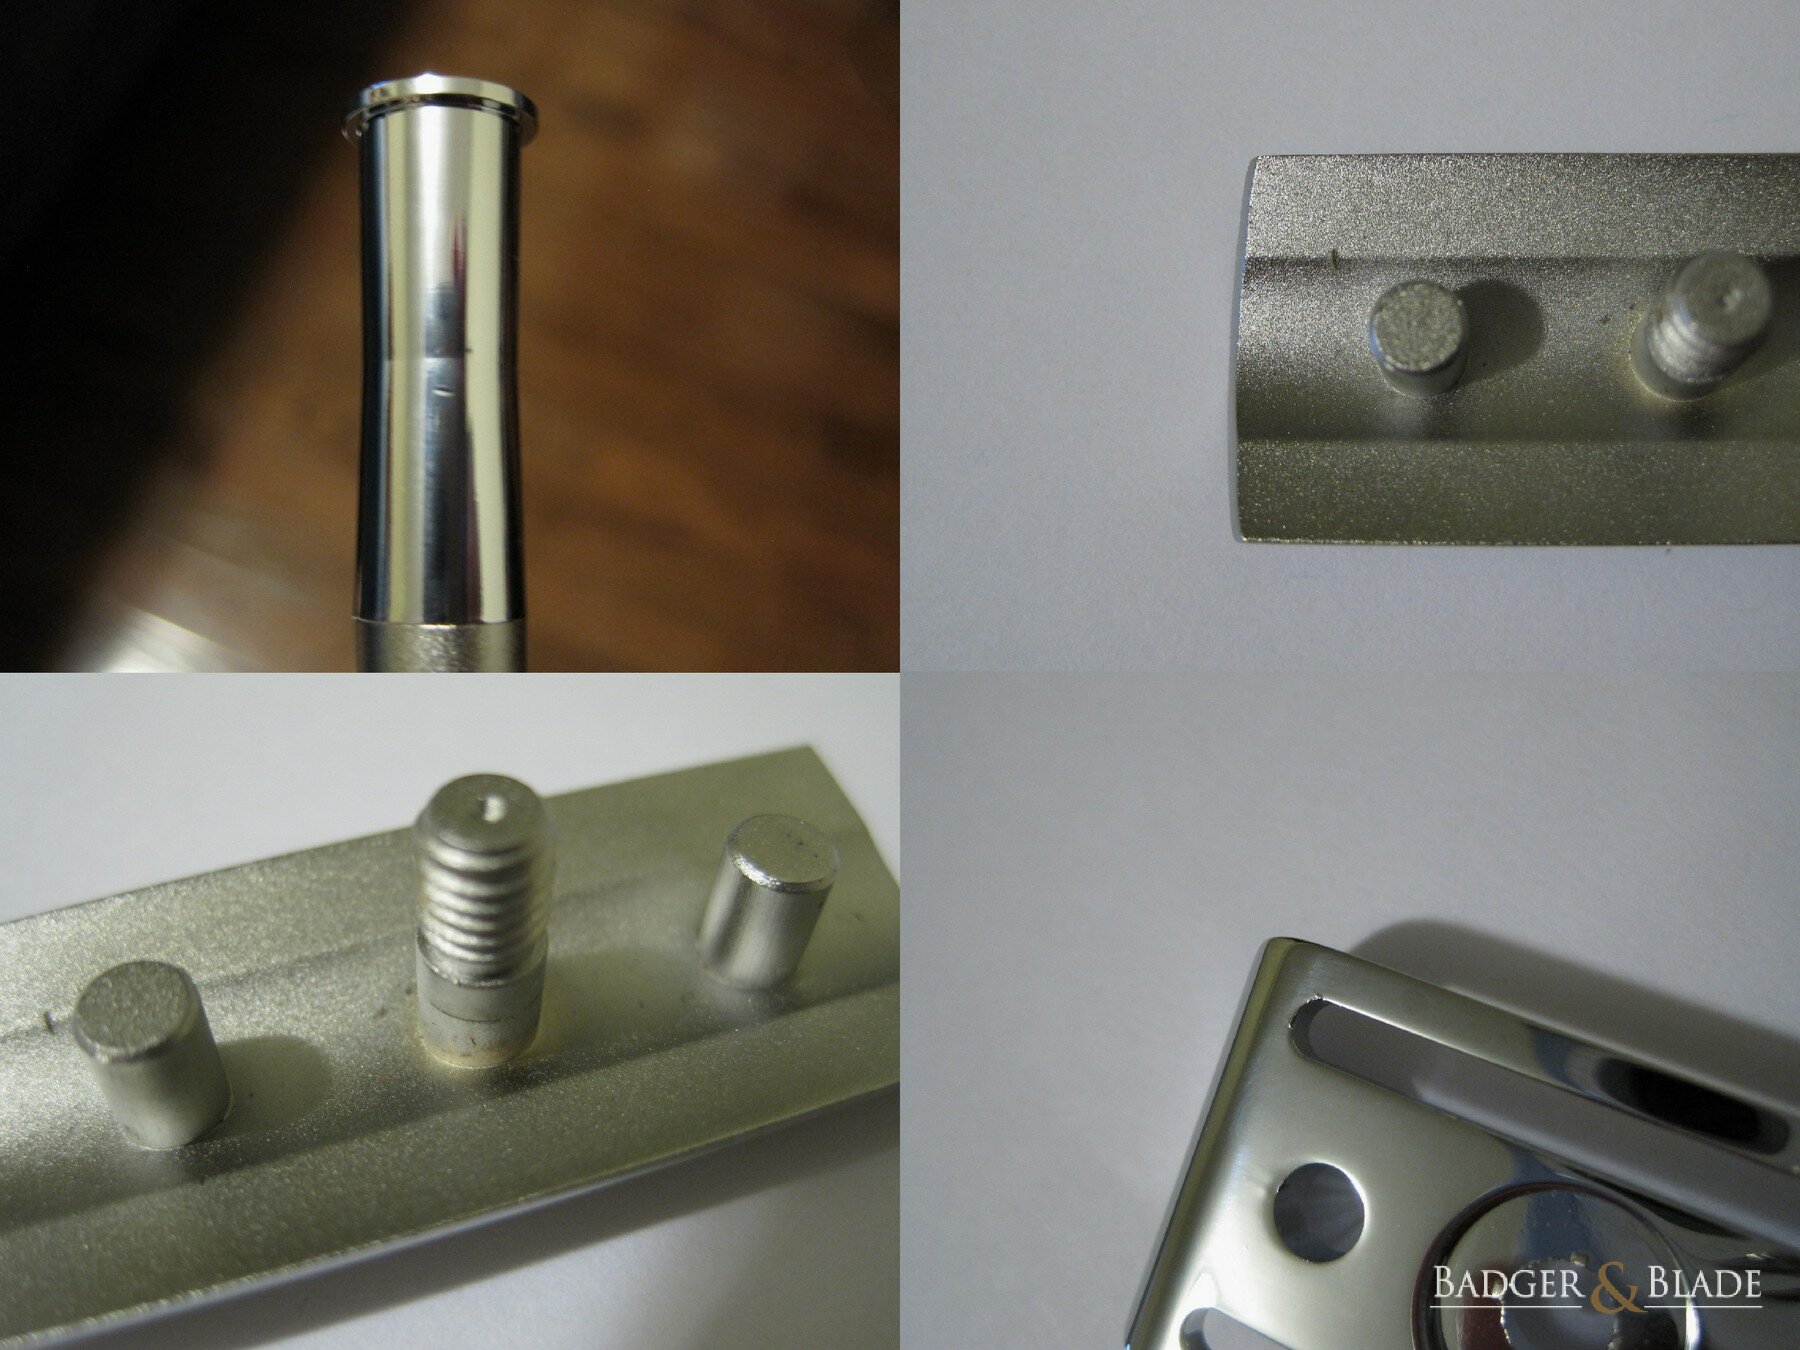
Several Surface Imperfections
The compilation below shows several surface imperfections that were found on my Bevel razor right after it was unboxed. These flaws indicate that the Bevel is not made with the highest standards of quality. Given that the Bevel razor costs more than a nearly flawless Edwin Jagger razor, the Bevel's quality is somewhat disappointing.
(Click on image for full-resolution version)
Measurements of Razor without a Blade
Below is the general table of measurements for the razor without a blade. Mass was measured with a calibrated scale having a 0.01 g resolution, distances were measured with a calibrated digital caliper having a 0.01 mm resolution, and center of mass was measured by carefully balancing the razor on a relatively thin edge of folded paper, noting the critical location, and measuring it with the caliper. Regarding the head, cap, and baseplate, width dimensions are perpendicular to the guards and length dimensions run parallel to the guards, as observed from the top of the razor. The spacing between the side pins/posts was found by averaging inside and outside caliper measurements.
| Bevel DE Safety Razor Measurements without a Blade | |
| Mass | 88.65 g |
| Length | 108.19 mm |
| Center of Mass from Top | 38.75 mm |
| Handle Mass | 56.28 g |
| Handle Length | 101.22 mm |
| Handle Diameter, Minimum | 9.07 mm |
| Handle Diameter, Maximum | 9.98 mm |
| Head Mass | 32.37 g |
| Cap Width | 19.08 mm |
| Baseplate Width | 25.42 mm |
| Head Length | 46.86 mm |
| Center Pin/Post Diameter at Blade | 4.90 mm |
| Side Pin/Post Diameter at Blade | 4.57 mm |
| Side Pin/Post Spacing from Center to Center | 25.31 mm |
The razor's mass, length, and center of mass are described above. Each individual develops preferences for these overall parameters. Due to my previous experience with the PAA DOC Satin (URL) and the EJ Kelvin (URL), the longer handle and greater mass of the Bevel took some getting used to, but it didn't take long. I actually might now prefer more razor mass, while still preferring handle lengths that are shorter than the Bevel's, but my experience is limited.
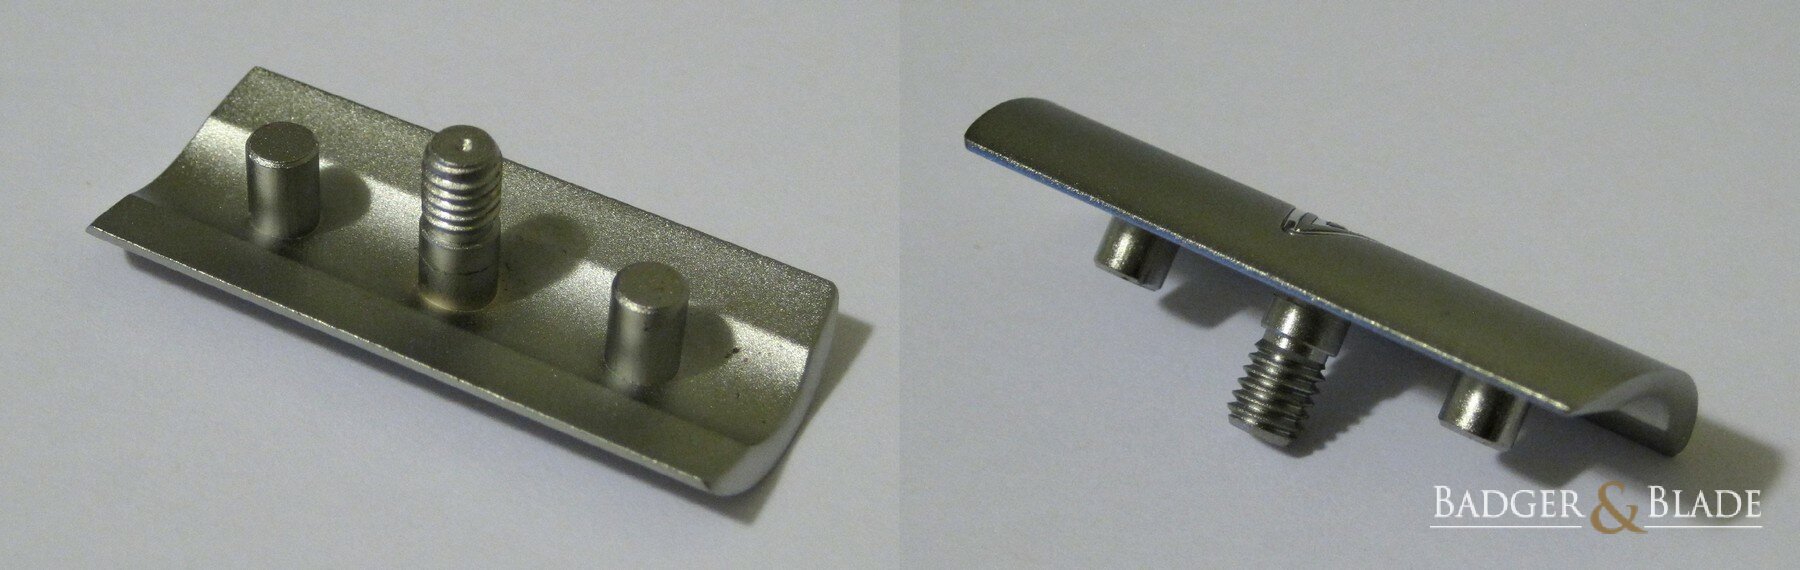
Blade Play Is Frustratingly Large
Loading a blade in the Bevel is often frustrating because the blade play is simply too large. Here is a typical, real example of the Bevel's poor blade alignment:
(Click on image for full-resolution version)
The pins/posts are too narrow for good automatic blade alignment. Based on my measurements of many blades and my measurements of the Bevel pins/posts, the center pin/post is about 0.15 mm smaller than the average diameter of the circular holes at the centers of various DE razor blades. By itself, such wiggle room could be considered a little larger than desired, but still reasonable. What really makes blade alignment difficult with the Bevel is the large blade play from the Bevel's side pins/posts. The side pins/posts are about 0.41 mm smaller than the average inner diameter of the diamond-shaped holes in the cutouts of various DE razor blades. This excessively large wiggle room generally dominates blade alignment, causing undesirable rotation of the blade during loading. (It is highly unlikely that Bevel-branded blades fit significantly better than other blades because apparently nothing is stated by Bevel about that.) With no exposure of the blade tabs for manual adjustments, the user is effectively left with knocking or shaking the razor during repeated reloading of the blade until the blade alignment issue is resolved. I've even used a piece of plastic to carefully push on a blade cutting edge to fix the blade rotation before tightening the razor's handle.
Improved Photo Analysis Methodology
From the PAA DOC Satin (URL), to the Dorco PL602 (URL), to the EJ Kelvin (URL), my analysis of parameters around blade cutting edges improved each time, but they significantly improved this time with my analysis of the Bevel. Given how the Bevel conceals the blade, the Bevel does not allow for analysis of critical parameters to be completed with photographs alone. Physical measurements must at least supplement the photography. In addition to many physical measurements with a digital caliper, my methodology greatly improved with the use of physical objects in many photographs of the razor. These physical objects included a modified blade for excessive exposure in order to accurately measure the blade plane angle, a flat plastic piece for accurately measuring shave plane angles, and a small metric scale for better measurements of guard and cap spans. Digital measurements were easier and more accurate due to these physical aids. These and other advancements in the photo analysis methodology, as discussed below, abrogate the need for apparently "perfect" close-up photographs that capture the blade cutting edge and still fall short with respect to accuracy due to inherent perspective and geometric issues.
Analysis of the Bevel began with measuring blade gap. The razor was loaded with a nominal blade having a 21.96 mm width (and 0.090 mm thickness) and reloading occurred a few times until the positive blade exposure was as symmetric on both sides as I could manage, as judged using a small smooth flat acrylic piece. Using my accurate set of micrometer-measured feeler gauge blade combinations (URL), blade gap was accurately measured on each side of the Bevel to a precision of 0.01 mm by finding the thickest feeler gauge stack that fit at most places between the guard and the blade cutting edge with room to spare. The blade gaps were found to be 0.66 mm and 0.69 mm for an average blade gap of 0.68 mm when rounded to precision.
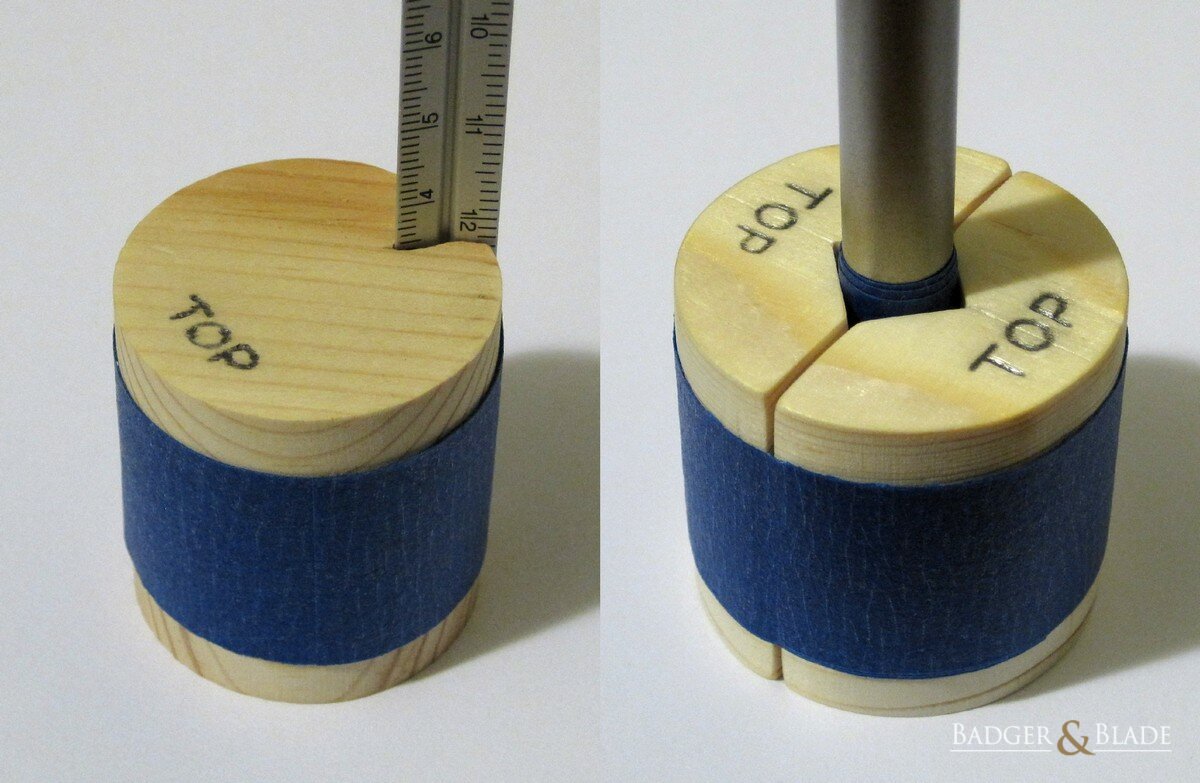
With blade gap measured, I proceeded to set up the razor for photographic analysis. A preliminary step in this process involved making wooden fixtures, or stands, for my metric scale and any safety razor to hold them up vertically and easily move them around. This was a great improvement! Since the Bevel razor has a narrow, tapered handle, blue painter's tape was judiciously wrapped around the handle so that the fixture for the razor held it securely and vertically. Painter's tape was used in general to hold the scale to its fixture and the razor inside its fixture, as shown below.
(Click on image for full-resolution version)
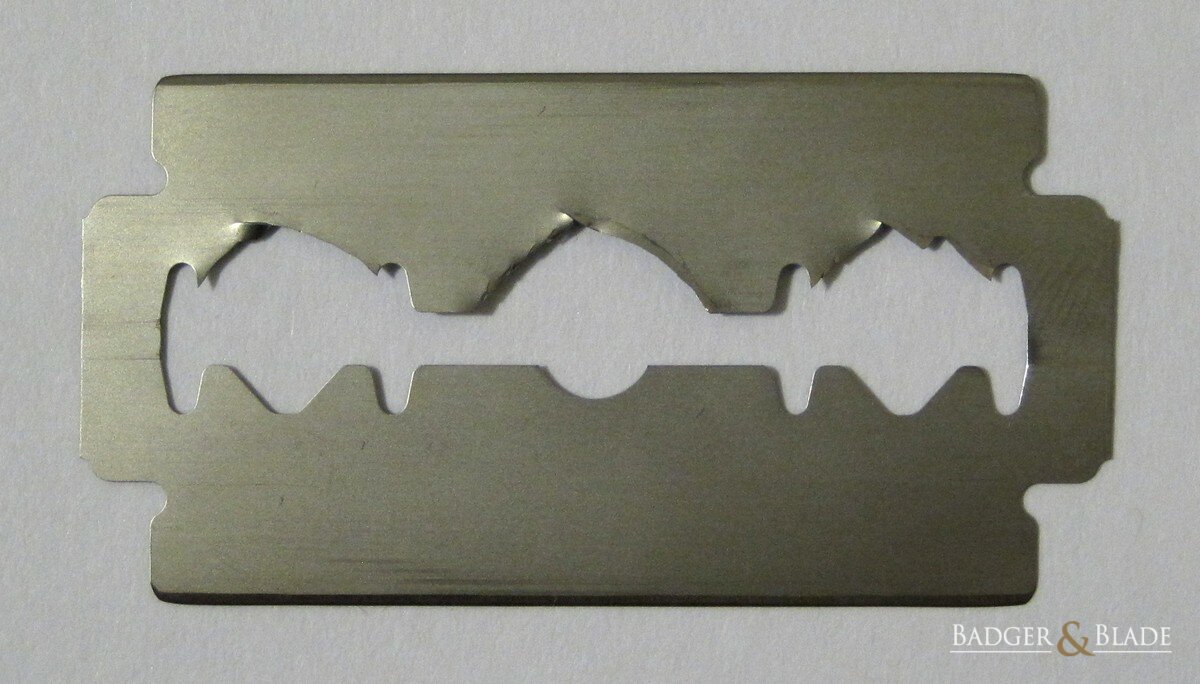
Another preliminary step in the photo analysis process was the making of a modified blade for excessive exposure. This blade is pictured below. It was created by using scissors to make the cutout larger on one side of the blade so that the blade can be shifted during loading towards the other side. This creates the illusion of a very wide blade and, more importantly, allows for easy identification and digital measurement of the blade plane angle from a good photograph.
(Click on image for full-resolution version)
The use of caliper measurements in the analysis has also been added, and one of these measurements is the distance from blade cutting edge to blade cutting edge. The nominal blade has a width of 21.96 mm, and loaded in the razor, the distance between cutting edges was measured with my digital caliper as 21.43 mm. This measurement came into calculations regarding the cantilevered blade cutting edge distances.
The setup for photo analysis proceeded similarly as the last time, involving the camera on a platform with the camera close to and pointing to the wall with a piece of white paper taped on the wall. Currently, the toughest part of the setup is getting the camera positioned with wooden pieces, painter's tape, and small thin right-angle acrylic pieces to have the camera looking forward at the right height to look down the blade cutting edge. The setup includes hard stops for the camera to be repeatedly placed in the same position after rotating it up, taking out the memory card and/or battery, putting back the memory card and/or inserting a full battery, and rotating the camera back down into place. With the camera height fixed, lined notecards were used for fine-tuning the scale and razor height. Notecards were stacked under the metric scale and razor in order to get the center of the camera lens at the same height as the cutting edge of a 21.96 mm blade loaded in the razor. The height was checked closer up and farther away from the lens. The same lined notecards were taped into position such that one of the lines was in the vertical plane running forward from the center of the camera lens. This provided a vertical guide when aligning the blade cutting edge.
Even though the blade cutting edge is hardly visible from the side of the Bevel's head, and I don't actually need photos looking down blade cutting edges for analysis anymore, it was prudent to take the photos, anyway. The razor was placed into position with the blade edge aligned from the top view. The scale's surface was then aligned with the edge of the blade, not the edge of the head. Alignment with the edge of the blade resulted in enough focus on the blade so that the edge could be seen, although not well, while alignment with the edge of the head resulted in a lack of focus on the blade and its edge. Next, a bright, secondary light was held close to the razor and positioned and angled just right to highlight the blade and razor surfaces and provide a backlit background. The camera's white balance was manually adjusted for the controlled room environment with the secondary light shining on the razor. As usual, many photographs were taken with my ten-megapixel camera and the best photograph out of each set was kept.
With the standard photographs captured down each blade cutting edge, photo analysis continued for measuring shave plane angles. Accomplishing this goal was significantly enhanced with the help of a flat square of hard thin plastic. The blue plastic piece was lightly taped into place for either the steep shave plane, making contact with the guard and blade cutting edge, or the shallow shave plane, making contact with the cap and blade cutting edge. Photos were taken for both shave planes and both blade cutting edges. With shave planes being easily identifiable, shave plane angles were digitally measured using a free scalable vector graphics program. Angles associated with both blade cutting edges were averaged in order to cancel out any systematic bias in the photographic setup and provide one overall angle for each shave plane. Accordingly, handle angles were calculated for the shave planes.
The blue plastic piece used for the analysis of shave planes can be seen below in several photographs among all of the photos and caliper measurements used for analysis. Steep and shallow shave planes were measured with respect to a 21.96 mm wide blade, but the neutral shave plane goes through the blade. Capturing the neutral shave plane with the blue plastic piece involved loading the razor with a shim so that the plastic piece could make contact with the guard and the cap as if the blade was still there. Photos were taken for both sides of the razor, and similar to the analysis of the photographs for steep and shallow shave planes, angles were digitally measured and averaged for one overall neutral shave plane angle.
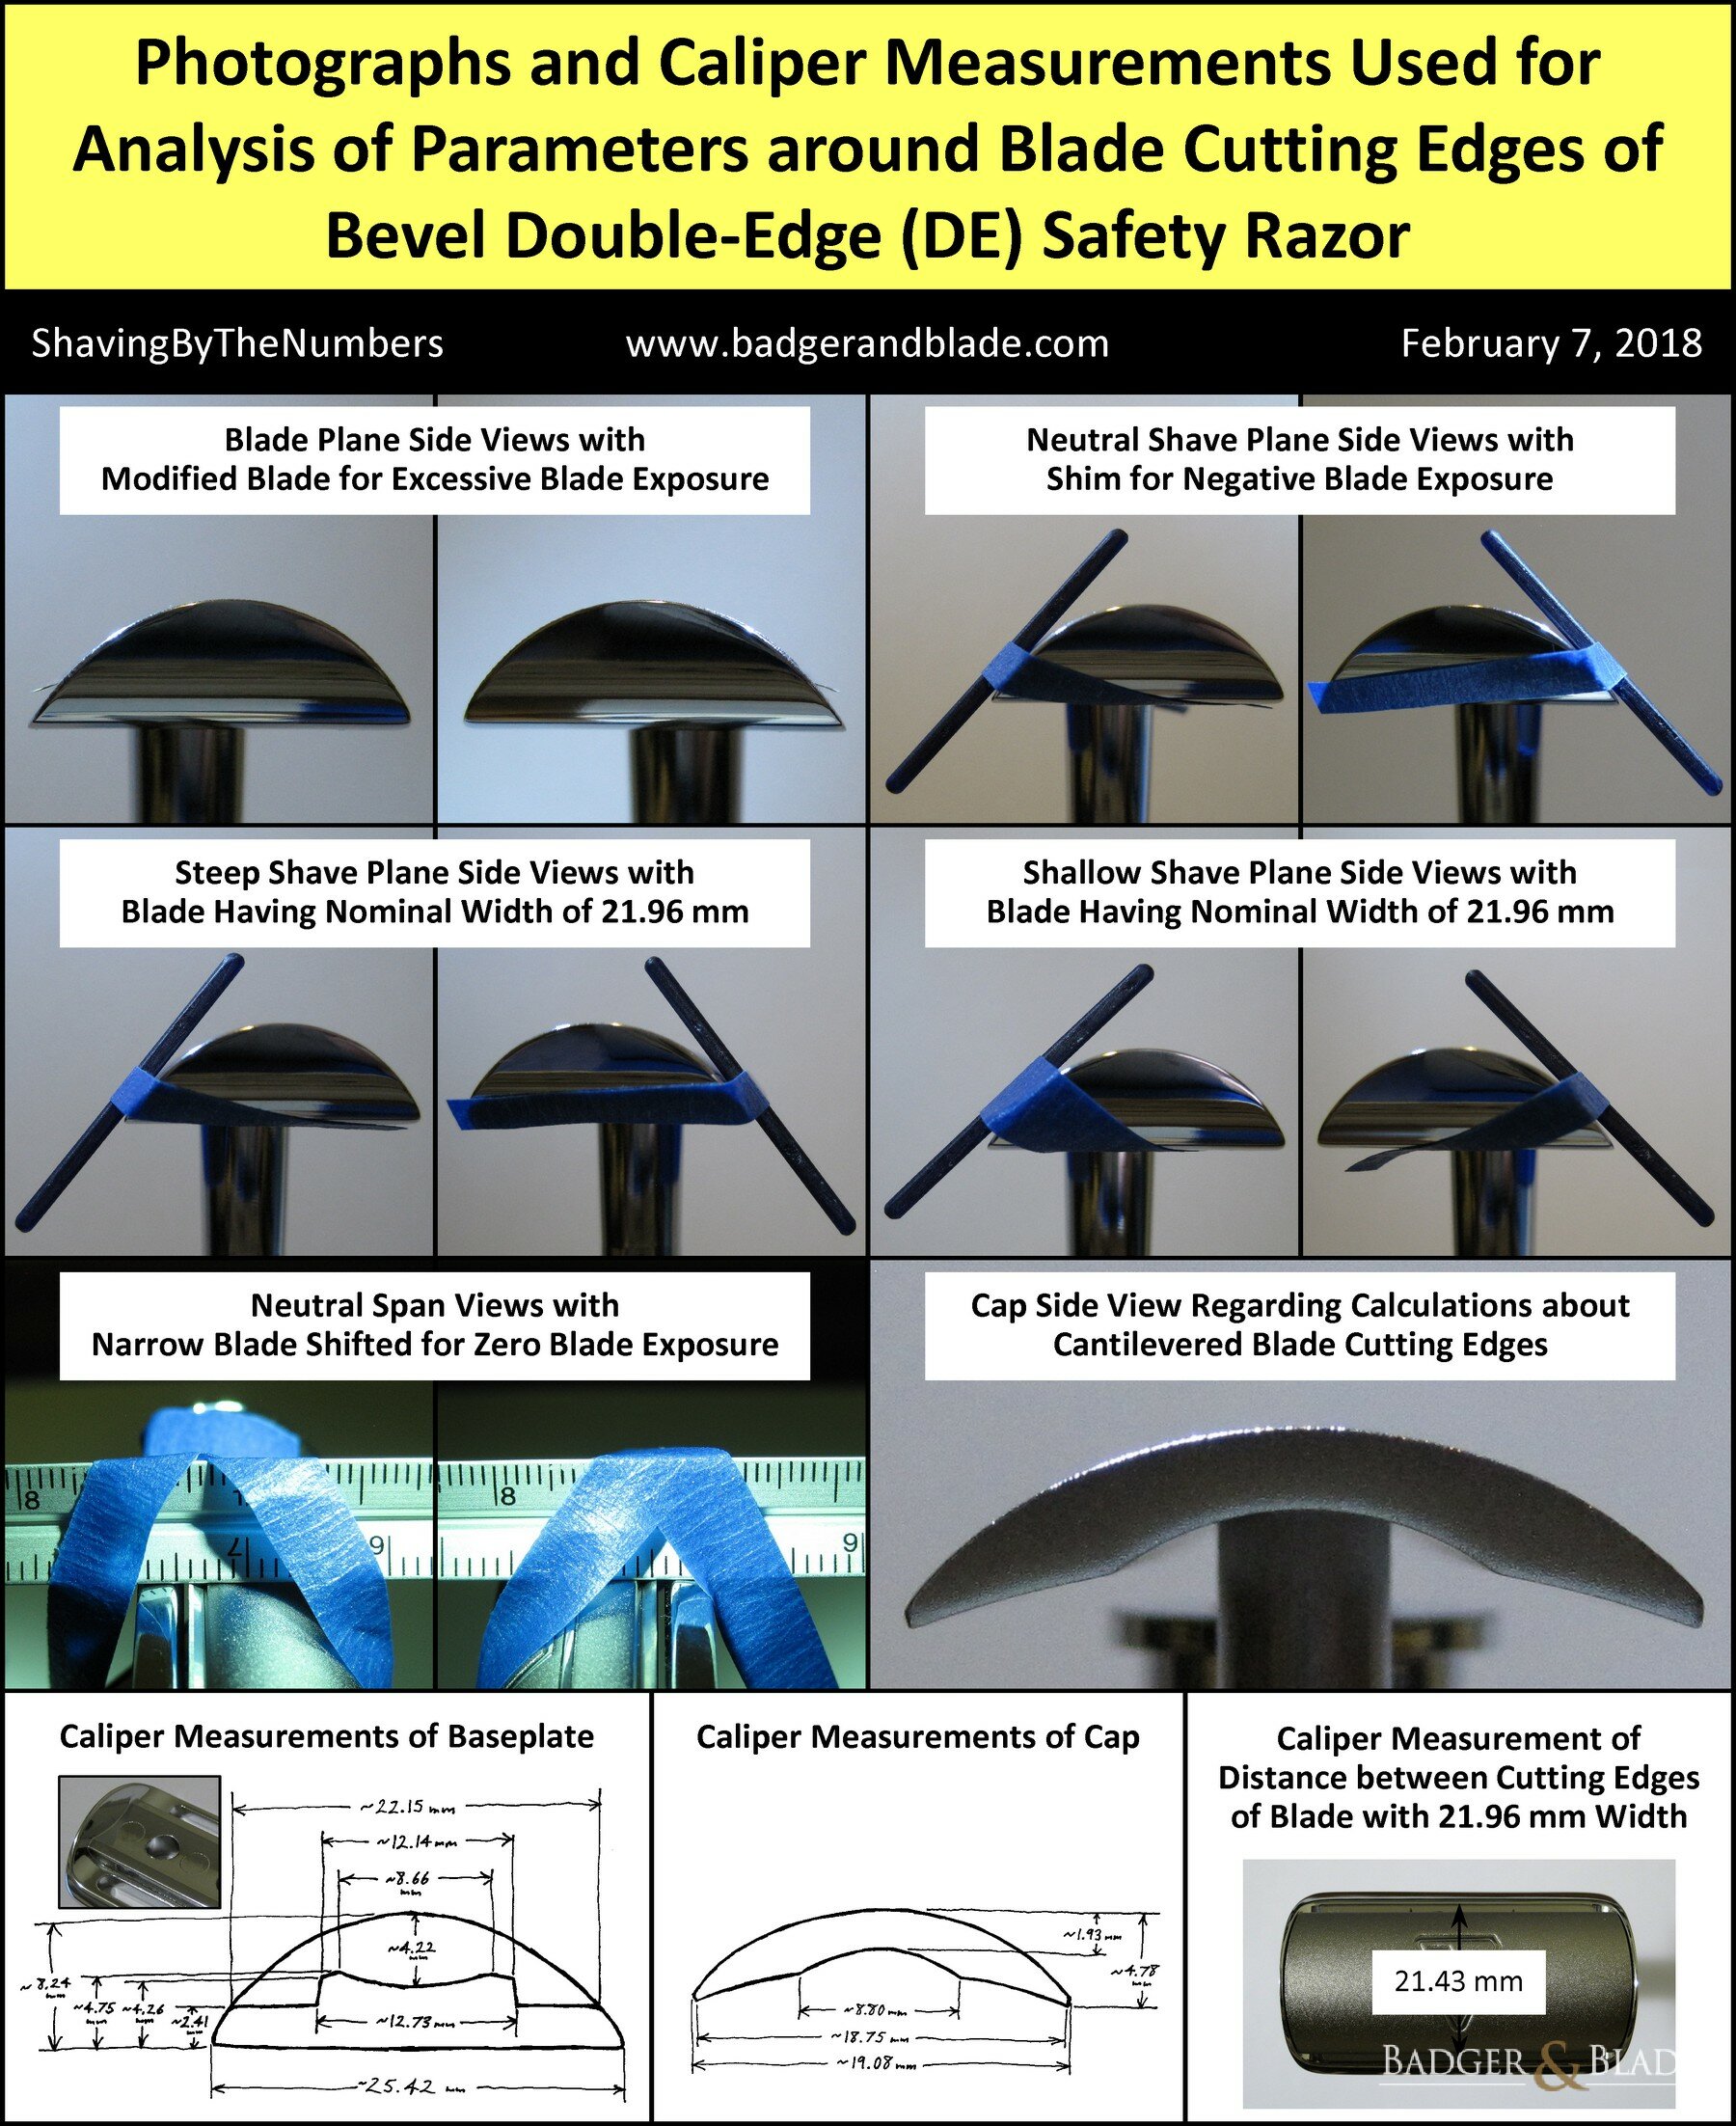
(Click on image for full-resolution version)
Using the modified blade for excessive exposure, as discussed earlier, photos were taken to capture the blade plane on each side of the razor, as shown near the top left corner of the image above. Distortion of the curved head is evident in the photos, but this photographic issue had virtually no effect on the digital measurement of blade plane angles because the blade was carefully centered in the photographs and, thus, remained effectively flat in the photos. Digitally measured angles were averaged to yield the overall blade plane angle. With all average plane angles found, calculating the average neutral, steep, and shallow blade angles was easily accomplished.
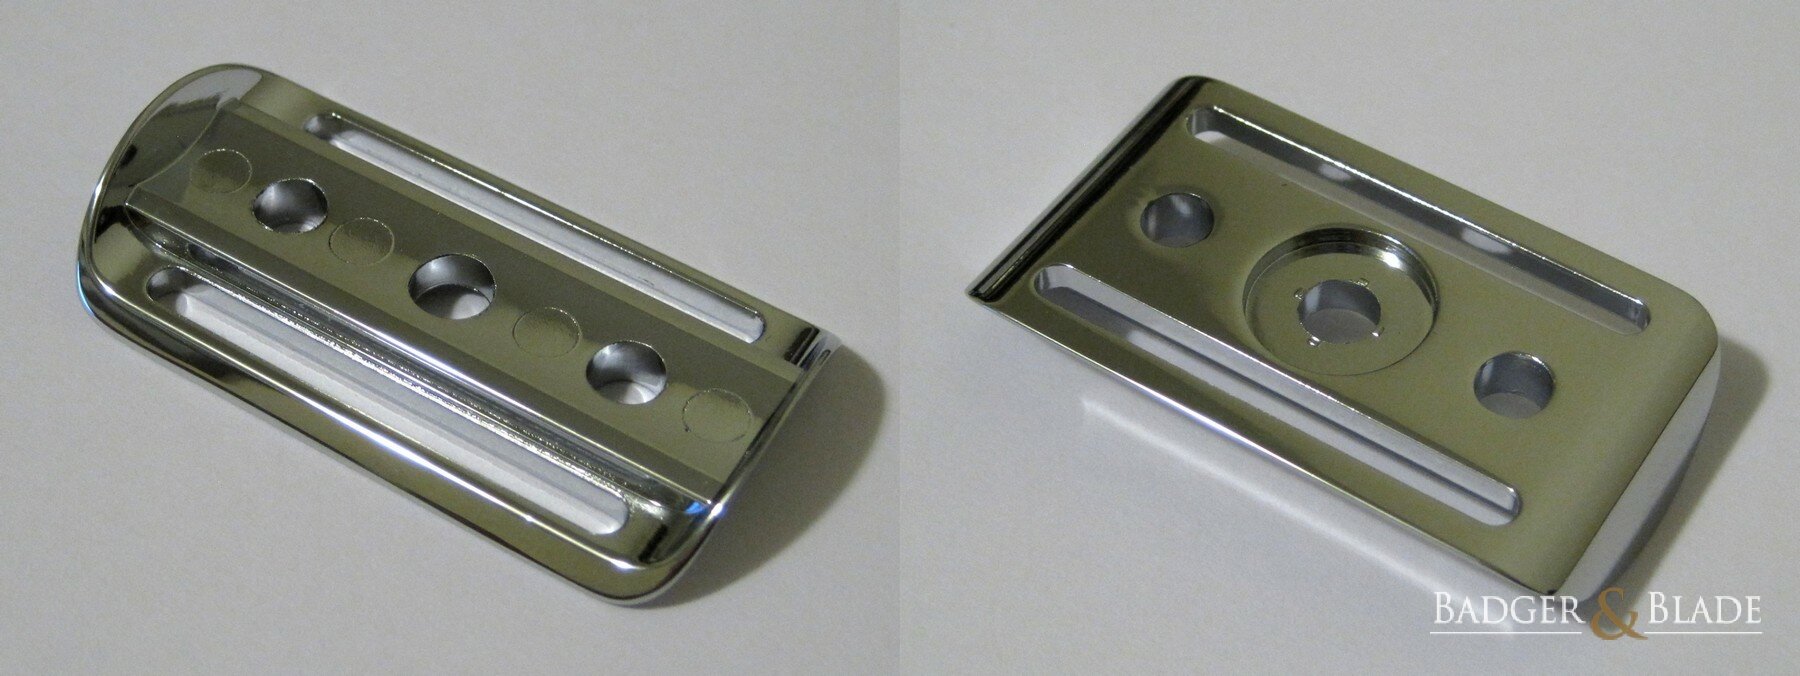
In order to measure guard and cap spans, I took a 21.73 mm wide blade, shifted it over when loading in order to allow some zero blade exposure on one side, taped on the metric scale on that side so that the scale ran along the neutral shave plane to measure neutral spans, and kept the best close-up photo. This was done for both sides of the razor, as shown above. Neutral guard and cap spans were then digitally measured and averaged, taking advantage of the shadows cast onto the razor by the bright, secondary light that was held close to the razor. It should be noted that the pictures show that the cap span on one side is significantly longer than on the other side. I verified this by physical inspection with a flat plastic piece against the razor loaded with a shim. It does not appear that rotating the cap by 180 degrees would change the situation.
The neutral blade width associated with zero blade exposure was still needed to calculate blade exposure, guard span, and cap span for any blade width, particularly 21.96 mm. An investigation was warranted for finding the neutral blade width. It was conducted using my catalogue of blades having reference widths. Using a shim against the blade cutting edge, I pushed over each blade when loading it in the razor to effectively decrease the blade width. The effective blade width was then the actual blade width minus the blade's center hole diameter plus the razor's center pin/post diameter. The neutral blade width was found for each side of the cap with each side of the baseplate, resulting in four combinations. Two neutral blade widths were found to be 21.60 mm and two neutral blade widths were found to be 21.70 mm for an average neutral blade width of 21.65 mm. Trigonometric relations were then used with the neutral blade angle and the neutral guard and cap spans to calculate the blade exposure and spans for an average 21.96 mm blade width. It was possible to photograph the razor with a 21.96 mm wide blade in order to digitally measure how the guard span shifts for the steep shave plane and how the cap span shifts for the shallow shave plane, but I did not spend the extra time for that analysis.
Determining the cantilevered blade parameters involved assessing precisely how the razor holds a blade, which was made difficult by the razor's concealment of the blade. Measurements and photographs of the cap and baseplate were, therefore, used to virtually assemble the razor with a 21.96 mm wide blade for making the necessary measurements. Cap and baseplate measurements made with my digital caliper are shown above, along with a good photograph of the cap from the side. For the virtually assembled razor, the neutral blade width was digitally estimated as 21.69 mm, which was close to the physically determined neutral blade width of 21.65 mm and served as overall validation of the digital model. The distance between free-end points, where the blade's free ends make contact with the underside of the cap, was digitally measured as 18.69 mm. Along with the physically measured distance between blade cutting edges and the photographically measured blade angle to the horizontal, the average free-end distance was easily calculated as 1.44 mm for a blade having an average width of 21.96 mm. The clamp distance from the blade cutting edge to the clamping point was found by adding the average free-end distance to the average blade arc length between the free-end and clamping points. This is where the distance between clamping points came in, as approximately measured as best as I could with my digital caliper. The average clamp distance was calculated as 4.87 mm for a 21.96 mm wide blade.
Parameters around Blade Cutting Edges
A fairly accurate cross-sectional illustration of the Bevel safety razor is shown below next to a close-up photograph looking down a blade cutting edge. Overall values for parameters around the blade cutting edges, the measurements of which were detailed in the previous section, are also given below. Definitions of the parameters can be found in the ShaveWiki (URL). The first table of values regards the neutral values associated with zero blade exposure. Since the neutral blade width is smaller than the smallest width that I have ever measured among a variety of blades and numerous blade samples, it is possible that any blade will result in a positive blade exposure with the Bevel. For blades with a nominal width of 21.96 mm, the blade exposure is 0.08 mm, as shown in the second table with other parameter values for a typical blade in the Bevel. The first table is presented for the record and can otherwise be ignored. The second table is comprehensive and should be used for understanding performance characteristics of the Bevel.
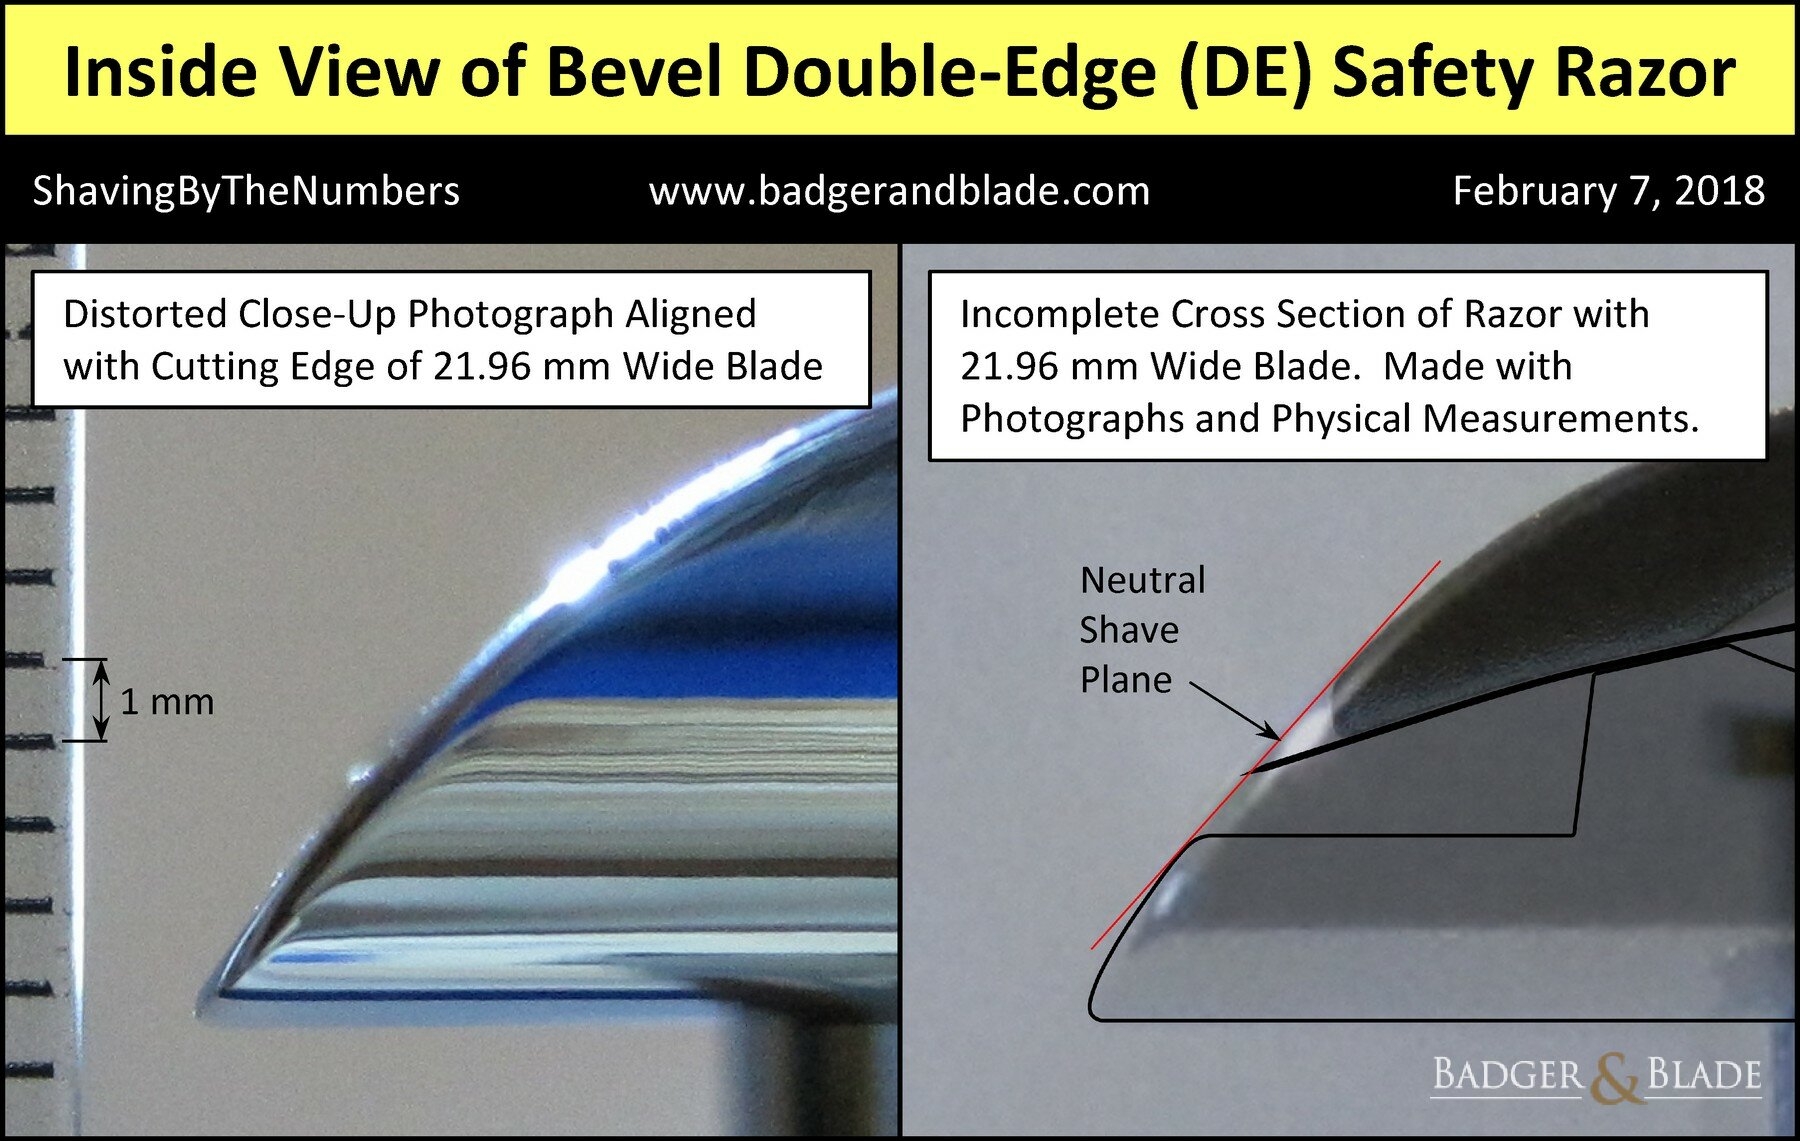
(Click on image for full-resolution version)
| Bevel DE Safety Razor Neutral Values Associated with Zero Blade Exposure | |
| Neutral Blade Width | 21.65 mm |
| Neutral Blade Angle | 30.23 deg |
| Neutral Handle Angle | 42.14 deg |
| Neutral Guard Span | 1.40 mm |
| Neutral Cap Span | 1.91 mm |
| Bevel DE Safety Razor Parameter Values Associated with Nominal Blade Width of 21.96 mm | |
| Steep Blade Angle | 34.66 deg (w/ 37.71 deg Handle Angle) |
| Neutral Blade Angle | 30.23 deg (w/ 42.14 deg Handle Angle) |
| Shallow Blade Angle | 26.97 deg (w/ 45.40 deg Handle Angle) |
| Blade Exposure | 0.08 mm |
| Guard Span | 1.27 mm |
| Cap Span | 2.04 mm |
| Blade Gap | 0.68 mm |
| Free-End Distance | 1.44 mm |
| Clamp Distance | 4.87 mm |
Modified Bevel Works Well For Me
Before attempting any razor modification, as specifically done with the EJ Kelvin (URL) and generally discussed in the ShaveWiki (URL), I tested the Bevel without any modification. Shaving with an Astra Superior Platinum was good, but I didn't get as close as I normally would with my modified EJ Kelvin and a Kai blade. With a new Kai blade, the Bevel was way too aggressive for me with a lot of snagging above the lip, but the shave was closer than what I would normally get with my modified EJ Kelvin. Given the parameter values presented above, and utilizing average blade width data for the Astra Superior Platinum and Kai blades (URL), the Astra Superior Platinum yielded a blade exposure of about 0.08 mm and the Kai yielded a significantly larger blade exposure of about 0.14 mm (or 0.06 mm more than normal), which helps explain the performance differences, especially in light of personal and general opinions that the Kai is a sharper blade.
After evaluating the razor without any modification, I began testing the Bevel with different combinations of the Astra Superior Platinum and the Kai with different numbers of tape strips under the cap edges and shims under the blade. Blade exposure was judged, as usual, with my small flat piece of smooth acrylic moved against the blade cutting edge and razor. Overall, using different modifications with the Kai and Astra Superior Platinum for very similar blade exposure, I got closer and better shaves with the Kai blade compared to the Astra Superior Platinum blade. I settled on the Kai blade with two layers of painter's tape strips under the cap edges and one shim for barely or slightly negative blade exposure, smaller guard span, smaller blade angle, and more blade rigidity. Neutral-angle shaving was also preferred, as is normal for me, but given the modified razor with effectively zero blade exposure, the issue of shaving angle was moot.
This setup doesn't result in perfect shaves for me, since I would prefer more closeness with less potential irritation and risk of cuts, but the setup is good. In working towards a closer shave, I tested a new Feather blade with two shims, instead of one, to make the blade exposure similarly neutral with a Kai blade. I was very careful with pressure, using much less than I normally would, and I got hacked up! The shave was closer, at least, but the many cuts and significant irritation from the Feather blade were not good. It is possible that I might end up preferring a Feather blade with a different razor, but in the meantime, the Kai blade was preferred with the Bevel safety razor.
Bevel Has Much Smaller Guard Span Than EJ DE89, Making Bevel Milder
When I switched from the EJ Kelvin to the Bevel, the Bevel immediately felt much smoother, as if I couldn't cut myself if I tried. (Of course, that was just a feeling, not reality.) After a few months of daily use with the Bevel, it was a good idea to revisit the EJ Kelvin for comparison. After shaving with my preferred modified setup with the Bevel razor and a Kai blade, as discussed in the previous section, I shaved the next day with my preferred modified setup with the EJ Kelvin and a Kai blade using the same lather with the same measured masses of soap and water. The modified EJ Kelvin had one layer of tape strips under the cap edges and no shims for effectively neutral blade exposure, very similar blade exposure as with the modified Bevel.
The feeling of how much harsher the EJ DE89 head was to the Bevel's head was apparent right from the first strokes with the Edwin Jagger. It is relatively aggressive or harsh compared to the Bevel, and this was felt even while I was using lighter pressure with the EJ Kelvin. In the end, the closeness of the shave was similar between the two razors, but the shave with the Edwin Jagger was much worse, including several nicks and cuts and significant irritation that was felt by the end of the shave and lingered afterwards. The reason that the Edwin Jagger is so much more aggressive or harsher than the Bevel is because the guard span with the EJ DE89 head (2.25 mm) is almost twice as much as that with the Bevel (1.27 mm). This is, by far, the most significant difference in parameter values around the blade cutting edges based on my analyses of these two razors. The neutral blade angles, blade exposures, and cap spans are nearly identical, but the guard spans are very different. I believe that the larger guard span with the Edwin Jagger allows for more bunching up of skin ahead of the blade, resulting in larger blade-to-skin angles and more irritation. This probably also explains why there was more drag felt with respect to cutting hair with the EJ DE89 head.
Another possible factor with the increased aggression of the Edwin Jagger compared to the Bevel could be the larger free-end and clamp distances with the Edwin Jagger, which are roughly 20 % longer and result in less blade rigidity, more blade cutting edge deflection. In fact, with blade deflection being proportional to the cube of cantilever distance, it would seem that the Edwin Jagger would have about 70 % more blade deflection than the Bevel for the same deflection force on the blade cutting edge.
Smooth Straight Guard Probably Increases Friction
Based on my experience with both the EJ Kelvin and the Bevel, it seems that friction with respect to lather is a little less, although similar, with the EJ DE89 head due to differences between the safety guards. The EJ DE89 head has a scalloped guard, while the Bevel has a straight bar. Both guards are plated with smooth chrome, which apparently causes more friction than textured surfaces (URL). The scallops of the EJ DE89 guard can effectively increase blade exposure and guard span due to the open spaces between the peaks of the scallops. Those peaks can indent the flexible skin more than a straight bar, but the straight bar can contact much more skin, so it is possible that the overall effect is more friction from the Bevel's straight guard compared to the EJ DE89's scalloped guard. Nevertheless, I prefer the straight guard for its consistency in safety razor parameters along the blade cutting edge, making shaves more reliable with less risk of cuts.
Textured Handle Does Not Eliminate Slip
Slipping occurs sometimes with the handle, in my experience, due to the lack of knurling. As exhibited here, the handle has a textured surface:
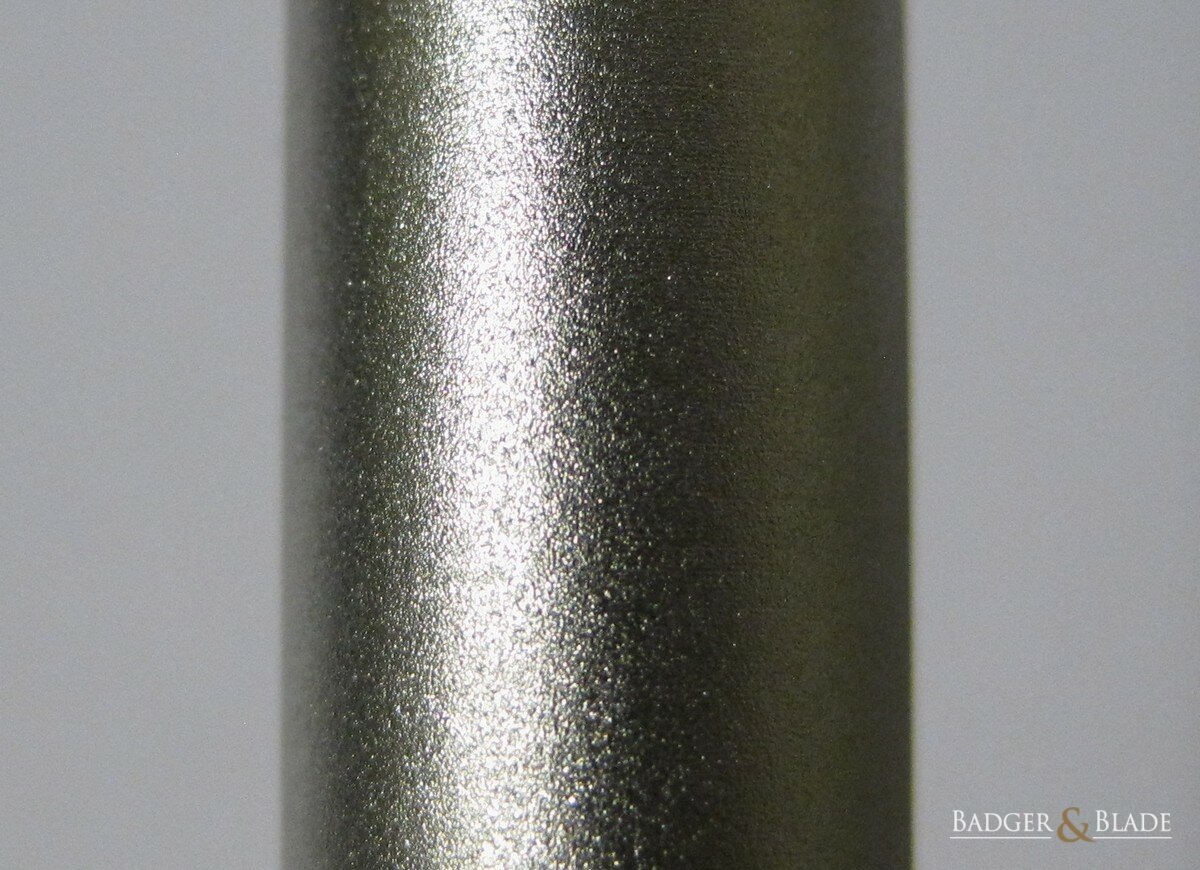
(Click on image for full-resolution version)
This surface treatment might prevent slip, but it does not eliminate slip. I have found myself occasionally readjusting my grip on the Bevel's handle due to slip, which is probably also related to the handle's tapered shape that gets slightly thinner towards the bottom. Personally, I'd prefer that the handle have knurling and a larger, more uniform diameter. In other words, I'd prefer a different handle. Screwing on the handle from another razor is easy, as I've proven to myself, but since the issue of slip was minor and I wasn't interested in creating a hybrid razor, I stuck with the handle that came with the Bevel.
Assembly and Disassembly Can Be Dangerous
Putting together or taking apart any razor can lead to a nasty cut, but this is especially true for the Bevel. This is because of the lack of grip with the Bevel's handle and the sloped sides of the Bevel's head. It is easier to lose grip of the handle and it is more difficult to securely grip the sides of the head when installing or removing a blade. I learned my lesson when I once tightened the razor too much. When I tried to loosen the handle, even when trying to not cut myself, I slipped and cut my thumb on the blade. Ever since then, I've tried to hold the razor head against another surface for support or between some cloth when tightening or loosening the razor to protect my hands.
Cleaning Is Simple
The Bevel cleans easily with soapy water and a toothbrush. Consistent with my normal pattern of drying razors after cleaning, I use a tissue to wipe off the residual soap scum that can be left in some tight spots and edges, such as in the corners of the long cutouts next to the safety guards.
Reflections
As hoped, due to the smaller guard span, the Bevel is significantly less aggressive and really works better than the EJ Kelvin for me. I wish that the Bevel was made with higher quality for its price, and I'd prefer some design changes, but at least the razor results in better shaves. It is neat that the Bevel is available in some brick-and-mortar stores. It isn't a perfect razor, but at least it is out there introducing others to traditional shaving.
What's Next?
Now that I'm finished analyzing the Bevel, it is time to move on. I'd like to keep moving in the direction of less aggressiveness, hopefully while increasing efficiency and blade rigidity at the same time. Since I'd also like to try something different, I'm leaning towards the Fatip Piccolo. Thoughts?
")

 I hear what you're saying about guard span and blade rigidity. The importance of each of these things might vary from person to person. You've never found blade rigidity to be an issue for you. That's cool. I can't even say how important blade rigidity is to me because of my lack of experience. At least I know that guard span is very important to me. My experience with the Bevel has proven that. My modified Bevel and modified EJ Kelvin are very similar in the critical parameters around the blade cutting edges, with the big exception being guard span (and type). (Even the blade gaps are very similar, but blade gap doesn't fundamentally matter much at all compared to guard span and blade exposure.) I can't say what exactly is happening with the skin, how the forces are increasing or changing, but it sure does seem related to skin bunching up more with the EJ DE89 head. I'm glad that we agree on guard span being a big issue with skin bunching up. It only makes sense that more guard span allows more skin to get in front of the blade and cause a problem. I'd love to analyze the Feather AS-D2, but from the looks of it, I'd probably agree with you about its performance.
 Your thinking about the Bevel was right. You definitely wouldn't like it. As for me, it worked out better than the EJ Kelvin, which makes me happy, but it isn't something that I want to keep using.


