What's new

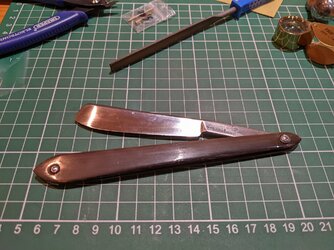
A French razor from the 1700's (A PARIS CH? BREVETE)

Happy new year everyone.

So I picked up some ancient French razors and restored one over the Christmas period.
The French seller described this one as "A PARIS BREVETE" but I've not had much luck in finding out more about it.
If anyone knows any background info post it here.
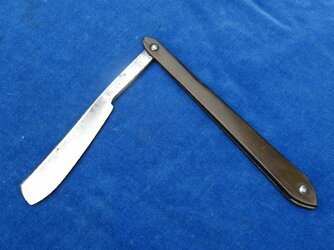
Stubtail - A PARIS BREVETE 8 (3).jpgStubtail - A PARIS BREVETE 8 (7).jpg
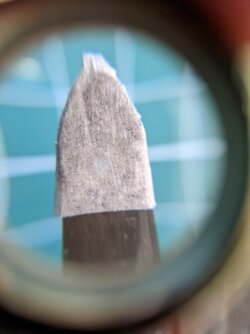
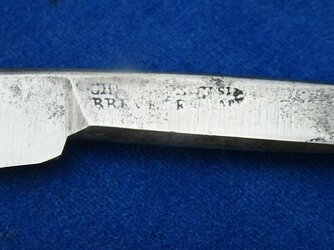
I can see CH? (Charles?) Brevete on the tang and "A PARIS" where the PARIS is in a circle (RIS part of Paris is goes upside down.

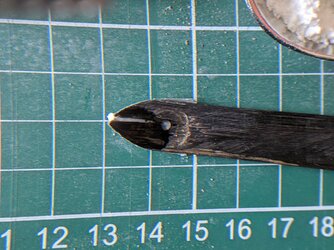
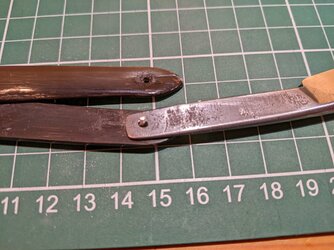
The horn scales are cracked at the "showside" pivot pin enough so that it flops around a bit.
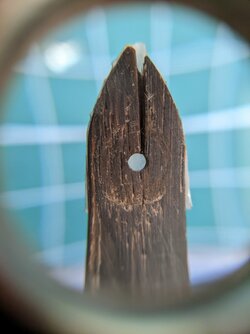
PXL_20211209_125320871.jpgPXL_20211209_125332296.jpg
The crack in the scales is bad enough that it'll never bear the weight of this hefty near wedge blade so that'll need to be fixed.
I taped the other side to make a receptacle for some baking soda.
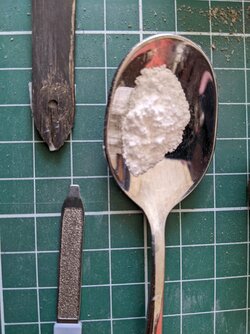
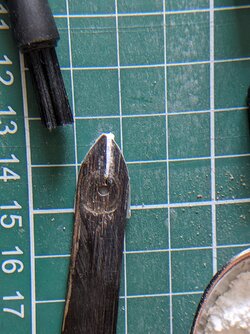
PXL_20211209_125702344.MP.jpgPXL_20211209_130543415.jpgPXL_20211209_130700090.MP.jpg
Packed as much as I could get in there and super glued it which will make it stronger than when it was just horn.
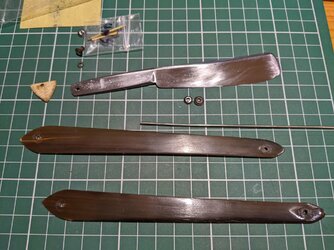
 
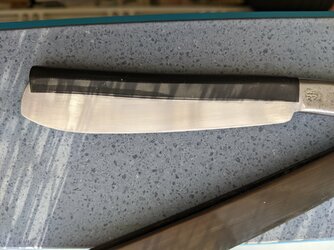
I sanded the blade to a good shine but left the tang with some pitting to preserve what was left of the stamping.
Due to its age I'm more concerned about puting it back into service than its looks although I think it looks fantastic for around 300 years old.

Time to put it back together
The only thing new going into this is nickle silver pinning so the original collars and bone wedge were cleaned up and put back where I found them. The better collars were chosen for the showside and a slightly damaged one went on the backside.
PXL_20211211_155445038.MP.jpgPXL_20211211_165127771.MP.jpg

PXL_20211211_171153317.MP.jpgPXL_20211211_171203413.MP.jpg
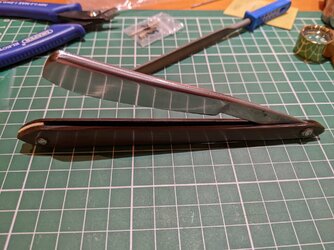
The pivot is nice and tight to hold the blade in the picture above as, for its size, it is incredibly heavy.

Off to the hones
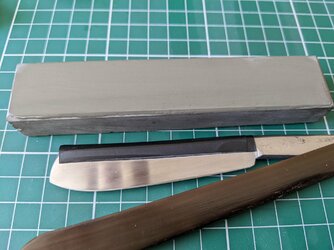
My trusty 1.5k Shapton and two layers of tape. (I rarely use tape but this needs it)
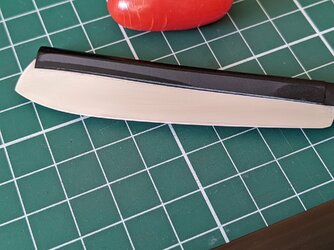
The bevel set was shockingly easy for a piece this old it is razor sharp every mm. (They don't make'em like they used to)
PXL_20211212_100439724.jpgPXL_20211212_115940531.MP.jpg

I used a small hone that I'm not sure exactly what it is but it put some edge on it. Easily treetopping arm hair.
PXL_20211212_123208679.MP.jpg

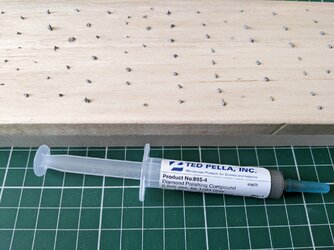
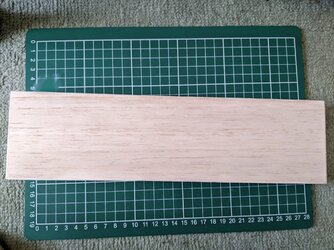
For a final round I lapped all my balsa and reapplied diamond paste.
I did 0.5, 0.25 and finally 0.1 below.
PXL_20211212_131204102.MP.jpgPXL_20211212_135425034.jpg

It's weird, this thing is absolutely plowing down arm hair but I took it for a test shave about a week ago and it wasn't good at all.
I've been doing other things since but I think I need some other sort of edge on this.
I might put a Jnat edge on it but I think what it needs is a coticule.
Now if Belgium post didn't loose my les latneuses coticule over the Christmas I'd be using that!
 

rbscebu

Girls call me Makaluod
Did you include short X strokes during the pasted balsa stropping? That can make a noticeable difference in the shave quality.
 
“It's weird, this thing is absolutely plowing down arm hair but I took it for a test shave about a week ago and it wasn't good at all.”

Yup, hair tests are unreliable, until you calibrate your test. Just because the edge cuts hair does not mean it will shave.

You will need to master the Rolling X stroke to hone that one, you will be “rolling” lifting, in order to hone the toe.

Ink the bevel and keep inking to see that you are honing the whole bevel. You might want to round that heel so it will not cut you.

Horn dust, (sand the inside of the scales) will do the same thing that baking soda will but, the color will match. You might be able to touch it up with a fine tip sharpie, try coloring just the baking soda. Make a series of dots and blend with a Qtip dipped in acetone so it does not look like a black sharpie line.

Soaking in neetsfoot will rehydrate the scales and may have prevented cracking. I rehydrate first, let dry a few days and then make repairs

Nice razor.
 
Did you include short X strokes during the pasted balsa stropping? That can make a noticeable difference in the shave quality.
I did, I usually start with heal leading, then toe, then flat and finish with x strokes.
The razor is sharp just not shave ready sharp. I haven't revisited this razor yet so I'll have another look soon.


You will need to master the Rolling X stroke to hone that one, you will be “rolling” lifting, in order to hone the toe.

Ink the bevel and keep inking to see that you are honing the whole bevel. You might want to round that heel so it will not cut you.
If you check the picture with the tomato the bevel is set from heal to toe, this wasn't achieved without using a rolling x-stroke.
To reach the toe on this particular razor the heal was at least 20 degrees off the hone to properly reach the tip.
I have honed a lot of razors and know what I'm doing. When I said it wasn't a good shave I mean it was that kind of edge that feels like it wants to cut you so I stopped there and grabbed another. It's also quite awkward to hold as the tang is very thin so it wants to snap between your fingers to a flat position and with no tail you have to hold it tang only which is a first.

Horn dust, (sand the inside of the scales) will do the same thing that baking soda will but, the color will match. You might be able to touch it up with a fine tip sharpie, try coloring just the baking soda. Make a series of dots and blend with a Qtip dipped in acetone so it does not look like a black sharpie line.
I've used the hornoxy approach before but the scales are thin so, while I usually sand scales, this time I used a buffer to shine them up but keep them looking antique at the same time. The sodaGlue (TM) is translucent and borrows the surrounding color from the horn so it's not really noticeable. A cursory glance looks like it hasn't been repaired but SodaGlue is as strong as concrete.
PXL_20220102_121906280.jpg

Also, in this case, I don't think I could have completely filled the void with epoxy and, as this is a supporting structure, I needed to make absolutely sure.
I hadn't thought of a acetone imbibed Qtip to camouflage a repair but that may come in useful in the future, cheers.
Soaking in neetsfoot will rehydrate the scales and may have prevented cracking. I rehydrate first, let dry a few days and then make repairs
Yeah, anything I get with horn or bone gets a neatsfoot oil treatment. It really makes a difference in both look and the underlying structural integrity.
 
Top Bottom