What's new

1⅝ Puma SR Restoration

rbscebu

Girls call me Makaluod
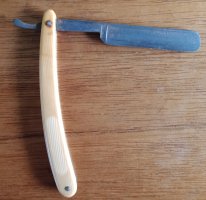
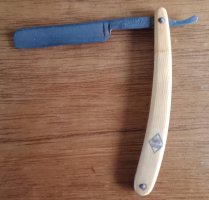
Yesterday I received my first Puma SR. This was purchased form a coin dealer for a song (about USD 10) with the intention of renovating it back to a useful shaver.

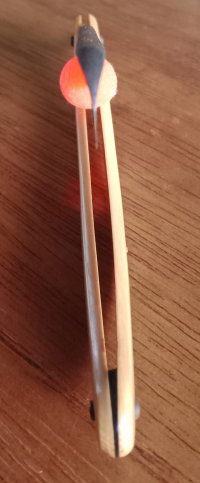
Here are some pictures of the 1⅝ Puma as received.
There is ever-so faint etching on the face. I will try and read it as I clean the face up but it will probably be lost during the restoration.

IMG_20211002_072049.jpg

IMG_20211002_071949.jpg

IMG_20211002_071847.jpg
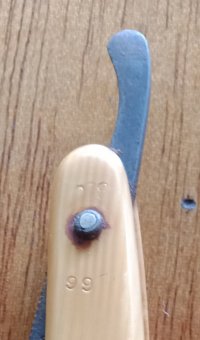
The scales at the pivot end on the face side have two numbers marked; 887 below the pivot pin and above the pivot pin towards the tail is 008 (or it could be 800 if it is the other way around). It is not that clear in the following picture.

IMG_20211002_072235.jpg

The edge is just a little unhappy with a frown of about 0.5mm. This I can easily hone out when I get to that stage of the restoration.

This will be my first "major" restoration. I will record the progress and ask for guidance in this thread.
 
Last edited:
rbscebu

Girls call me Makaluod
For this restoration, my available tools are limited (nothing powered). I have:
  • A 50mm bench vice
  • Jeweller's hammer
  • Drill vice with 1.5mm and 1.6mm bits
  • Set of jeweller's files of various cross-sectional shapes
  • W&D sandpaper up to 2000 grit
  • Lapping film from 30μm to 1 μm
  • Diamond paste of 0.5μm, 0.25 μm and 0.1μm
  • Flush cutters
I still need to order some repinning materials.

My first thoughts are to try and sand most of the steel oxidation off with 1000 grit W&D.
 

rbscebu

Girls call me Makaluod
Thank you both for your guidance. I will start with 1k W&D to see if I can read the face etching. Once I have done my best, I'll drop down to 600 or lower where it may be needed.
 
You will probably need to go below 1k, but good idea to start high if you want to try to read the etching, then do a proper sanding progression after. However...

I wouldn't actually start with sandpaper at all. The blade doesn't look to be particularly rusted, and if all you have there is a thick oxidation layer you should be able to get rid of it with just a vinegar soak, some bicarb, plus a scouring pad or bit of wire wool. That kind of oxidation doesn't eat into metal in the same way that rust does, and so might not require sanding at all. And if you can avoid it then do... sanding steel well is a ball-ache.


Is a 'frown' the way it's been kinda oversharpened in the middle? How does one manage to do that on a razor? On a knife it's almost always the result of over steeling, but I can't picture how you'd do it on a SR...

The handle is very nice!
 
I think you'll probably still have to sand, but it's worth checking. If you do, the number-one-most-important-thing-more-important-than-all-the-others-put-together is: don't cut corners.

Start low, and with low pressure. Use as many grit stages as you have access to - I cannot emphasize this enough. Alter the direction of your sanding slightly, particularly for early grits as it will allow you to see when you've removed previous scratches. Do not move on until you have. Once you get past about 1k you can start upping the pressure without worrying too much about very deep marks. At this stage try to use all full length strokes, or make a simple jig / guide. Do not use too much water; a few drops to keep it moist and create a kind of polishing swarf. Take it to 2k on wnd and then cut loose from there.

AS @Legion said - I wouldn't do any of that without being sure you've got the edge in order. Sanding a razor is much less of a faff than a knife (in part I think because of the HT) but it's still annoying. And doubly so if it's all for nought!
 
Good choice razor for your first restore - excessive rust. I rarely get away without going own to 220/240 grit.

Take your time and experiment with different techniques. Your first razor will take a while. By the time you get to your tenth, you will be more efficient and faster.

I have had good luck using light oil with 00 and 0000 steel wool on scales. I normally use food-grade mineral oil. The discoloration around the pivot pin should clean up nicely. Steel wool is good for this because it is not rigid.

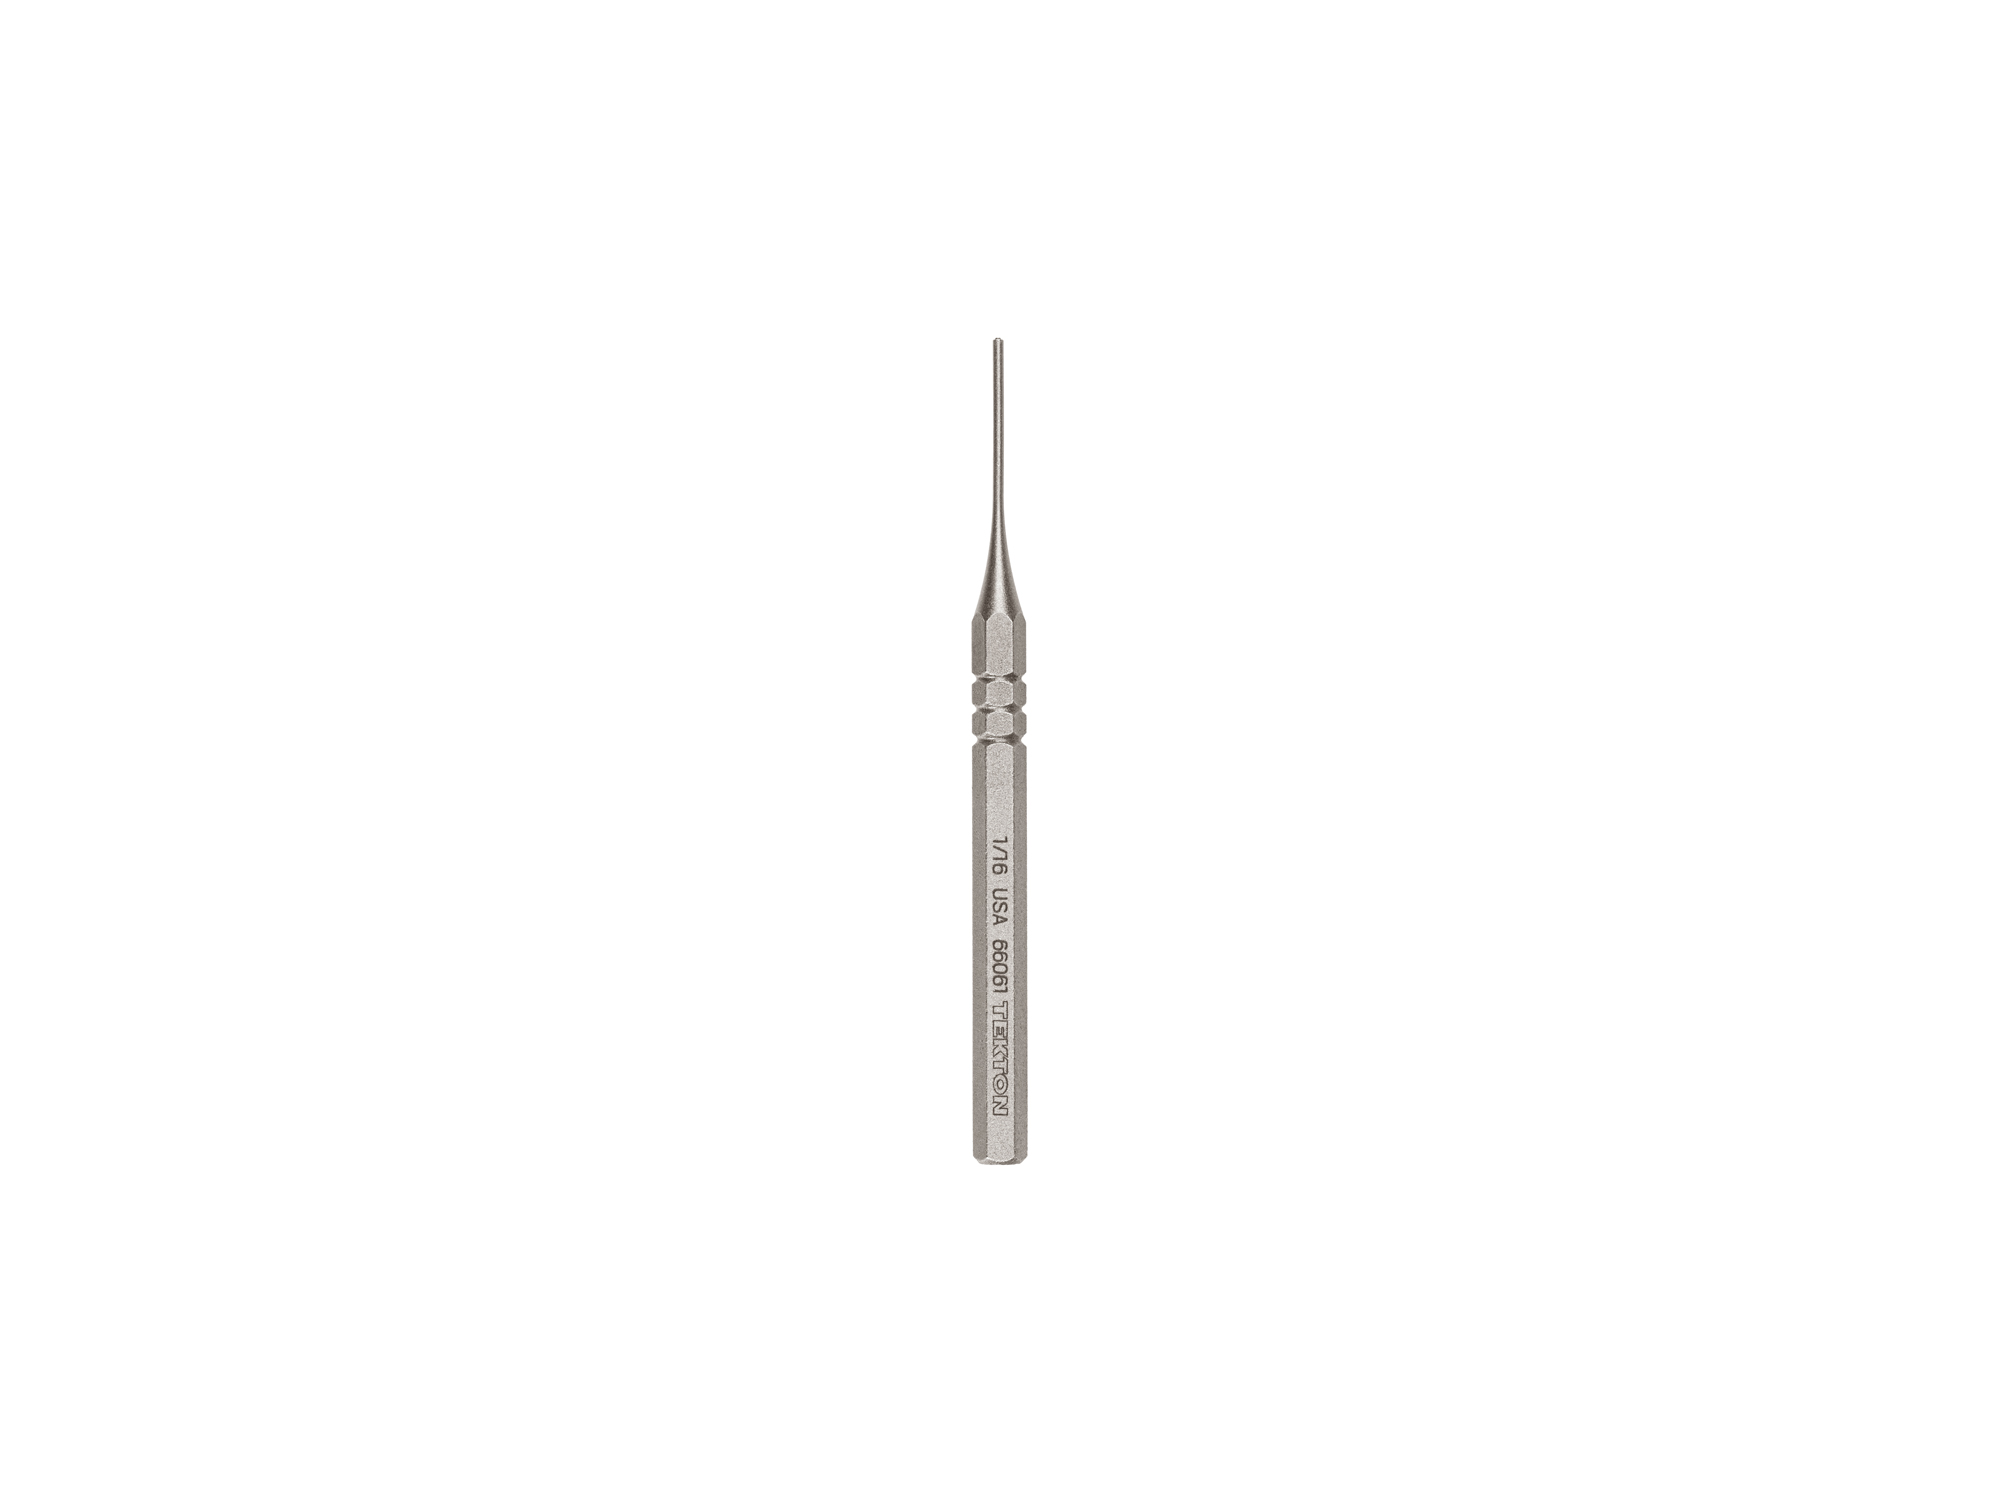
If you unpin the razor, do not try to pry the scales off the pin. Older plastic scales can be quite brittle and crack. Some makers must tap the pins into the plastic scales making them quite tight. A Tekton 66061 is your friend:


Some folks drill the pins out. I have still not figured out how to do this cleanly.

Wrapping sandpaper around a wine cork can be useful. Try sanding the face of the blade in both directions. Always finish each grit sanding in the direction of the original grind marks, which should be perpendicular to the edge for your Puma.

Blue painter's tape is your friend. After you get blade nicely sanded and see that one spot you missed on the tang, mask the face of the blade with the painter's tape.
 
Honestly, with a razor like this I would use something like Barkeepers Friend (oxalic acid) followed by a polish like Mother's or Flitz and see how it cleans up first. You'll probably still need to do some sanding but maybe not as much as you think. And I wouldn't do a ton of heavy lifting until I took it to a coarse hone to see if I could correct that frown.
 
From the title, I thought a 13/8 razor might be involved. ;-) Good luck luck with the restoration. To hand sand the hollows, I have used wet-dry sandpaper wrapped around a small section of a wooden dowel or a narrow-diameter PVC pipe.
 
Is a 'frown' the way it's been kinda oversharpened in the middle? How does one manage to do that on a razor? On a knife it's almost always the result of over steeling, but I can't picture how you'd do it on a SR...

Could be due to warp, grinding, honing pressure or torque, or a stabilizer in the way.

And maybe too much compensation in that area to have an even grind along the length and side to side
 
In the few razors I have restored, I have learned some lessons. If the edge looks wonky from hone wear, has a frown, or too much of a smile... I do a good bevel set and go about halfway through a progression. If the entire length of the blade will shave arm hair with no effort, then it will be good. I have come across razors I just couldn’t straighten out... after I had gone to the trouble of polishing them well.

Your razor doesn’t look like anything that would scare me. I believe the frown will hone out easy enough (I couldnt tell from the picture until I really started looking for it). I would still do this legwork before polishing. And yes, it does appear that you have carbon steel patina, and not so much rust. I happen to like patina. I even have a razor I forced a patina on with vinegar. I do it to most carbon steel knives I make. It’s entirely up to you, but you may be able to use steel wool to bust any small rust splotches and even the patina a bit. If you insist on shiny, I would start at 600 w/d. It’s not so course that it takes forever to smooth out, but it’s just aggressive enough to not take forever to shine up razors that aren’t in rough shape. Any pits anywhere and its time to break out 220, and clear the schedule out.
 
Yesterday I received my first Puma SR. This was purchased form a coin dealer for a song (about USD 10) with the intention of renovating it back to a useful shaver.

Here are some pictures of the 1⅝ Puma as received.
There is ever-so faint etching on the face. I will try and read it as I clean the face up but it will probably be lost during the restoration.


The edge is just a little unhappy with a frown of about 0.5mm. This I can easily hone out when I get to that stage of the restoration.

This will be my first "major" restoration. I will record the progress and ask for guidance in this thread.
That's a Puma #1 5/8 and to get it for $10 is fantastic.
The faint etching probably reads "FISGEHARTET FROZEN-STEEL"
The reverse side is missing a sticker on the scales that you can see in picture 2.
Where the sticker was looks new and the rest is aged but below is what was on your razor at one point.
1634077280435.png

The scales at the pivot end on the face side have two numbers marked; 887 below the pivot pin and above the pivot pin towards the tail is 008 (or it could be 800 if it is the other way around). It is not that clear in the following picture.


The edge is just a little unhappy with a frown of about 0.5mm. This I can easily hone out when I get to that stage of the restoration.

This will be my first "major" restoration. I will record the progress and ask for guidance in this thread.
I believe the 008 stamped on the scales is a quality control mark.
It's difficult to tell from the photos but I think you may need to go lower than 1000, maybe 800.
I do all my restorations by hand so I wouldn't worry about it, the tools you have should be fine.
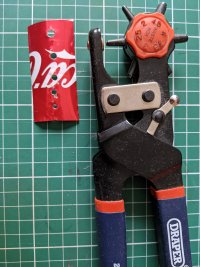
The only thing I do use is a dremel if I need to keep the collars. If you're waiting on pinning supplies they'll probably include collars so you can file them off. Use a coke can with a hole in it to protect the scales though.
PXL_20201205_134202018.jpg
Some folks drill the pins out. I have still not figured out how to do this cleanly.

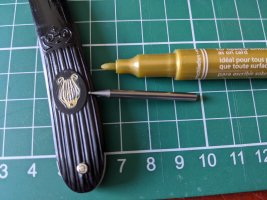
Use one of these dremel bits and put a dimple in the dead center of the pin and drill away
PXL_20210629_131524876.jpg
 

rbscebu

Girls call me Makaluod
First, thank you all for your guidance and suggestions so far. Much appreciated.

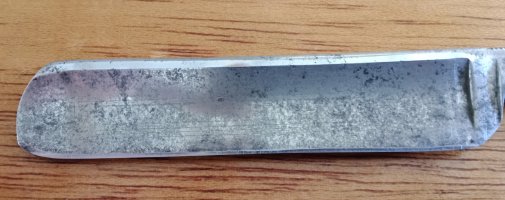
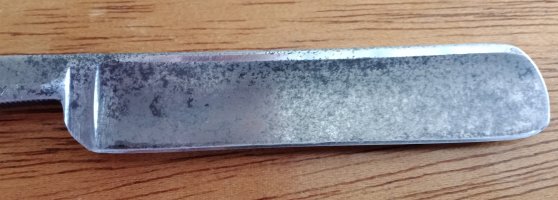
Here is the Puma 1⅝ so far.

IMG_20211013_113701.jpg

IMG_20211013_113748.jpg
This has been achieved by hand sanding with W&D (dry). 1k grit all over except for the spine, where I used 400grit due to rust pitting.
 

rbscebu

Girls call me Makaluod
I performed a Sharpie test on the Puma 1⅝ doing 3 light laps on a freshly lapped 3k synthetic. All came out as expected. Spine and bevel touched everywhere except in the slight frown area on the bevel. This confirmed my observations that there was a slight frown and that the blade was not warped.

I then lightly bread-knifed the frown out of the edge on the side of the 3k synthetic. With a now straight edge (except where it curves up a little at the toe), I proceeded to reset the bevel progressing from 1k up to 8k. The edge's profile remained straight (except near the toe) and now just tree-tops my chest hairs.

IMG_20211013_123425.jpg

IMG_20211013_123443.jpg
All is coming along well.

My thoughts are that the previous person who honed this SR did so on a whetstone that was slightly convex transversely.
 
Last edited:

Legion

Staff member
I performed a Sharpie test on the Puma 1⅝ doing 3 light laps on a freshly lapped 3k synthetic. All came out as expected. Spine and bevel touched everywhere except in the slight frown area on the bevel. This confirmed my observations that there was a slight frown and that the blade was not warped.

I then lightly bread-knifed the frown out of the edge on the side of the 3k synthetic. With a now straight edge (except where it curves up a little at the toe), I proceeded to reset the bevel progressing from 1k up to 8k. The edge's profile remained straight (except near the toe) and now just tree-tops my chest hairs.

All is coming along well.

My thoughts are that the previous person who honed this SR did so on a whetstone that was slightly convex transversely.
Ive always believed that a frown is most often introduced buy someone doing X strokes on a thin hone (over a long period of time).

In such a situation, the middle of the blade would be in contact with the stone through the whole stroke, where as the toe and heal would each only have hone contact for half the stroke, leading to more wear in the middle than the ends.
 

rbscebu

Girls call me Makaluod
A question. So far I have been sanding with W&D dry. Would it be better to sand using W&D with water or oil?

Tomorrow I will be going into town when I will buy some more W&D and machine oil - if needed.
 

Legion

Staff member
A question. So far I have been sanding with W&D dry. Would it be better to sand using W&D with water or oil?

Tomorrow I will be going into town when I will buy some more W&D and machine oil - if needed.
I use water. Some people use WD-40
 
A question. So far I have been sanding with W&D dry. Would it be better to sand using W&D with water or oil?

Tomorrow I will be going into town when I will buy some more W&D and machine oil - if needed.

I also use water. You don't want too much tho; a few drops at a time and work a bit of a slurry, like using a stone.
 
Top Bottom