What's new

Restoration tragedy...

So, tonight I finally started removing the old knot out of my Dbl Duck brush. I was trying something new and twisted the knot and broke it loose. So, myself being ambitious...I kept twisting trying to pull the knot out...and then SNAP! The handle snapped in half and my heart sunk.

IMG_1711.JPG


I'm not sure it's a total loss just yet because I wanted to fill the handle anyway. The knot came out cleanly and the old shelf is still intact. Really, before I spend the resources in trying to fix it I'm wondering if epoxy would repair it or is it a total loss? Hoping I can save it because I really liked the look of this one.
 

ajkel64

Check Out Chick
Staff member
Hopefully someone with more experience than me will be able to help you out. Sorry for the break in the handle. I hope that it can be fixed as it looks like a nice handle.
 
I had a recent handle I was making crack badly. Several members encouraged me to resurrect it. Here is the thread showing how I did.
Some days are better than others
I don't expect you would use this method on that brush but I do think the epoxy wold hold and there are guys here that can direct you on methods of camoflaging the crack
 
IMG_1712.JPG

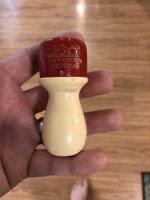
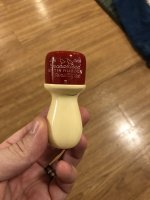
So, tried epoxy this afternoon to mend the handle, and seems to have been successful. Attempted to fill in the one hole with some sanded off bits from a sacrificial brush and some epoxy so hopefully it cures a color that blends in somewhat. Also weighted the handle with some BBs and filled with epoxy so the brush has a nice heft to it.

Next step will be to sand and polish the lower part and polish the upper and re-color the lettering.
 
We all have one(or even more) of those stories. A break, a crack, a shatter, a boil, and a gouge should be in everyone's repertoire.
 
Good to see you didn't give up on it. Hope the color on the patch turns out satisfactory.

The patch didn't turn out quite how I would have wanted, but it's filled and will function just fine. Got it all polished and clean last night so now I get the task of choosing a knot.

We all have one(or even more) of those stories. A break, a crack, a shatter, a boil, and a gouge should be in everyone's repertoire.

This is only my second restore/re-knot and I'm sure I will have plenty oops moments if I keep at it.
 
IMG_1713.JPG IMG_1714.JPG

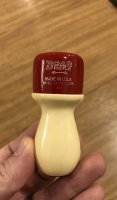
Next step is complete. Nicely polished up with up to 1500 grit wet/dry on the bottom part, then ran through my polishing wheels to give it a shine. Picked up some Testors paint and gave the lettering a new coat of white gloss. Some of the letters are very shallow and didn't take the paint as well, but still seems to have come out nice. Also put on order a Maggard Beige synth knot. Now to wait for that to arrive for the final steps.
 
View attachment 955674 View attachment 955675

Next step is complete. Nicely polished up with up to 1500 grit wet/dry on the bottom part, then ran through my polishing wheels to give it a shine. Picked up some Testors paint and gave the lettering a new coat of white gloss. Some of the letters are very shallow and didn't take the paint as well, but still seems to have come out nice. Also put on order a Maggard Beige synth knot. Now to wait for that to arrive for the final steps.
Beige should go well with it!
 
Beige should go well with it!

Took me a couple days to settle on the beige knot, but I really wanted something at least similar look to the original boar knot that was in it. In the end it came down to an Omega s-knot and the beige.
 
Top Bottom